background image

SP Racing F3 NEO Flight Controller & Power Distribution Board 

+ On-Screen Display & Video Transmitter FPV Stacking System

Seriously Pro

Seriously Pro Racing F3 NEO Manual (Version 1)

Copyright © 2016 Dominic Clifton

Thank you for directly supporting the Cleanflight project with your purchase.

Summary of Contents for Seriously Pro Racing F3 NEO

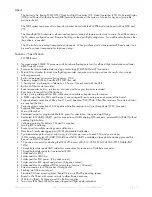
Page 1: ... Distribution Board On Screen Display Video Transmitter FPV Stacking System Seriously Pro Seriously Pro Racing F3 NEO Manual Version 1 Copyright 2016 Dominic Clifton Thank you for directly supporting the Cleanflight project with your purchase ...

Page 2: ...ranged for easy wiring on each corner of the board Supports direct connection of SBus SumH SumD Spektrum1024 2048 XBus IBus receivers No external invert ers required built in Supports direct connection of 3 3v Spektrum Satellite receivers via 3 pin through hole JST ZH connector Supports PPM receivers Micro USB socket Dedicated output for programmable LEDs great for orientation racing and night fly...

Page 3: ...ts supplied connecting CAMERA an EXTERNAL VTX boards Solder pads for PCB side mount antenna JACK connection when not using u FL connector CAMERA and EXTERNAL VTX sockets power selectable between 5V and 12V Hole for accessing the boot button via paper clip on the NEO below it Board is 36x36mm with standard 30 5mm mounting holes 12 position connector for stacking above the NEO Illuminating white LED...

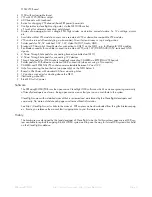
Page 4: ... reinforce JST SH connectors helps if you crash your aircraft To further protect the board from crashes you can add a some additional solder to the edges of the JST SH and USB sockets to reinforce them Support JST connector sockets when inserting removing cables Ensure all wires are tinned correctly make sure there are NO loose strands of multi core cable sticking out This is VERY IMPORTANT FOR TH...

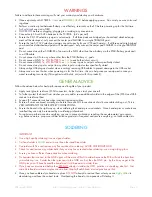
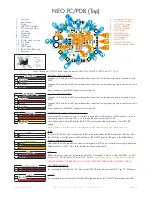
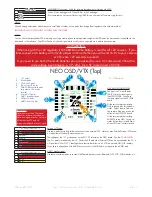
Page 5: ...LDERING CHECK UART2 PPM 4 1 n GND 2 l 5v 3 l RXD R2 PPM 4 l TXD T2 TLM UART2 PPM Serial RX or PPM RX Telememetry Use a standard 3 pin cable on pins 1 3 to attach to either a Serial RX receiver or a PPM receiver Use pin 4 as telemetry output when using PPM 5v is also supplied when connecting via USB Note When using a Serial RX receiver the TXD T2 pin cannot be used for telemetry Use UART5 TXD inste...

Page 6: ...r connecting to the USART headers on the OSD VTX directly above the NEO LC FILTER 5V OUT 10 1 n LC FILTER OUTPUT towards front 2 n 5V 3 n GND towards rear LC FILTER 5V OUT 3 convenient pads for connecting external devices The LC filter output is at BATTERY voltage See 12V 3S selector Current drawn here is measured by the amperage meter I2C UART3 UART4 socket 14 1 l GND 2 5v 3 SCL 4 SDA 5 TXD T3 6 ...

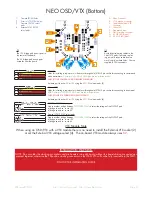
Page 7: ... 7 UART1 break out pads 8 5V from FC pads 9 UART1 from FC pads A VTX Module IMPORTANT Never power on the VTX module without an antenna connected or with a damaged antenna Doing so will destroy the VTX module Inspect your antenna after any crash 1 2 5 7 4 3 6 8 9 A I2C UART3 UART4 socket 14 1 n 12v 2 n GND 3 n VIDEO OUT 4 n AUDIO IN 5 n GND 6 n 5v Switchable 7 n GND 8 n 5v External VTX Pads Use the...

Page 8: ... side mount through hole JST ZH 3 pin socket for connecting to camera and video transmitters Center pin is POSITIVE GND pins are towards the button CHECK YOUR CAMERA WIRING BEFORE POWERING Set each port to either 5V or 12V using the 5V 12V selector pads 3 External VTX 2 1 l VIDEO 2 l POWER 12V or 5V 3 l GND External VTX Holes for installing a top mount or side mount through hole JST ZH 3 pin socke...

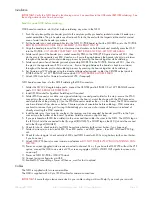
Page 9: ...LL THREE PADS 2 Install JST ZH socket for Spektrum Satellite port if required 3 Solder XT60 connector or cable use a good soldering iron and good solder for this step ensure the XT60 connector is the correct way round see markings on the board match the shape with the XT60 connector and double check the polarity on the XT60 connector matches the on the board The XT60 connector can be soldered in f...

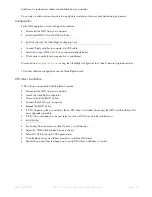
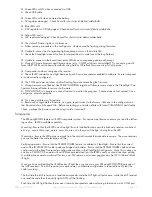
Page 10: ...connect and upgrade the firmware using the Cleanflight configurator tool See Firmware Upgrade section For further software configuration see the Cleanflight manual DFU driver installation A DFU driver is required to flash the latest firmware Disconnect the NEO from your computer Launch the cleanflight configurator Press and hold the BOOT button Connect the NEO to your computer Release the BOOT but...

Page 11: ...an cause the NEO to be permanently damaged 4 If this is the first time you are flashing the board or you want to erase all the settings then select Full Chip Erase 5 Click Load firmware Online and wait for firmware to download and read release notes before flashing 6 Click Flash Firmware At this point the FC will reboot into DFU mode DFU will appear in the list of ports and flashing via DFU will p...

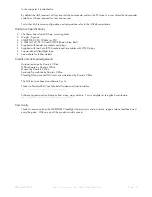
Page 12: ...configurator on the Documentation Support tab Before contacting your retailer reflash with latest CLEANFLIGHT and double check perhaps the firmware you are using is old or incorrect Transponder The SPRacingF3NEO features a IR LED transponder system For optimum performance ensure you read the follow ing section IR LED available separately Mounting Ensure that the IR LED can shine light from its ins...

Page 13: ...further details Credits and acknowledgements Hardware design by Dominic Clifton OSD software by Dominic Clifton Manual by Dominic Clifton Seriously Pro website by Dominic Clifton Cleanflight firmware and GUI tools are maintained by Dominic Clifton The GUI tool was based on software by cTn Thanks to Painless360 Lee Schofield for ideas and tutorial videos https www youtube com user Painless360 playl...

Reviews: