Page 45 399G169 Rev B 27 April 2016
confirmation screen will appear. Select Yes to connect to a new system or No
to remain connected to the current system.
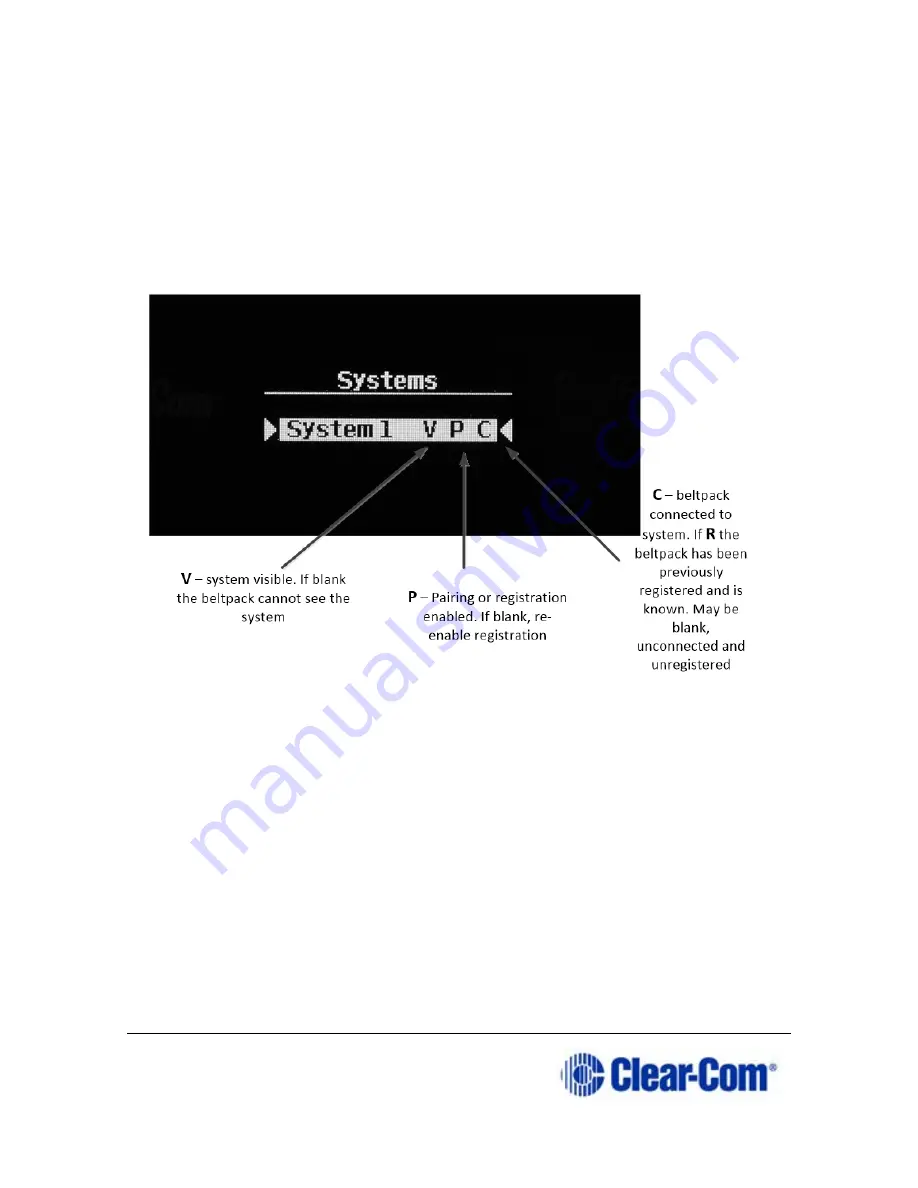
Available systems and previously registered systems will be visible on the
beltpack menu screen.
To connect the beltpack to the system, the system must be visible (V) and in
registration (pairing) mode. If the system is not in registration mode (P
visible), registration should be re-started (Step 1).
Connect the beltpack to the system using key D.
6.1.2.4
Enter pairing code
Enter the four-digit pairing code for the system using both rotary controllers
and the menu select key (D). The default code is 0000.
Note:
The O.T.A. pin code is available from the Base Station menus and the CCM.
See Administration/Beltpacks on the Base Station,
Home/General/Wireless in the CCM.
Summary of Contents for FreeSpeak II
Page 31: ...Page 31 399G169 Rev B 27 April 2016 How to set cable length in the CCM 1 ...
Page 32: ...Page 32 399G169 Rev B 27 April 2016 How to set cable length from the Base menus ...
Page 65: ...Page 65 399G169 Rev B 27 April 2016 ...
Page 70: ...Page 70 399G169 Rev B 27 April 2016 Save settings from the CCM ...
Page 72: ...Page 72 399G169 Rev B 27 April 2016 Fix a Role in the CCM ...
Page 73: ...Page 73 399G169 Rev B 27 April 2016 Fix a Role from the Base menu screens ...
Page 80: ...Page 80 399G169 Rev B 27 April 2016 ...
Page 85: ...Page 85 399G169 Rev B 27 April 2016 How to program a Talk key to the Group ...
Page 89: ...Page 89 399G169 Rev B 27 April 2016 ...
Page 90: ...Page 90 399G169 Rev B 27 April 2016 Edit Beltpack Roles from the Base Station ...
Page 92: ...Page 92 399G169 Rev B 27 April 2016 Change Base Station key assignment from the Base Station ...


