11 Pentz EF5 Installation Guide
© Clear Vue Cyclones 2018
Attaching the Impeller
Improper installation of your impeller can lead to the impeller coming off during
operation. Significant damage to your system and/or bodily harm can result. It
is imperative that you read and follow these directions closely. Detailed
assembly videos can be found under the Education Center/Assembly
Instruction section of our website at www.clearvuecyclones.com.
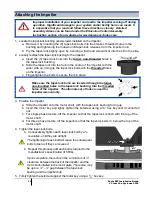
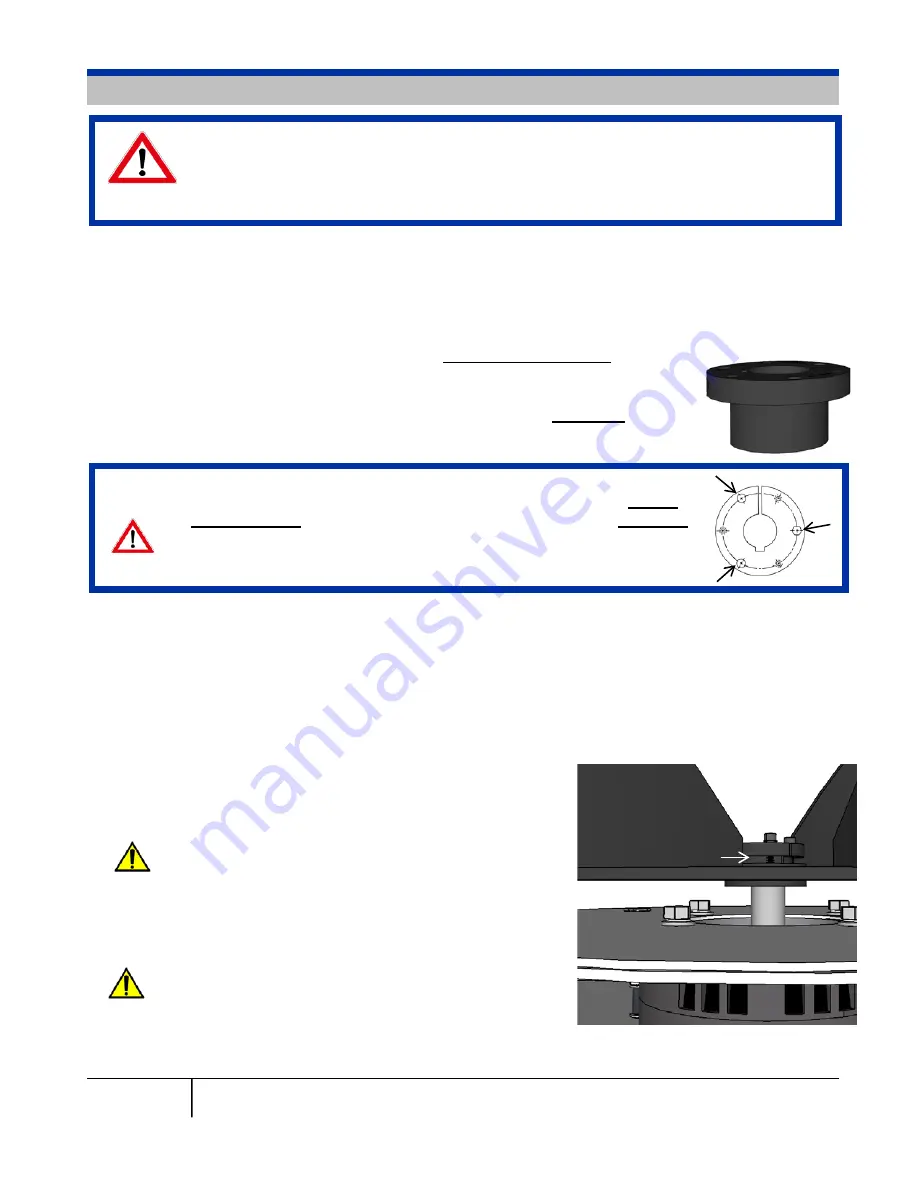
1. Locate the taper-lock bushing (and screws) installed on the impeller.
a. Remove it by inserting the (3) taper-lock bolts into the smaller, threaded holes in the
bushing and tightening them down until taper-lock releases from the impeller hub.
b. Pry the taper-lock slightly open by inserting a flat-head screwdriver into the slit in the side.
2. Loosely reattach the taper-lock bushing to the impeller:
a. Insert the (3) taper-lock bolts into the
larger, non-threaded
holes in
the taper-lock bushing.
b. Slide the taper-lock into the hub in the center of the impeller with the
wider side up, lining up the taper-lock bolts with the
threaded
holes
on the impeller.
c. Finger-tighten the bolts to secure them in place.
Make sure the taper-lock bolts are inserted through the larger,
non-threaded holes in the taper-lock bushing, into the threaded
holes of the impeller. The alternate set of holes is used for
impeller removal only.
3. Position the impeller:
a. Slide the impeller onto the motor shaft, with the taper-lock bushing facing up.
b. Insert the motor key and lightly tighten the setscrew using a
3
∕
32
” hex key until it cannot fall
out.
c. For single phase motors, lift the impeller so that the taper-lock is flush with the top of the
motor shaft.
d. For three phase motors, lift the impeller so that the taper-lock sits ¼” below the top of the
motor shaft.
4. Tighten the taper-lock bolts:
a. Consecutively tighten each taper-lock bolt by a ¼
revolution, until they are all tight.
The tightening of each bolt will cause the subsequent
bolts to feel as if they’ve loosened.
b. Repeat this process until each bolt is torqued to the
manufacturer’s specification of 5 ft/lbs.
Upon completion, there should be a minimum of ¼”
clearance between the back of the impeller and the
motor bolts intalled in the motor plate. There also may
be up to a
1
∕
8
” –
1
∕
4
” gap between the taper-lock
bushing and the impeller hub.
5. Firmly tighten the setscrew against the motor key using a
3
∕
32
” hex key.
≥
¼”
1
∕
8
” –
1
∕
4
”
This end UP


