


49
FieldSmart
®
Fiber Active Cabinet (FAC) 400
__________________________________________________________
Installation Manual
Direct: 763.476.6866 • National: 800.422.2537 • www.SeeClearfield.com • techsupport@clfd.net
Manual 020419 REV A - Feb 2019
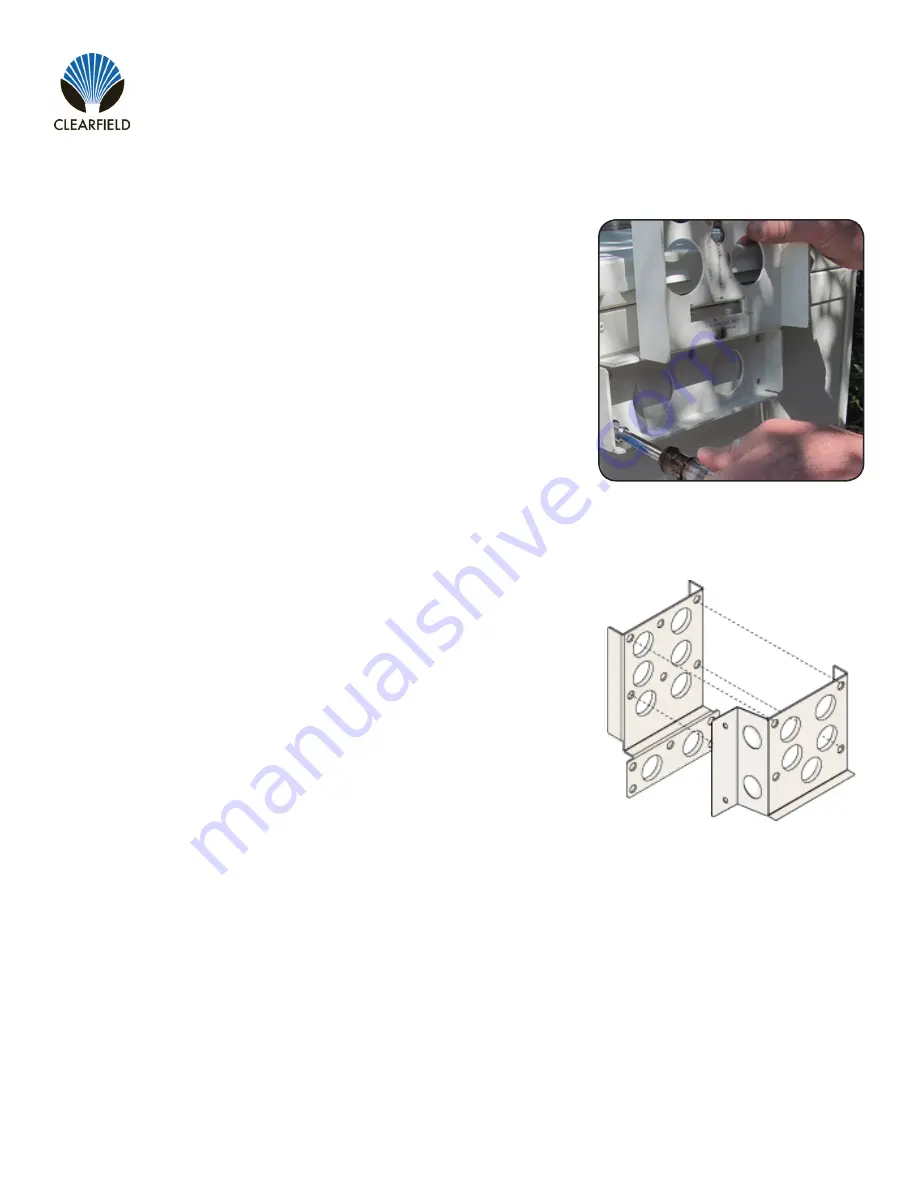
On the left side of the cabinet, remove the five plastic caps covering
the bracket mounting holes.
Attach the top bracket to the cabinet as follows:
a.
Position the top bracket against the left cabinet wall, aligning the
bracket holes with the counterpart holes on the cabinet.
b.
Insert (5) 1/4-inch hex screws (with flat and lock washers)
into the bracket holes.
c.
Tighten the screws completely to secure the bracket in place.
Attach the adapter to the top bracket as follows:
a.
Place the adapter over the top bracket, aligning the (4) holes
with the counterpart holes on the bracket.
b.
Insert (4) 1/4-inch hex screws (with flat and lock washers) into
the adapter holes.
c.
Tighten the screws completely to secure the adapter in place.
Install the cabinet on the mounting fixture.
Perform the remaining steps only after the cabinet is installed on the
mounting fixture.
Attach the adapter and top bracket to the wall or H-frame as follows:
a.
While holding the adapter and top bracket against the wall or frame, drill (4) 3/8-inch pilot holes into the wall
or frame through the holes in the adapter (two holes per side).
b.
Install (4) 1/2 x 3-inch lag screws (with 1/2-inch flat washers) into the pilot holes. Tighten the bolts
completely to secure the bracket in place.
Step 1:
Step 2:
Step 3:
Step 4:
Step 5:
To install the top bracket


