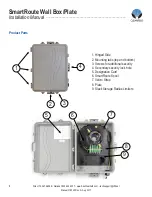
5
SmartRoute Wall Box/Plate
__________________________________________________________
Installation Manual
Direct: 763.476.6866 • National: 800.422.2537 • www.SeeClearfield.com • techsupport@clfd.net
Manual 018545 Rev A - Aug 2017
Indoor Wall Box Installation
Unpack wall box from packaging – make sure you check for small items that may be included. These would be bagged
separately and included in the box.
Installing Grommets
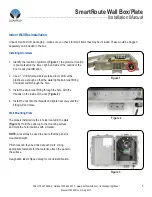
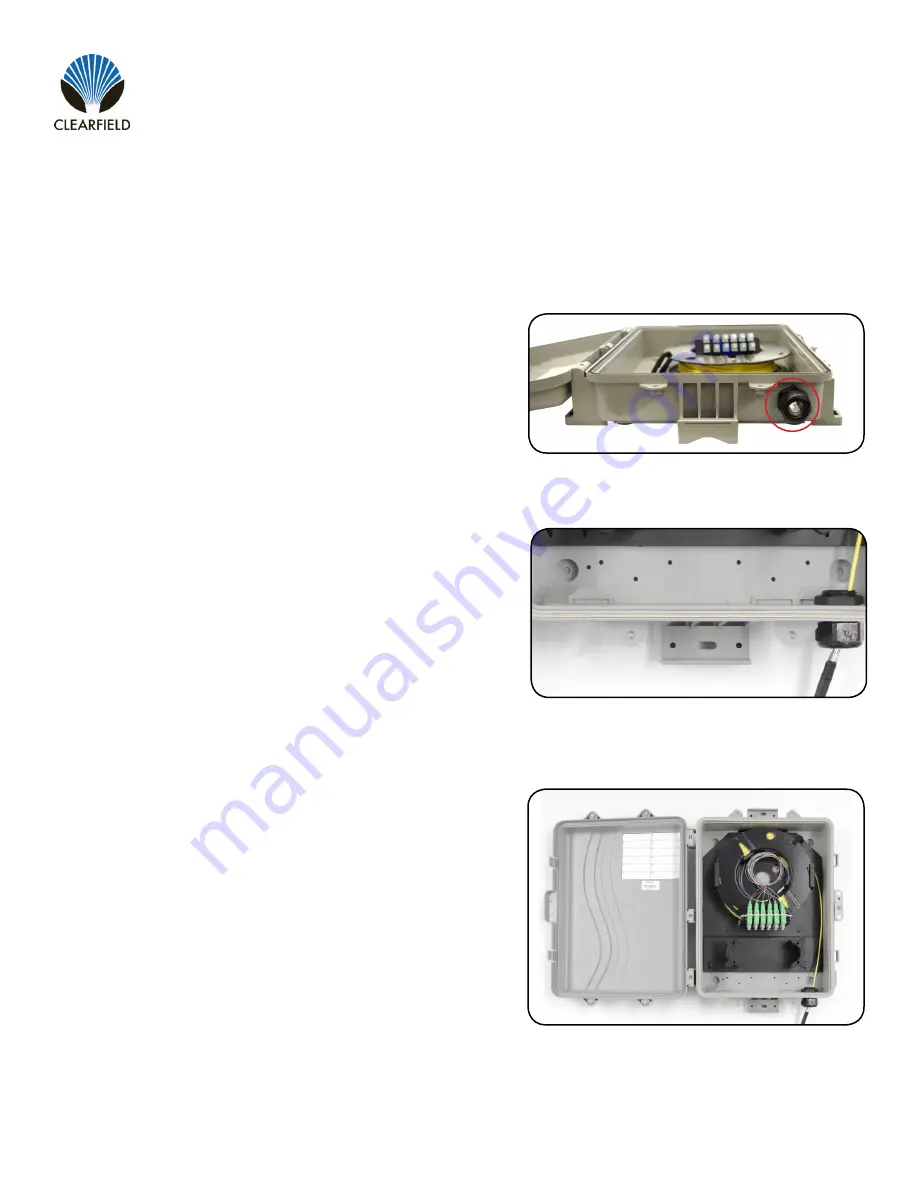
1. Identify the location of grommet
(Figure 1)
: the grommet location
is pre-marked on the lower, righ-hand side of the outside of the
box for easy identification.
2. Use a 1” drill bit (step drill is preferred tool); drill out the
plastic area enough so that the water tight strain relief fitting
(included) will fit through the hole.
3. Install the strain relief fitting through the hole, with the
threads on the inside of the box
(Figure 2)
.
4. Install the nut onto the threads and tighten securely until the
fitting will not rotate.
Wall Mounting Plate
The plate is installed via the 4 holes located in the plate
(Figure 3)
. Hold the panel up to the mounting surface
and mark the hole locations with a marker.
NOTE:
A level may be used to ensure that the panel is
mounted straight.
Pilot holes can then be drilled at each mark. Using
appropriate fasteners for the material, attach the panel to
the surface.
Designation label shipped along for circuit identification.
Figure 1
Figure 2
Figure 3


