Direct: 763.476.6866 • National: 800.422.2537 • www.SeeClearfield.com • techsupport@clfd.net
16
YOURx Flex Box
Installation Manual
_________________________________________________________
Manual 019209 REV F - Jan 2019
Using the Aggregator Plates
Depending on the configuration, the Flex Box is available with 2 different style slide-in aggregator plates, supporting multiple
cable entries.
Figure 2
Figure 3
Figure 1
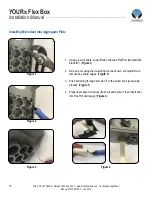
1. Slide plate into base of Flex Box,
aligning into the groove as shown
(
Figure 1
).
2.
Using provided screws, secure plate to
box as shown (
Figure 2
).
3.
For
OUTDOOR APPLICATIONS
, apply
silicon bead onto aggregator plate
before sliding into groove.
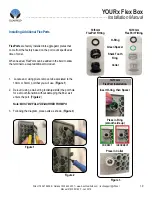
The Duct Plate (
Figure 3
) with (2) 14/10mm and (24) 10/6mm
ports arrives from the factory with (1) 14/10mm FlexPort and the
appropriate number of 10/6mm FlexPorts matching port count.
These FlexPorts will be marked on the opposite side, “tabs” with a
black “
X
”, indicating that the port has a FlexPort installed to accept
microduct.
Clearfield recommends the following port assignment.
Working from back (bottom in
Figure 3
):
1-6, then moving up to next row 7-12…etc.
Note: DO NOT
place microduct into port
WITHOUT
a FlexPort
installed or this box will not be water tight.
7 8 9 10 11 12
1 2 3 4 5 6


