11
CLEARSPAN
™
VALUE LINE
Revision date: 03.10.08
FRAME ASSEMBLY (CONTINUED)
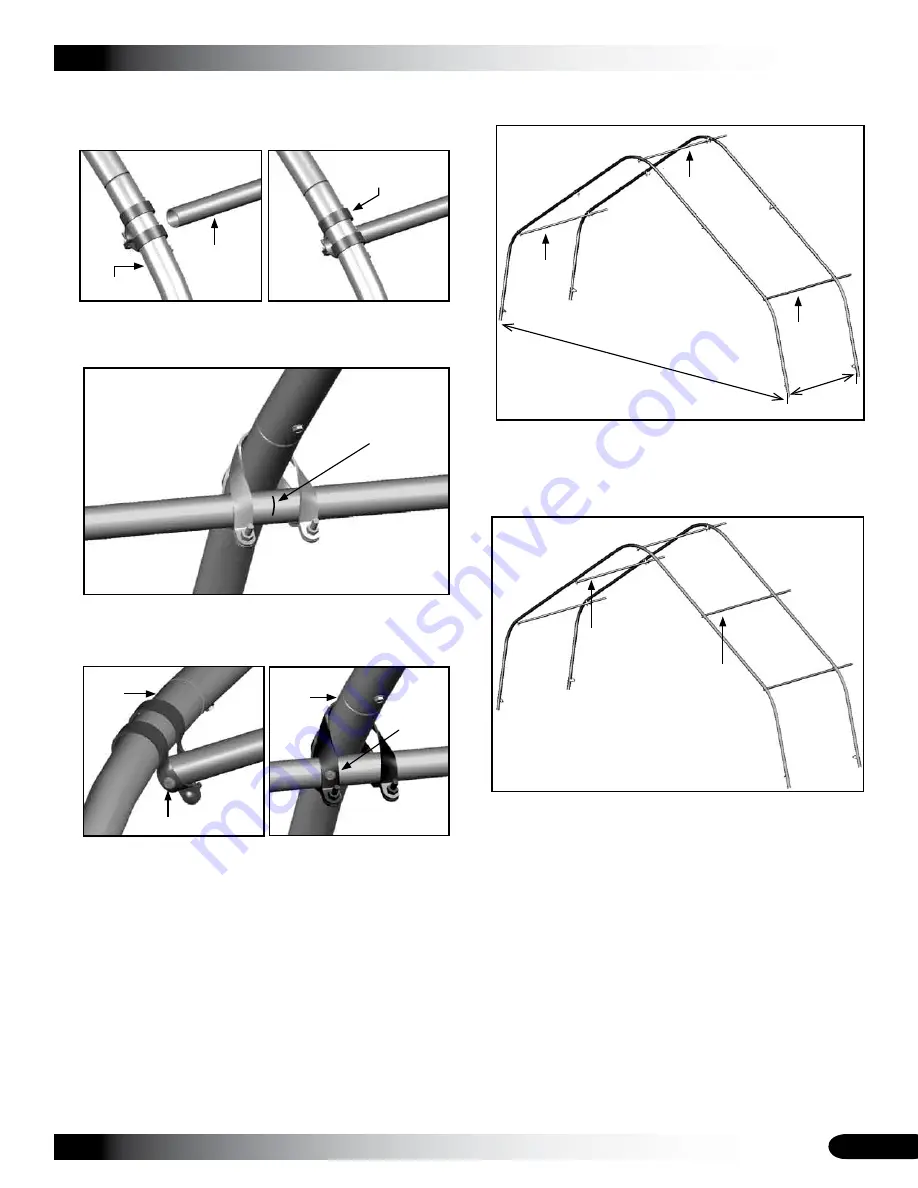
Align the cross-connector with the 102857 clamp on the
end rafter that was slid onto the rafter during assembly.
11.
Align the mark on the purlin with the center of the rafter
as previously described.
12.
Install a Tek screw to
secure the purlin to the cross-
connector and the clamp on the end rafter
.
13.
Tek Screw
Tek Screw
End
Rafter
Interior
Rafter
NOTE:
To prevent damage to the main cover and end
panels, do not allow the purlin to extend beyond the
edge of the end rafter.
Repeat the steps to install the first section of the next
purlin. See the arrow in the following diagram.
NOTE:
Do not remove the temporary bracing until
additional rafters are in place.
14.
To this point, the assembled frame includes two rafters
and three purlins as shown.
After attaching the first section of the third purlin to the
rafters, move up the rafter assembly and place a cross-
connector over the mid rafter pipe and install the first
sections of the next two (2) purlins.
15.
Verify that the rafters are plumb, align the mark on the
purlins with the center of the rafter, and secure the
purlins in place.
Secure the connectors and clamps to the purlins using
Tek screws.
NOTE: All cross-connectors and clamps on the end
rafters are secured to the rafters with Tek screws. All
purlin pipe splices are secured with Tek screws.
16.
17.
22' on-center
5'
on-center
End Rafter
Purlin
102857


