CLEARSPAN
™
VALUE LINE
12
Revision date: 03.10.08
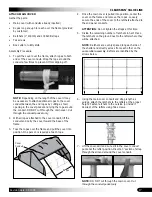
Move to the lower end of the rafters and position
the bottom purlin 10'' up from the finished grade.
18.
1/2''
10''
Toward the inside
of the frame when
assembled.
CAUTION:
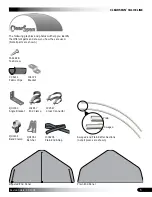
To prevent cover damage, the ends of the
purlins should extend no more than ½'' past the end
clamp. The bolt side of the end clamps must go toward
the “inside'' of the shelter (the same side as the purlin)
as shown above.
Install the remaining purlins. Verify the rafter spacing is
5' on-center and tighten connectors.
19.
Secure the connectors and clamps to the purlins using
Tek screws.
20.
Continue the frame assembly by setting the next rafter
in place.
21.
Continue to add the cross-connectors and the pre-
marked sections of purlins and secure these to the
rafter assemblies as previously instructed.
ATTENTION:
The last rafter to place in position will
be the remaining end rafter. This end rafter includes
the end clamps attached during the rafter assembly
procedures and is identical to the first end rafter set in
place.
Set the end rafter in place and align the purlins with the
end clamps (previously attached to the rafter).
Begin with the top end clamp and ensure that
approximately half an inch of the purlin extends through
the pipe strap and tightened the pipe strap mounting
bolts.
Verify that the end rafter is plumb.
NOTE:
If the rafter is not plumb (straight up and down)
and more of the purlin pipe needs to extend through
the pipe strap and beyond the edge of the rafter, it may
be necessary to cut the purlin to the required length.
Do not allow the purlin to extend beyond the edge of
the rafter
.
22.
23.
24.
25.
With all rafters in place and the seven (7) purlins
installed and tightened, remove the temporary bracing
(if needed) and verify that all purlin splices are secure
with a Tek screw.
After the final purlin is attached to the end rafter,
continue with squaring the assembled frame.
26.
27.
5'
on-center


