CLEARSPAN
™
POLY BUILDINGS
10
Revision date: 06.18.09
FRAME ASSEMBLY
Gather the parts:
• All rafter assemblies
• Purlin pipe 1.315" x 75" swaged (131S075)
• Purlin pipe 1.315" x XX" plain (131P0XX)
NOTE:
The XX" represents the remaining length required
to reach the end of the shelter. Consult the Spec
Sheet and Side Profile diagrams (Quick Start) for pipe
identification.
Frame Assembly Procedure
NOTE:
Plumbing the end rafter at this stage assists in
placing the remaining rafters.
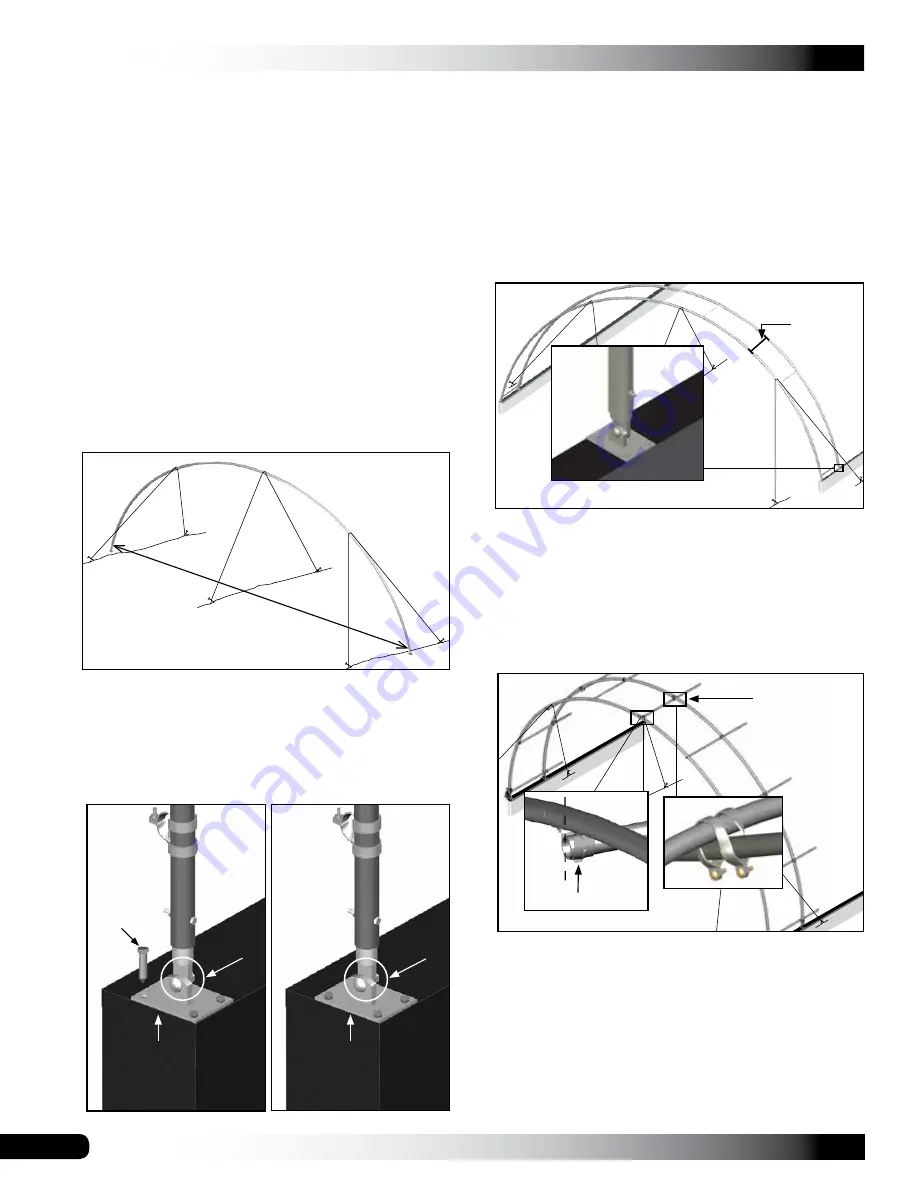
2. Position rafters to maintain width at 30' on-center, and
secure the rafter feet to the pony wall to prevent the
rafter from shifting.
30' on-center
1. Stand the first end rafter and secure it using rope,
cable, or some other form of temporary bracing to hold
the rafter in position. Use a level (or other leveling
device) to plumb the end rafter.
Views are shown from outside the shelter.
Step 4
Customer
Supplied
Fastener
(Step 3)
104302
Step 4
104302
3. Brace the rafter in place and tighten the rafter base
mounting bolts as shown in previous photos.
4. With the first end rafter set and the on-center width at
30', set the first interior rafter in place.
5. Using the 5' on-center, rafter-to-rafter spacing, set
the interior rafter in position and repeat Steps 3-4.
(Additional assistants are required to hold the rafter
in position.) See Side Profile diagrams for the correct
rafter spacing.
6. Place a cross connector at the top of the inside rafter,
align it with the QH1070 pipe strap attached to the end
rafter in the same location, and insert the
plain end
of
the purlin pipe (131S075) through the connector and
through the
pipe clamp at the top of the end rafter
.
7. Verify that both rafters are plumb and properly spaced
(5' center-to-center).
8. Verify that the purlin does not extend beyond the end
rafter and tighten the cross connector at the
top of the
interior rafter.
(See dashed line in the insert above.)
Frame shown may differ from actual frame, illustration
purposes only. All cross-connectors will align with the
QH1070 pipe straps attached to the end rafters when
properly installed.
Attach center
purlin first.
Tek Screw
5'
on-center
View
is from
inside the
shelter.
pony wall


