CLEARSPAN
™
CARPORTS
14
Revision date: 12.10.07
INSTALL OPTIONAL MAIN COVER (if equipped)
The main cover is secured to the frame using ratchets and
straps. The straps are wrapped around a conduit inserted
in a pocket along each side of the cover.
NOTE:
Carports can be ordered with or without covers.
WARNING:
To prevent damage to the cover and to
prevent serious personal injury, DO NOT attempt to
install the cover on windy days.
1. Locate the pipes for two (2) main cover conduits.
The
conduits when assembled are nearly the length of the
shelter
.
NOTE:
The number of pipes used in the cover conduit
assembly varies with the length of the shelter.
Each cover conduit consists of 1.315'' x 75''
(#131S075) swaged pipes (number is determined by
shelter length) and one (1) 1.315'' x XX'' (#131P0XX)
plain pipe.
The "XX'' represents the remaining length needed to
reach the end of the frame.
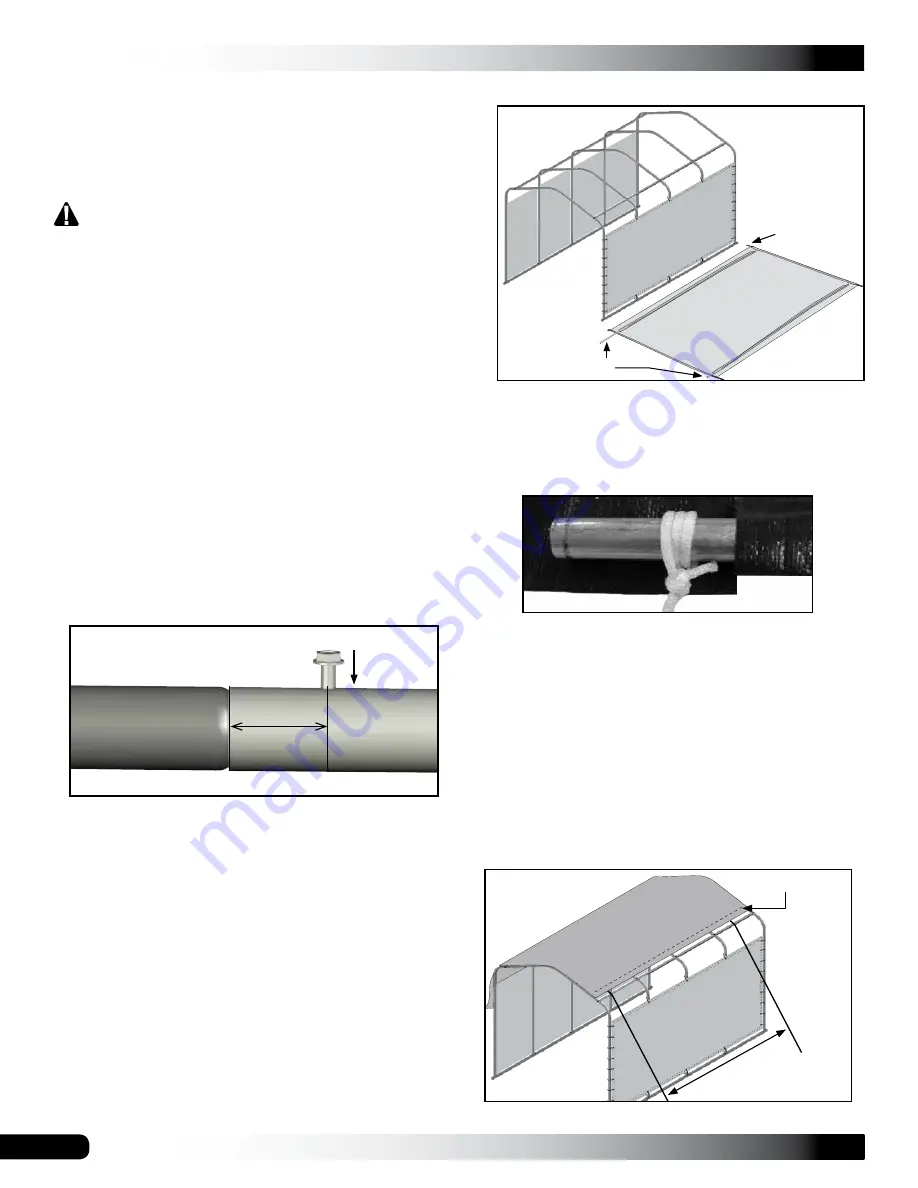
2. Connect these pipes by inserting the swaged ends
of the pipes into the plain ends until each conduit is
assembled. Secure each pipe joint with a Tek screw
and wrap the joint with duct tape.
These cover conduits are inserted into the pockets
sewn into the cover. The conduits are used to tighten
and secure the cover.
3. After assembling the cover conduits, locate the cover
and unfold it on a clean, smooth surface near the
frame.
NOTE:
When handling the cover and setting it in
position, do not pull on the end straps. They will pull out
of the cover. Unfold the cover with the inside surface
facing up.
4. Locate the cover ends with strapping and align cover
with the front and back of the shelter.
1˝
Cover Conduits
Cover
Ends with
Strapping
5. Insert the cover conduits into the pockets of the cover.
NOTE:
Shelter shown above may differ in length from
the actual model. Cover design may also differ.
6. To pull the cover over the frame, attach ropes to both
ends of the cover conduit. Wrap the rope around the
conduit a few times to prevent it from slipping off.
NOTE:
Depending on the length of the cover it may
be necessary to attach additional ropes to the cover
conduit between the end ropes by cutting a small
opening in the cover pocket and tying the rope around
the conduit. DO NOT cut through the cover.
Cut
through the conduit pocket only.
7. With all ropes attached to the cover conduit, lift the
conduit and carry the cover toward the base of the
frame.
8. Toss the ropes over the frame and pull the cover into
position. One person is required at each rope.
9. Center the cover front to back and side to side.
Ropes
Diagram may show a
different shelter
length.
Cover Conduit
Cover pockets may
also be along the
edges of the cover.
ATTENTION:
Do not leave an unsecured cover unattended.


