11
CLEARSPAN
™
COLD FRAMES
Revision date: 12.29.08
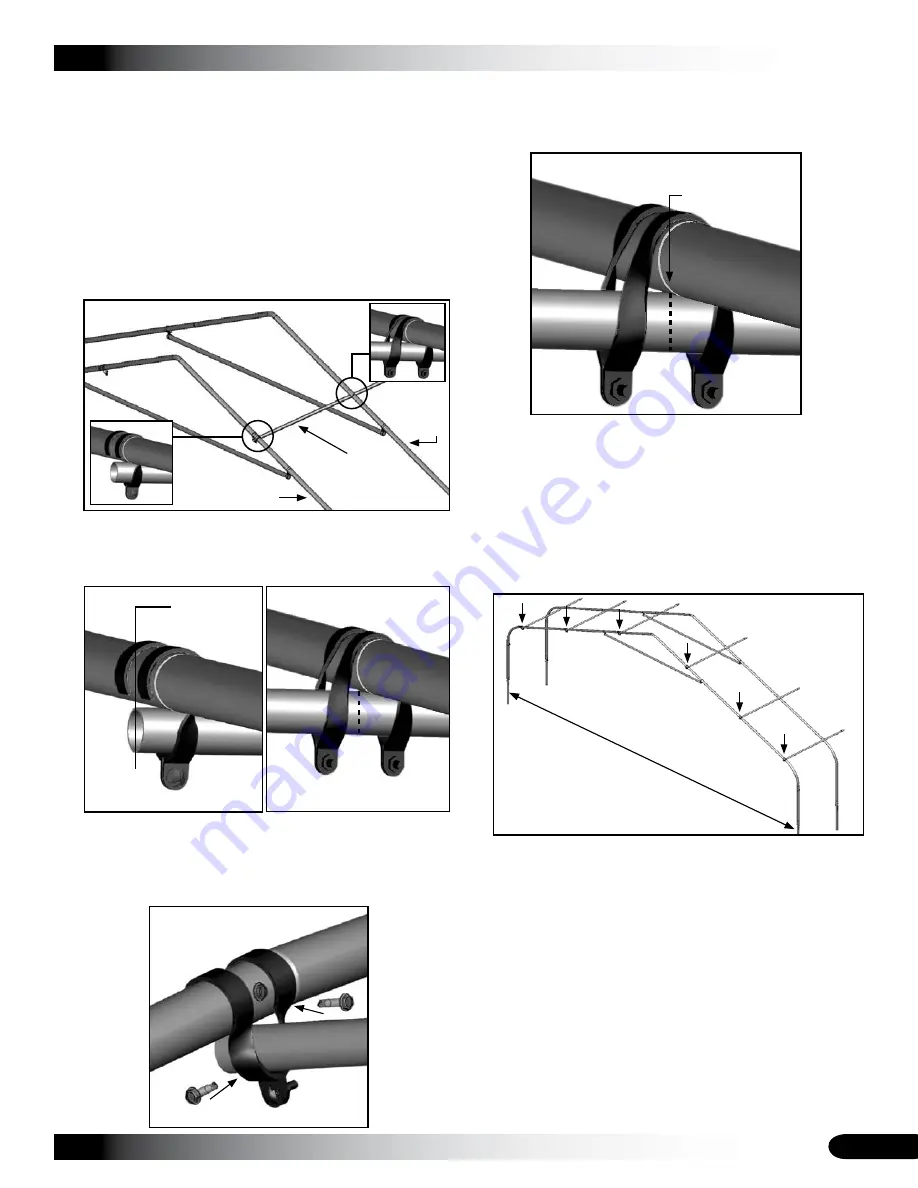
Purlin
End Rafter
Do not allow the
purlin to extend
beyond the end
rafter
.
End rafter view
Interior rafter view
Interior Rafter
Align mark with
center of rafter.
Purlin
FRAME ASSEMBLY (continued)
As the second rafter is steadied, remove one section of
5.
pipe from one assembled purlin.
NOTE:
Work from the end of the purlin where the
first measurement was taken during the pre-marking
procedure.
Insert the purlin pipe through an upper end clamp of
6.
the end rafter and through a cross connector placed in
the same position on the
interior rafter.
Consult Quick
Start section for purlin location per frame.
Align the plain end of the purlin with the center of the
7.
end rafter and rotate the purlin pipe so that the first
mark is visible (near the clamp of the interior rafter).
Tighten the end clamp and secure it to the rafter with a
8.
Tek screw.
Install Tek screw through end clamp and into the purlin
9.
pipe.
Move to the interior rafter and align the mark on the
10.
purlin with the center of the rafter to maintain the proper
spacing.
Verify that the rafter spacing is forty-eight inches (48")
11.
on-center (adjust as needed) and tighten the cross
connector.
Secure the cross connector to the rafter using a Tek
12.
screw. See Quick Start section if needed.
Repeat Steps 6-12 to install the first section of each
13.
purlin assembly for the first two rafters.
Choose another interior rafter assembly and set it
14.
in position. DO NOT USE THE REMAINING END
RAFTER.
Secure the rafter legs to the ground posts as previously
15.
described and steady the rafter.
Remove another section of purlin pipe from each pre-
16.
marked purlin assembly and attach these to the rafter.
Verify that the distance between the rafters is 48"
17.
center-to-center.
Adjust the rafter forward or backward
as needed to maintain this dimension.
34' wide
center-to-center
Interior
Rafter
End Rafter


