CLEARSPAN
™
GREENHOUSES
20
Revision date: 10.03.14
Complete the following general steps to install the end wall
panels.
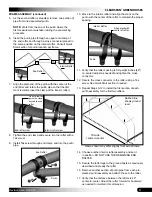
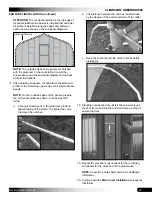
1. Consult the panel location diagrams, select one
polycarbonate panel, begin at the edge of the opening
for the door, and work to the outside edge of the end
wall.
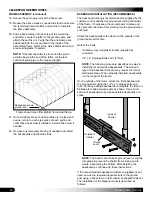
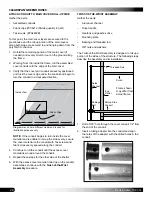
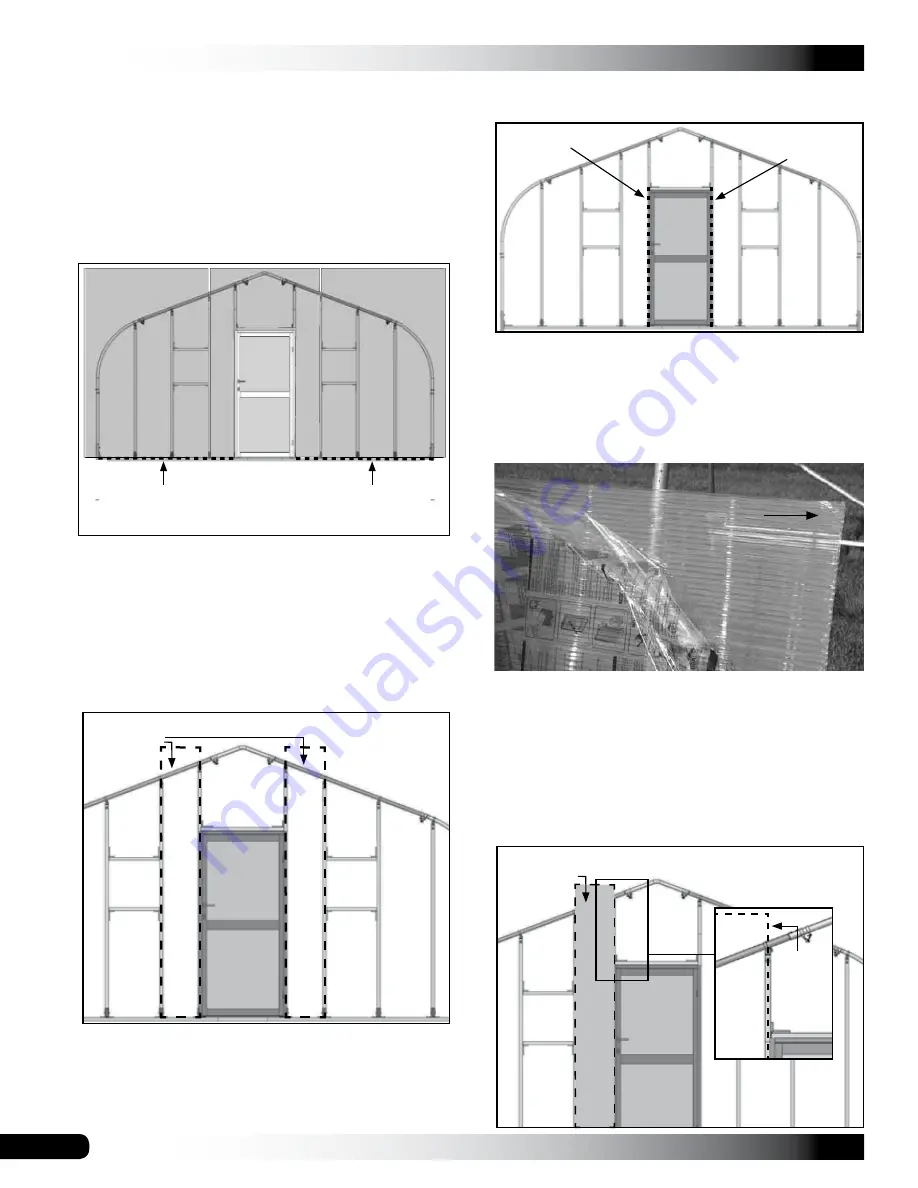
See the X in the diagram below for the first panel.
END PANEL INSTALLATION (continued)
Mark UV Side
X
Dashed line and small arrows (above) show where to
install the white vent tape. Do not install tape in any
other location on any other end panels.
X
NOTE:
Remove the protective film. When needed, an
upper panel is cut to length
after
attaching it to the end
wall frame and rafter.
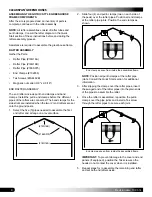
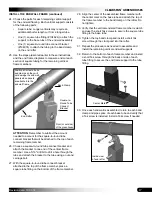
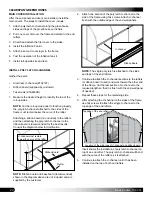
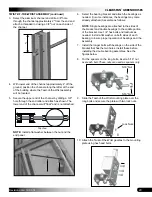
2. The first 6' x 10' panel will be cut into three (3) different
widths and installed around the door.
Measure and cut the first two (2) sections (A & B) to the
proper size using the rafter as a guide.
ATTENTION:
U-channel profile is installed along the
edges of the panels shown in the diagram below.
Profile installed here.
NOTE:
DO NOT
damage the part of the polycarbonate
panel removed during the cutting of the panel. That
portion is used to cover the small area above the door.
Always remove the protective film and mark and install
the UV-protected side to the outside of the greenhouse.
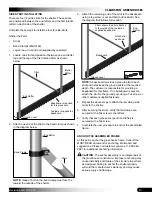
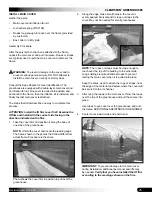
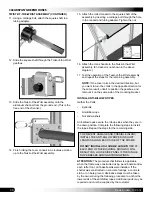
3. Apply white vent tape to the bottom of the lower panels
and then install the aluminum U-channel profile to the
edge of the panels adjacent to the door as shown on
the Polycarbonate Panels diagram.
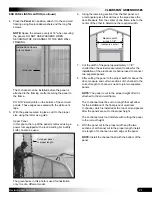
NOTE:
Tuck panel behind channel of the door frame.
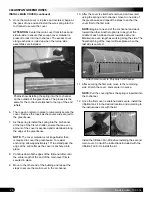
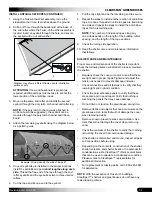
Align the edge of the panel adjacent to the door with
the center of the vertical end wall frame tube that
frames the door.
Trimmed
6' x 10' Panel
Not to scale.
A
B
Panel
Center
of tube
Trimmed
6' x 10' Panel
Not to scale.
A
The dotted line shows the
location of the edge of the first
polycarbonate panel.
NOTE:
Consult end wall diagrams located in the Quick
Start section for on-center dimensions.

