

ATTACH MAIN COVER
Gather the Parts
•
Main cover (with conduits already inserted)
•
30' Ropes (2) (provided by you)
•
Strap 12"x.75" W/D-Rings Clearspan (2)
(#102947)
•
Strap, Black 1"x3' 3000LB Capacity (2)
(#103620B)
•
Box cutter
Assembly Procedure
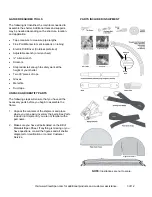
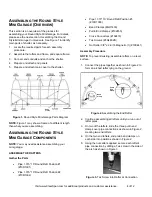
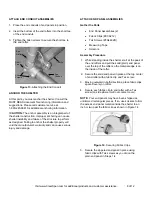
1. To pull the cover over the frame, attach ropes to
both ends of the cover conduit. Wrap the rope
around the conduit a few times as shown in Figure
18 to prevent it from slipping off accidentally.
NOTE:
Long shelters require additional ropes at every
rafter where you installed a ratchet. If your cover's hem
was notched at the factory, you can attach additional
ropes at these locations. If your cover was not notched
at the factory, you can cut a small slit in the hem just
inside the cover conduit, pass the rope through, and tie a
bowline knot as shown in Figure 18.
Figure 18.
Rope Attached to Cover Conduit
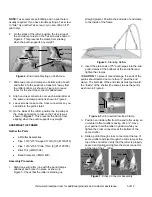
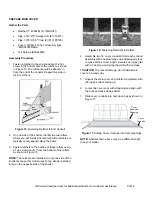
2. Throw the ropes up and over the frame and then pull
the cover over the frame as shown in Figure 19. You
need one person at each rope for this step.
Figure 19.
Pulling Cover Over Frame
3. Remove the ropes and position the cover evenly on
all four sides.
! CAUTION:
Do not leave the cover unattended until it
has been secured in all four corners as damage may
occur to it.
4. In the front and rear hems of the cover (the part that
extends over the end panels), locate the black
straps already attached near the bottom corners of
the cover.
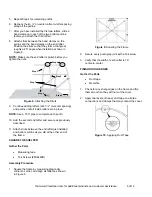
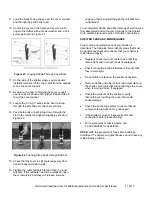
NOTE:
If any of your corner straps were shipped with
a D-ring attached as shown in Figure 21, you must cut
the D-ring off with scissors because it is not used on
this model.
5. Have a partner help you tighten both corner straps
on the front and rear ends of cover by each
simultaneously pulling on the straps.
6. Cut off the excess strap leaving about 12" in length,
and feed the strap through the center slot in the
ratchet, previously attached to the end panel
conduit,
and tighten only slightly. Repeat this step
in all the corners of shelter.
7. On the shelter side opposite the installed ratchets,
lift the cover skirt from the outside to see the cover
conduit. Using the same rafters where you installed
ratchets on the opposite side, you will install D-ring
side straps on this side.
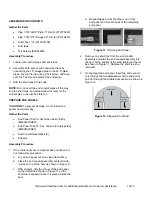
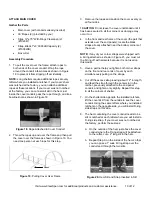
8. The hem containing the cover conduit needs to be
slit or notched at each rafter where you will install a
D-ring side strap. If your cover was not notched at
the factory, perform these steps:
a. On the outside of the hem just above the cover
conduit where the D-ring strap will be attached
to the rafter, cut a 2" long slit in the hem.
b. Repeat Step A on the inside of the hem so that
you can pass a 1" wide D-ring strap over the
conduit and through the two slits.
Figure 20.
Hem Slit and Strap Inserted in Slit
Ropes
Visit www.ClearSpan.com for additional products and customer assistance.
10 of 12