15
Revision date: 05.13.10
Move to the next set of ground posts (or mounting feet), attach that rafter (and rafter legs if needed), and brace in
4.
place. As previously described, use the 1/2" bolts to secure the rafter to the tops of the ground posts or rafter legs.
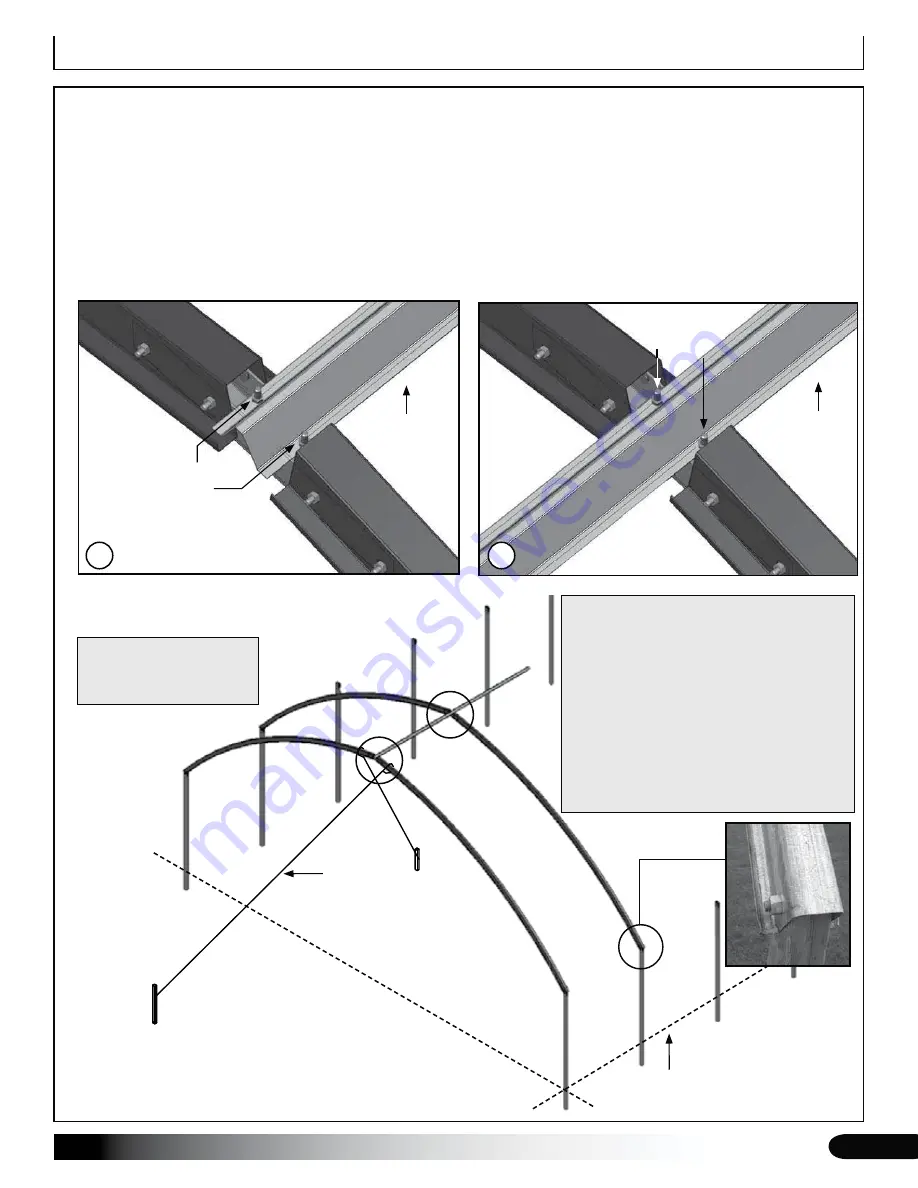
Take the first section of ridge purlin (consult Side Profile diagram for your building length and correct purlin
5.
identification), align the pre-drilled holes with the studs of the rafter splice, and secure to the end rafter (A) and first
interior rafter (B) using 1/4" nuts.
NOTE:
If a short purlin spans the first bay, do not secure the purlin to the second rafter until next purlin is added.
Consult the Side Profile diagram for your frame for details.
FRAME ASSEMBLY (continued)
A
1/4" Nuts
Ridge
Purlin
B
Ridge
Purlin
Splice Studs
Frame Assembly
A
B
Ground Level
Rope or
Cable
NOTE:
The 20', 30', and 36' long frames
use a combination of different purlin
lengths during frame assembly.
Consult the Side Profile diagram for your
building length to determine which purlin
to use and where to install that purlin.
Some frame lengths use a 4' or 6' (short)
purlin to span the first bay and to connect
the first two rafters.
Example shows a long 12'
purlin in the first bay position.
Different frame lengths may
have a shorter first purlin.


