17
Revision date: 05.13.10
Purlin
Eyebolt
Eyebolt
Cable
Bracket
Cable
Bracket
Cable
Bracket
Cable Bracket
Purlin
Ground Level
Ridge Purlin
E
D
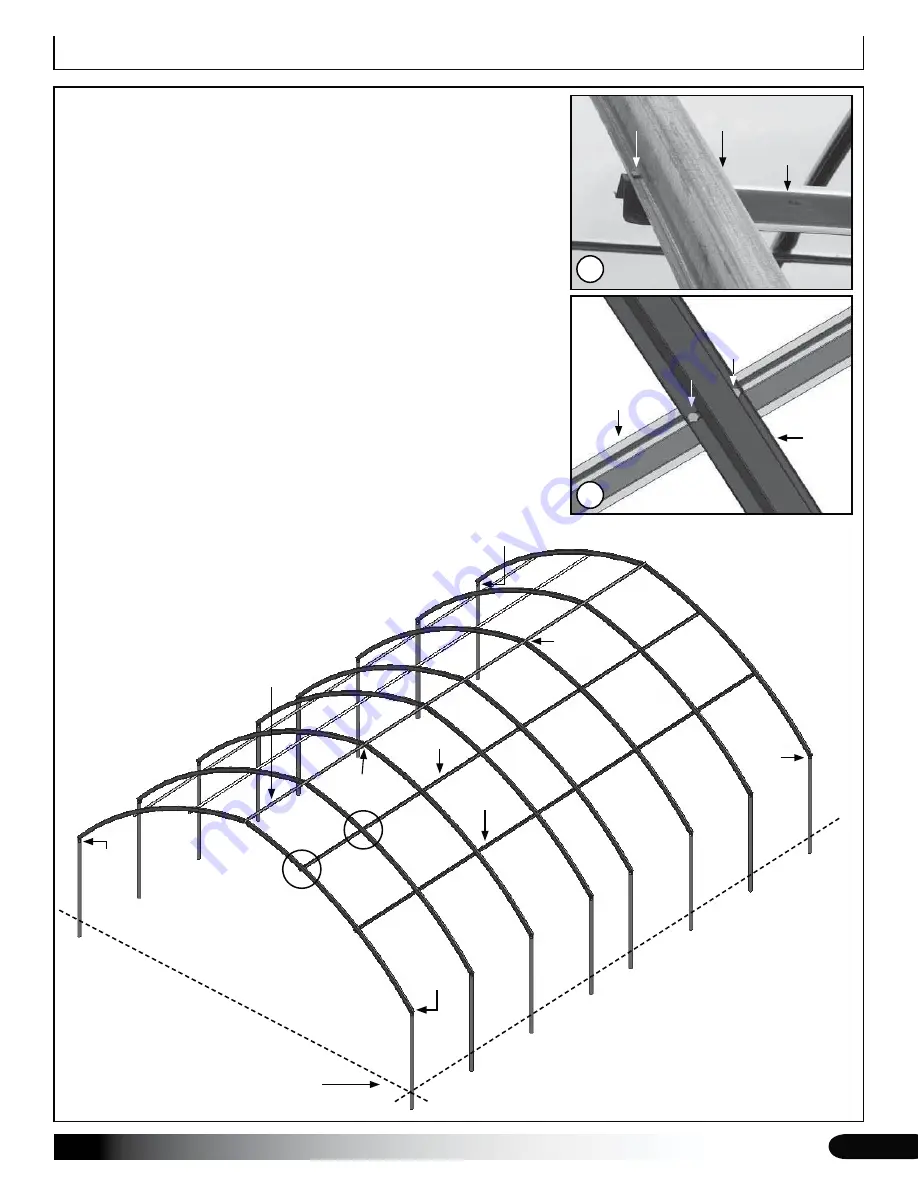
Frame length of your building may differ from what is shown.
Frame Assembly
E
(2) 1/4" x 1" bolts
and 1/4" nuts
Rafter
Purlin
(2) 1/4" x 1" bolts
and 1/4" nuts
D
Purlin
FRAME ASSEMBLY (continued)
With the first two bays (3 rafters) assembled, take the
9.
first under purlin and secure it to the rafters using the
1/4" x 1" bolts and 1/4" hex nuts. See diagrams D and
E at the right.
NOTE:
The purlin pattern is the same as the ridge
purlin. Consult the Side Profile diagrams for details.
Install and secure the remaining under purlins for the
10.
first bay as previously described and as shown in the
Quick Start section of these instructions.
Repeat the previous steps to assemble the remainder
11.
of the frame.
ATTENTION:
Attach the final eyebolt to the splice of
the third (3rd) from the last rafter as described in
Step 8.
When mounting the remaining end rafter, install the
final two (2) angled cable brackets as described in
Steps 1 and 2.
Continue with the installation of the baseboards.
12.


