31
Revision date: 05.13.10
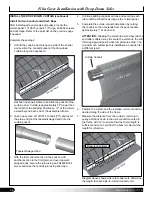
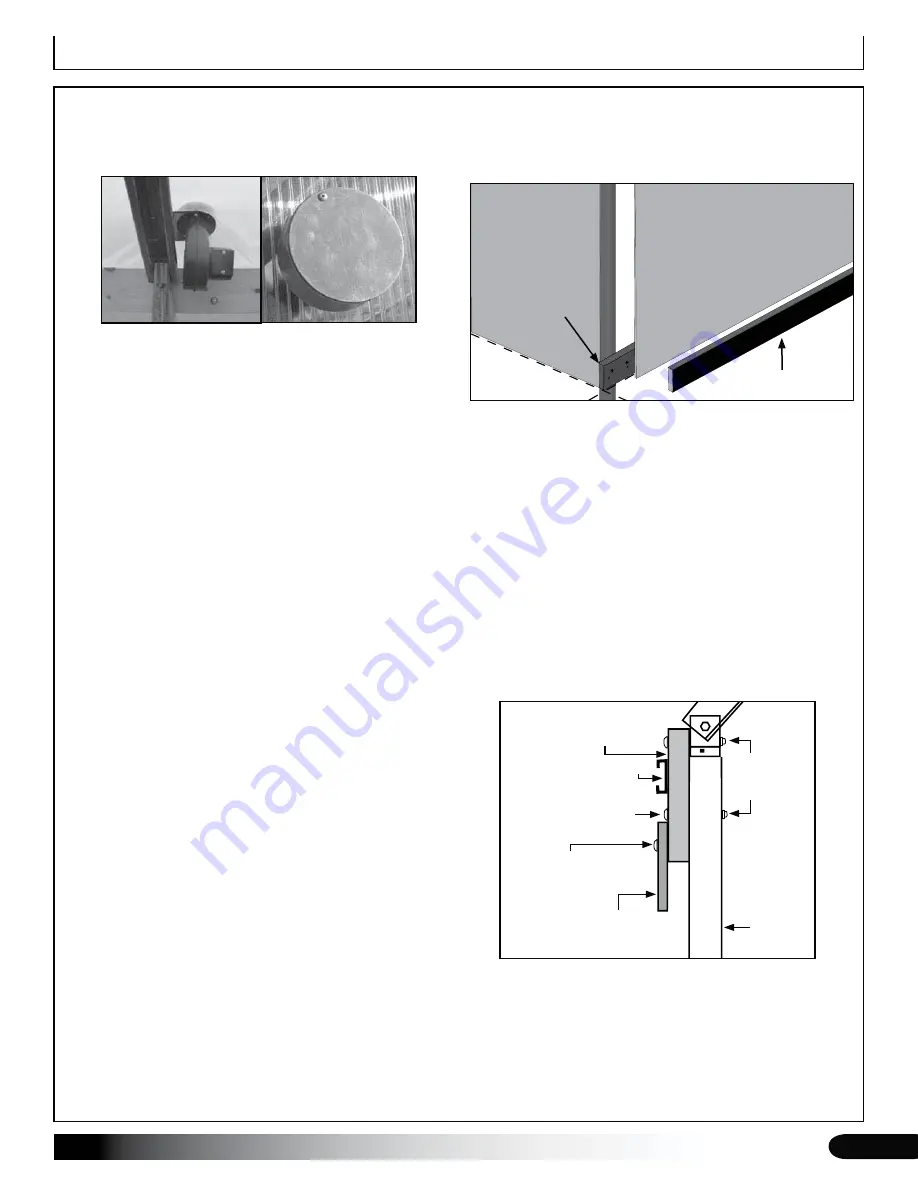
BASEBOARD NOTE
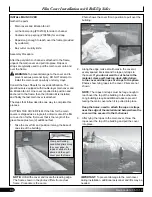
A customer-supplied baseboard and retaining board are
required to attach the drop-down curtain's lower edge.
See the exploded view below.
The baseboard runs the length of the frame at ground
level. The retaining board secures the curtain to the
baseboard.
The baseboard and retaining board are
supplied by the customer.
Fasteners (5/16" x 5" carriage bolts and FA4652 wood
screws) are included. Depending on board width, use 2
carriage bolts per rafter connection for the baseboard and
ribbon board. Evenly space the wood screws at 24".
FRAME CHECK AND CURTAIN PREPARATION
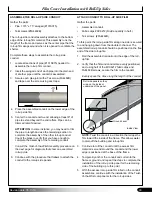
If not already installed, attach the 1" x 4" board to the
1.
ribbon board using FA4652 wood screws as shown
below. Space screws every 24" (minimum spacing).
Verify that the baseboard is installed properly at
2.
ground level. The baseboard must be level for the
drop-down curtain to install and function properly.
Gather the boards needed for the retaining board of
3.
the baseboard. See diagram at the top of this page.
Collect all drop-down curtain components and
4.
continue with the curtain installation.
Film Cover Installation with Drop-Down Sides
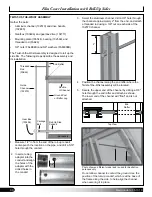
Ground Level
Drop-Down
Curtain Panel
Optional
End Panel
Retaining Board
Baseboard
View shown from outside the shelter.
Rafter Leg
or Ground
Post
2" x 6" Ribbon Board
1" x 4" Board
U-Channel
End View
5/16" Nuts
(FALB32B)
5/16" x 5"
Carriage
Bolts
FA4652 Wood
Grip Screw
INSTALL MAIN COVER (continued)
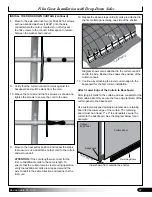
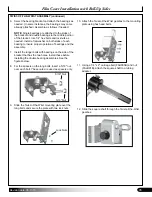
Once the first cover is stretched and secure, install the
10.
inflation fan kit in the desired location and
according
to the instructions sent with the kit.
ATTENTION:
Install the inflation fan kit
before
installing the second main cover. Consult the
instructions included with the fan kit to install the fan.
FOR ADDITIONAL DETAILS, CONSULT THE
INFLATION FAN INSTALLATION PHOTOS FOR A
SIMILAR BUILDING IN THE QUICK START GUIDE
AT THE BACK OF THESE INSTRUCTIONS.
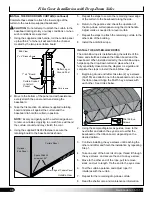
After installing the inflation fan kit, repeat the steps to
11.
install the film for the second main cover.
NOTE:
When installing the second cover film, use the
same end cap channel and U-channel used for the
first cover film, and a second run of the correct spring
(Steps 5 & 8), which is installed on top of the first
spring already in the channels.
With the second cover film layer installed, test the
12.
operation of the inflation fan kit.
IMPORTANT:
If trimming the excess cover material at
the ends and sides, DO NOT remove too much of the
excess material. Some excess main cover material
(the material that extends beyond the end rafters)
should remain in place to more easily re-stretch the
film if needed.
FRAME CHECK
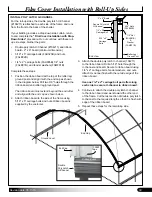
Before you attach the drop-down curtain, inspect the
frame for sharp edges or fasteners that could damage the
curtain or kit components.
Verify that all frame members are properly secured
1.
and that all bolts and clamps are tight.
Recheck the frame assembly for sharp edges
2.
or clamps and bolts that may interfere with the
installation of the curtain. File or tape sharp edges as
needed.
Reposition clamps and bolts as needed and tape all
3.
rafter pipe joints with duct tape to protect the curtain.
Verify that the main building frame is properly and
4.
adequately anchored.


