11
Revision date: 02.10.10
SET GROUND POSTS
This procedure describes setting the ground posts in
holes, bracing in place, and adding concrete.
If your
building includes mounting feet, skip this procedure and
continue with the installation of the mounting feet.
Required parts and equipment:
Ground post (no mounting feet)
•
Equipment to level and brace posts
•
NOTE:
Concrete (customer-supplied) is required to
secure all ground post in the holes. All posts must be set
at the same height for the frame to assemble properly.
Consult the services of a qualified contractor to properly
set posts.
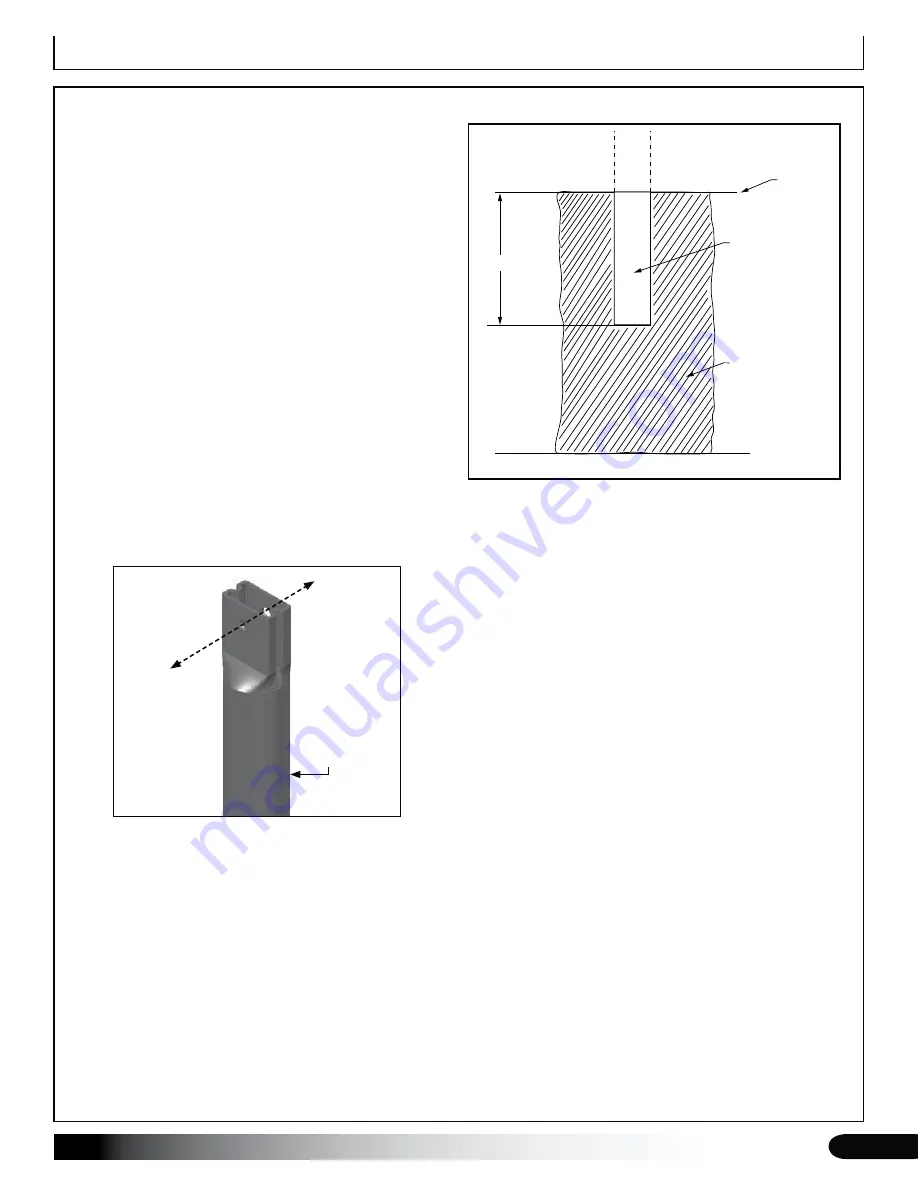
Take one ground post, measure 24" from the plain
1.
end, and mark the location on the pipe.
Set all posts
two (2) feet below ground leve
l. See diagram to the
right.
Add concrete to a corner hole, set the first corner
2.
ground post into the hole, and brace in position. Fill
hole so concrete remains below the finished grade.
Ground Post
Toward
the ends
of the
frame
Toward
the ends
of the
frame
Ground Post
Concrete
Ground Level
2’ Deep
ATTENTION:
Position the pre-drilled holes facing
toward the ends of the shelter so they align with the
bolt holes in the rafter sections. Verify that the ground
post is at the correct height.
Check that the corner post is straight (plumb) and
3.
adjust as needed before the concrete sets.
Repeat the above steps to complete the installation of
4.
all ground posts.
Continue with the rafter assembly.
5.
Set Ground Posts (option)
DIAGRAM SHOWS A TYPICAL POST HOLE
In areas where frost is common, dig each post hole so it
falls below the frost line.
Minimum hole depth for all areas
regardless of frost is 24".
Consult local building codes and qualified contractors for
additional details when digging the post holes and setting
the ground posts.


