30
Revision date: 02.10.10
Roll-Up Sides Installation
Gather the parts:
Customer-supplied retaining board (1" x 2" minimum)
•
Roll-up side panel (or panels)
•
FA4652 wood grip
•
screws to secure retaining board
The following instructions describe attaching one roll-up side
panel to the frame.
ATTACH ROLL-UP PANEL
FA4652 Wood
Grip Screws
5/16" x 5" Carriage
Bolts
Roll-Up
Side Panel
End
Rafter
Retaining Board
Corner Cap
2" x 6" Ribbon Board
ATTENTION:
If your building is equipped with drop-down
sides, skip this section and continue with the
Drop-Down
Sides Installation
instructions.
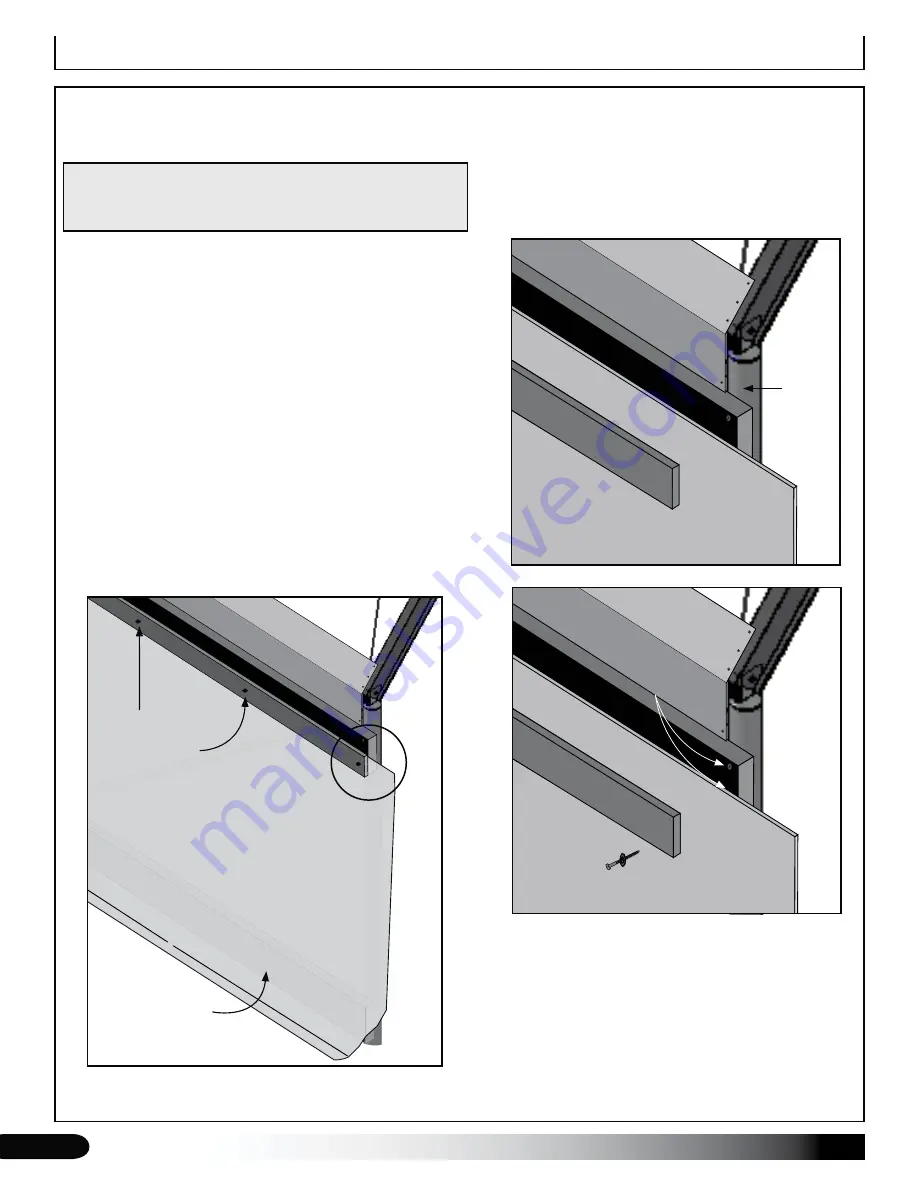
A customer-supplied retaining board is required to attach
the upper edge of each panel to the ribbon board. See the
exploded views at the right. The baseboard (recommended)
serves as the point where the roll-up conduit rests when the
panel is in the down/closed position.
Complete these steps to install the roll-up side panel:
With assistance, unfold one panel along the frame and
1.
lift the upper edge—no pocket—up to the ribbon board.
Using customer-supplied roofing nails or a similar
fastener with a flat head, stretch the panel along the
face board and tack it in place using the nails.
Panel
must be installed level.
Take the customer-supplied retaining board, place it
2.
over the upper edge of the panel, and square it with
the 2" x 6" ribbon board.
Secure the retaining board to the face board using
3.
FA4652 wood grip screws.
Space screws every 24"
.
Repeat steps to install the remaining roll-up panel.
4.
Assemble and install roll-up conduit. See next page.
5.
FA4652 wood
grip screws
installed every
24"
Customer-Supplied
Baseboard
(recommended)
Panel
ATTENTION:
Panel is longer than the frame. Center
panel on sidewall and allow the same length to extend
beyond the end rafters. Panel can be trimmed later.


