background image

3. Installing the Clearswift SECURE ICAP
Gateway

You can install the Clearswift SECURE ICAP Gateway software from the ISO image

that you downloaded from the Online Clearswift Repository.

The installation process includes the following phases:

1. Combined installation of Red Hat Enterprise Linux 6.8 operating system and the

Clearswift SECURE ICAP Gateway from the installation media.

2. Running the console-based

System Configuration

wizard to adjust default

system values, including network configuration.

3. Enable access to the Clearswift online repositories containing the latest software

updates.

Once the Gateway has been installed, you will need to complete the

Clearswift

Installation Wizard

.

3.1 Installing the Clearswift SECURE ICAP Gateway

The following steps describe how to install the Clearswift SECURE ICAP Gateway.

Section 3.2 Installing from the ISO image

only applies if you are

performing a standard installation using the ISO image containing both

RHEL 6.8 and the Clearswift software.

If you are performing the hardware install, go to

Section 3.3 Running the

Clearswift System Configuration wizard

.

If you are installing onto an existing RHEL 6.8 server, use the instructions

in Appendix A of this guide to perform the installation. Then refer to

Phase 2 of installing the Clearswift SECURE ICAP Gateway.

3.2 Installing from the ISO image

1. Insert the media containing the ISO image into the drive and power on the

server.

The

Welcome to Clearswift Web Solutions

should be displayed. If the load device

can not be found you might need to adjust your system boot sequence in the

BIOS.

- 7 -

Summary of Contents for SECURE ICAP

Page 1: ...Clearswift SECURE ICAP Gateway Installation Getting Started Guide Version 4 5 0 Document Revision 1 0 ...

Page 2: ...anies products and events for illustrative purposes Any similarities to real persons companies products and events are coincidental and Clearswift shall not be liable for any loss suffered as a result of such similarities The Clearswift Logo and Clearswift product names are trademarks of Clearswift Ltd All other trademarks are the property of their respective owners Clearswift Ltd registered numbe...

Page 3: ...Clearswift First Boot Console 8 Notes on using the Clearswift SECURE ICAP Gateway installation wizard 12 3 3 1 How to re enable TLS v1 0 on the 4 5 0 Gateway and update ciphers 12 3 4 Enabling access to the Clearswift online repositories 13 4 Upgrading from version 3 2 of the Clearswift SECURE ICAP Gateway15 4 1 Back up your original system 15 4 2 Install the 4 5 0 Gateway 16 4 3 Restore the syste...

Page 4: ...ull installation 1 1 Who is this guide for This guide is intended for use by n New customers installing the Clearswift SECURE ICAP Gateway for the first time n Existing customers upgrading from the most up to date version 3 2 release of the Clearswift SECURE ICAP Gateway to a 4 5 0 release If you are upgrading from an earlier version 4 release of the Clearswift SECURE ICAP Gateway see the 4 5 0 Re...

Page 5: ...wift software Installing from the ISO image Hardware install process Applies to users deploying the product using pre installed hardware supplied by Clearswift Running the Clearswift First Boot Console Software install process Applies to users installing the product on an existing RHEL 6 8 platform Appendix A Software Install Process 2 2 Obtaining the software You can obtain the Clearswift SECURE ...

Page 6: ...g the ISO image to DVD Clearswift recommends using this option when installing the Clearswift SECURE ICAP Gateway software n Copying the ISO image to USB media See Appendix B of this guide for instructions n Attaching the ISO image as a virtual DVD drive This applies to virtual machines only Browser support The Clearswift SECURE ICAP Gateway supports connections using TLS 1 2 ciphers and has been ...

Page 7: ...1 Installing the Clearswift SECURE ICAP Gateway The following steps describe how to install the Clearswift SECURE ICAP Gateway Section 3 2 Installing from the ISO image only applies if you are performing a standard installation using the ISO image containing both RHEL 6 8 and the Clearswift software If you are performing the hardware install go to Section 3 3 Running the Clearswift System Configur...

Page 8: ...the install process displays the message Running post installation scripts for a period of up to 5 minutes When this message is on screen the install process still runs in the background and you should not interrupt it At the end of the install process the system reboots automatically The Welcome to Clearswift Web Solutions boot screen appears again and Boot from local drive triggers automatically...

Page 9: ...work Adapters Select a network adapter and press Edit Press IPv4 Addresses and then Edit your selected IP address After you have made your edits press Save n DNS Servers Select a DNS entry and press Edit Add Search Domains if required or leave blank After you have made your edits press Save 4 Configure your repository settings on the Repository Configuration page 5 On the cs admin password page en...

Page 10: ...elp also provides information on how to disable the password policy 6 Apply your settings and confirm to reboot the server 7 Following the reboot open a browser and navigate to the Gateway IP address https ip address Appliance To check your IP address log in to the console using the default credentials Select View System Status and click OK The Clearswift SECURE ICAP Gateway installation wizard is...

Page 11: ... media has been ejected following the reboot you must ensure that it is re inserted before configuring the Clearswift Installation Wizard The wizard requires access to the installation media to complete the setup of your Gateway 11 ...

Page 12: ...ou can use the Clearswift SECURE ICAP Gateway We recommend visiting the First Steps topic in the online help when the Gateway interface is accessible Peering between v3 and v4 Clearswift Gateways Due to security hardening on v4 Clearswift Gateways we no longer provide support for the TLS v1 0 protocol for peering Only TLS v1 2 is supported If you wish to peer v3 Gateways for example using PMM or W...

Page 13: ... ICAP Gateway you need to enable access to the Clearswift online repositories containing the latest software updates This is done in the Clearswift Server Console application 1 From the Clearswift Server Console main menu select Configure System Select Update Repositories Clearswift Server Console checks the status of your YUM repositories and the Select YUM Repositories page appears 2 Select the ...

Page 14: ...3 Press Back to return to the Configure System page of the Clearswift Server Console 14 ...

Page 15: ...Gateway does not preserve network settings such as static hosts static routes and DNS settings Use the Server Console to re apply your network settings when you have upgraded your Gateway 4 1 Back up your original system The system backup on an FTP server includes only the most recently applied configuration If you require an earlier policy configuration along with audit and tracking data and logs...

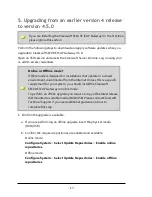
Page 16: ... Gateway When you have installed the Clearswift SECURE ICAP Gateway you need to configure access to the Clearswift online repositories containing the latest software updates See Enabling access to the Clearswift online repositories for more information 4 3 Restore the system backup 1 Using the new installed Gateway navigate to the System Center Backup Restore page 2 Select Restore System using the...

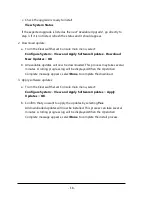
Page 17: ...nnected from the Internet Unless this is a specific requirement for your system you should install the Clearswift SECURE ICAP Gateway in online mode To perform an offline upgrade you require a copy of the latest release ISO mounted to suitable media DVD USB Please contact Clearswift Technical Support if you need additional guidance on how to complete this step 1 Confirm the upgrade is available a ...

Page 18: ...wnloaded This process may take several minutes A rolling progress log will be displayed When the Operation Complete message appears select Done to complete the download 3 Apply software updates a From the Clearswift Server Console main menu select Configure System View and Apply Software Updates Apply Updates OK b Confirm that you want to apply the updates by selecting Yes All downloaded updates w...

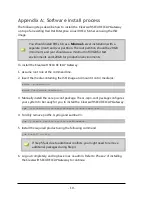
Page 19: ... 2 Insert the media containing the ISO image and mount it onto media os mkdir p media os mount dev cdrom media os 3 Manually install the cs repo conf package The cs repo conf package configures your system to be ready for you to install the Clearswift SECURE ICAP Gateway rpm ivh media os cs repo Packages cs web repo conf 4 Forcibly remove postfix rsyslog and samba V3 yum y remove postfix rsyslog s...

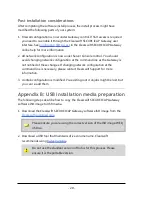
Page 20: ...fied of these changes If changing network configuration at the command line is necessary please contact Clearswift Support for more information 3 crontab configuration is modified Pre existing root cronjobs might be lost but you can re add them Appendix B USB installation media preparation The following steps describe how to copy the Clearswift SECURE ICAP Gateway software ISO image to USB media 1...

Page 21: ...enu 5 Under Format Options select Create a bootable disk using and click the disk icon to choose the Clearswift SECURE ICAP Gateway ISO you want to burn Once Rufus scans the ISO it fills in other options automatically 6 Click Start The ISOHybrid image detected dialog box appears Select Write in ISO Image mode Recommended and then click OK A dialog box appears to warn you that any existing drive da...

Reviews: