37
38
Step 7
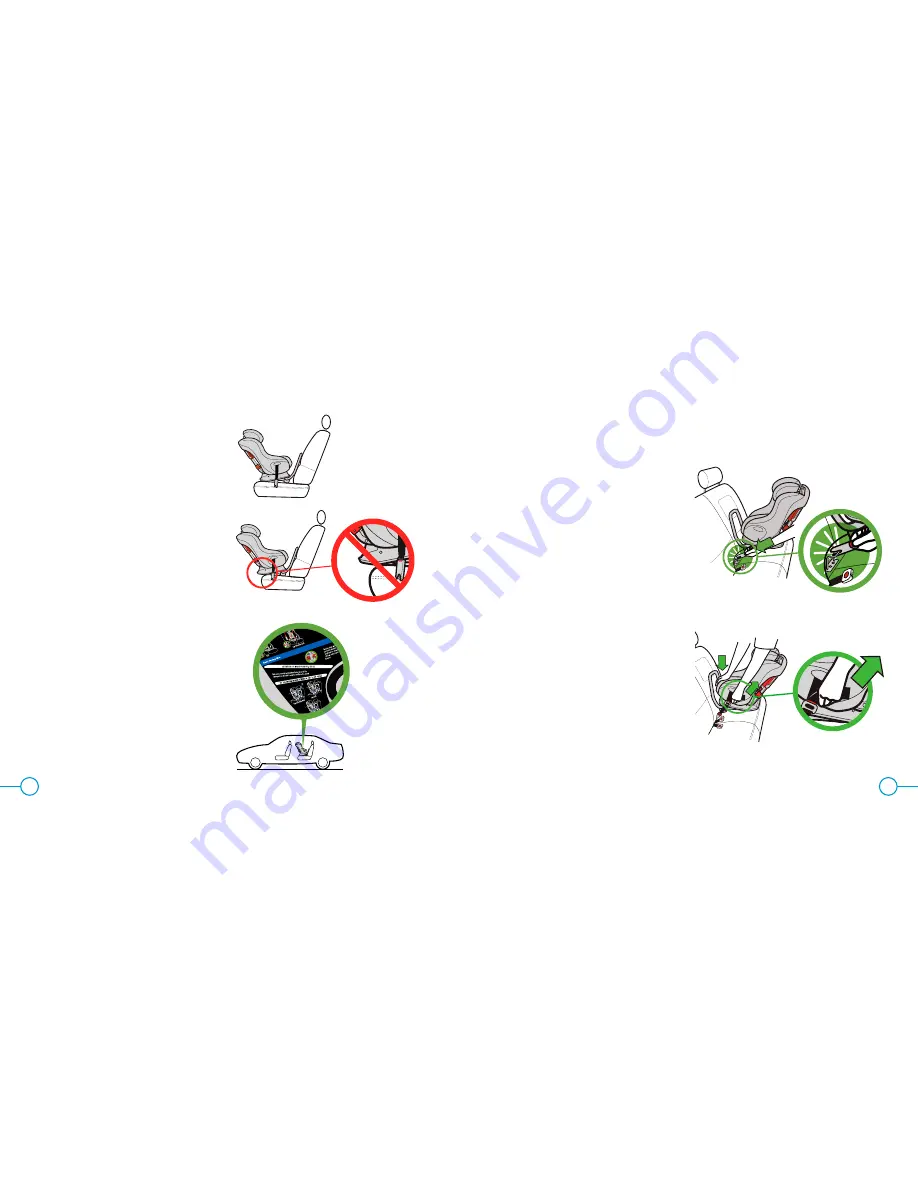
Place car seat Rear-Facing in the vehicle
seat location selected with Rear-Facing Belt
Path toward vehicle seat back and centered
between the vehicle lower anchors as shown
in
Figure 45
.
IMPORTANT:
Car Seat base must NOT
extend beyond the edge of the vehicle seat
cushion as shown in
Figure 45a
.
Step 8
Position the seat so that the Rear-Facing Level
Reference Line appropriate for the child’s
weight is parallel with the ground as shown in
Figure 46
.
• If using with a child under 10 kg (22 lb),
position the seat with the more reclined
Reference Line (top line) parallel to the
ground
• If using with an older child who is over
10 kg (22 lb), position the seat with the
more upright Reference Line (bottom line)
parallel to the ground
Figure 45
Figure 45a
Figure 47
Step 9
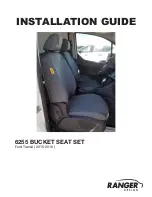
Secure UAS Push-on Connectors to the
vehicle UAS lower anchors. For each
connector:
• Position red release button of UAS Push-
On Connector facing away from car
seat.
• Align UAS Connector with the vehicle
UAS anchor and press the UAS
Connector against the UAS anchor until
you hear the UAS Connector click, as
shown in
Figure 47
.
• Pull on UAS Connector to check that it
is securely locked on the vehicle UAS
anchor.
Step 10
Tighten UAS Belt to secure the car seat.
• Press down in center of car seat to
depress the vehicle seat cushion and
pull end of UAS Belt to tighten as shown
in
Figure 48
.
Figure 48
Figure 46


