39
40
Step 11
Check for secure installation. Gripping car
seat at top of armrests, pull car seat front
to back and left to right to check for secure
installation as shown in
Figure 49
. UAS belt
MUST stay tight and child restraint should not
move more than 2.5 cm (1”) in any direction.
• If UAS belt does not stay tight or car
seat cannot be securely installed, try a
different UAS location or install using the
vehicle belt, see “Installing Rear-Facing
Car Seat With Vehicle Belt” on page 41.
Step 12
Verify that the Rear-Facing Level Reference
Line appropriate for the child’s weight is
parallel to the ground as shown in
Figure 46.
Step 13
Install Seat Cushion, see “Removing/Installing
Seat Cushion” on page 72.
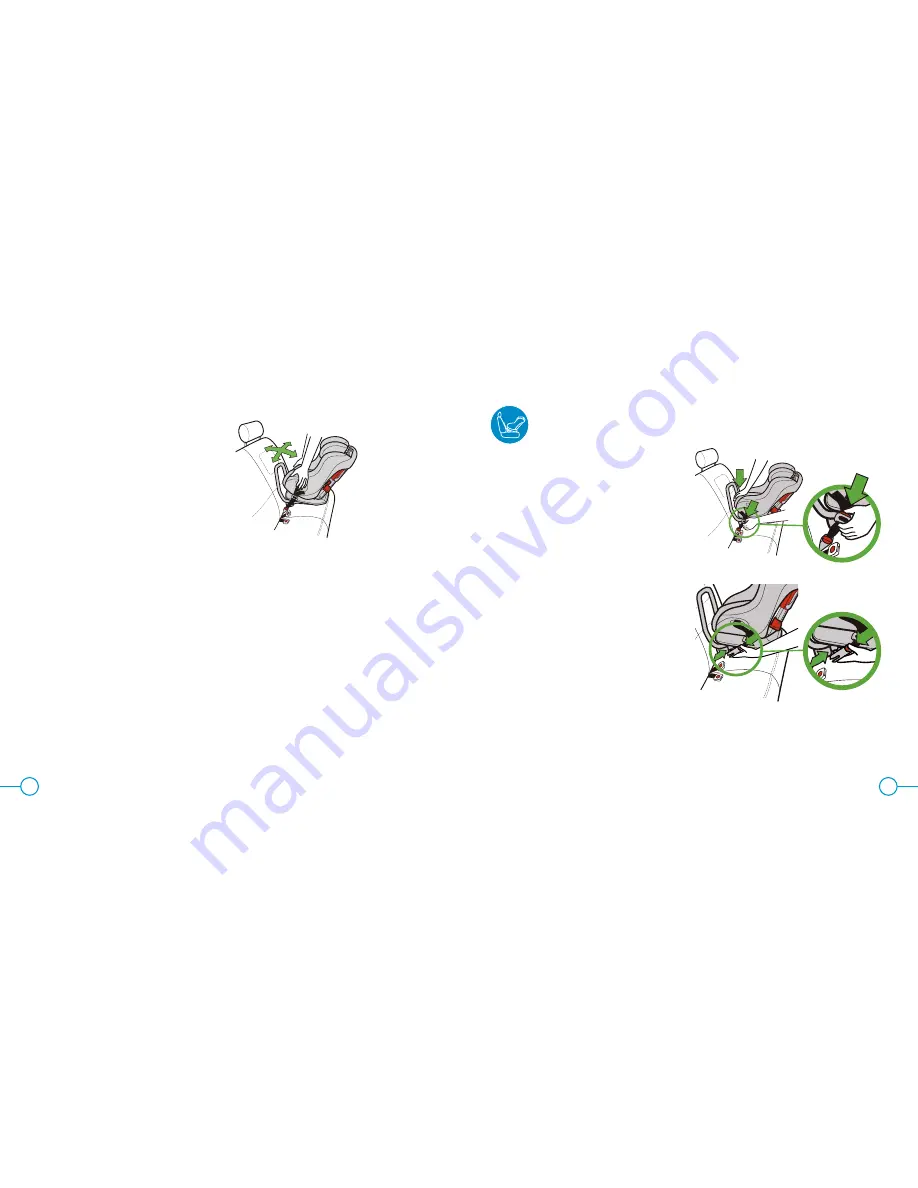
Figure 49
Removing Rear-Facing Car Seat Installed With UAS
Figure 50
Figure 51
Step 1
Loosen UAS Belt by pressing the adjuster
button on the UAS Belt adjuster and pulling
out on UAS Belt as shown in
Figure 50
.
• Pressing down in center of car seat to
reduce tension on UAS Belt will make it
easier to loosen UAS belt.
Step 2
Remove UAS Push-on Connectors from
vehicle lower anchors.
• Press and hold red release button while
pulling UAS push-on Connectors as
shown in
Figure 51
.
• Repeat to remove push-on connector on
opposite side.
Step 3
Remove this car seat from vehicle.
Step 4
Store the UAS Belt, see “UAS Belt Storage”
on page 76.


