


APOLLO 20 LP SUPPLIED-AIR RESPIRATOR
Page 9
8.0
CLEANING
CAUTION
Follow washing instructions as described in this
section. Do not use any caustic chemicals or
solvents that may be irritating or harmful to the
user, or which change the properties of the mate-
rials used in any part of the respirator.
8.1
Outer Cape
8.1.1
The cape can be machine washed using warm
water and mild detergent. Dry in a clothes dryer at the
lowest temperature setting. Do not dry clean. See Section
9.4 for removal and installation instructions.
8.2
Sweatband and Suspension
8.2.1
The sweatband, suspension, suspension strap,
and chin strap should be washed using warm water and
mild detergent. See Section 6.1 for removing the suspen-
sion.
8.3
Helmet Assembly
8.3.1
The helmet assembly should be wiped clean with
mild detergent and water. DO NOT IMMERSE THE HEL-
MET IN WATER! While this does not permanently damage
the helmet, it will require an extended drying period.
8.3.2
Care must be used to prevent abrasive entry when
putting on or removing the respirator and when changing
lenses. Vacuum the inside of the helmet to remove any
abrasive.
8.4
Inner Lens
8.4.1
Inner and middle lenses should be replaced when
pitted or scratched; however if they become dirty but not
pitted, use mild detergent and water to clean them. Volatile
solutions such as alcohol, gasoline or ammonia must not
be used to clean these lenses. Allow the lens to air dry;
cloth and towels can scratch the lens surface.
9.0
SERVICE MAINTENANCE
CAUTION
Clean the respirator of dust and media before
maintenance. All maintenance must be done in a
clean environment away from dust and media.
Doing so will help prevent ingress of dust and
contaminants.
9.1
Replacing Inner Lens, Ref. Figure 3
9.1.1
Open the lens frame.
9.1.2
Remove the middle lens and cover lenses.
9.1.3
Pull the lens gasket and inner lens off the window
opening flange. The gasket is held in place by tabs on the
flange, that fit into slots on the gasket.
9.1.4
Remove the old lens from the gasket lens channel,
and clean the gasket.
9.1.5
Place a new lens into the gasket lens channel. The
lens must be in place before affixing the gasket to the
window opening.
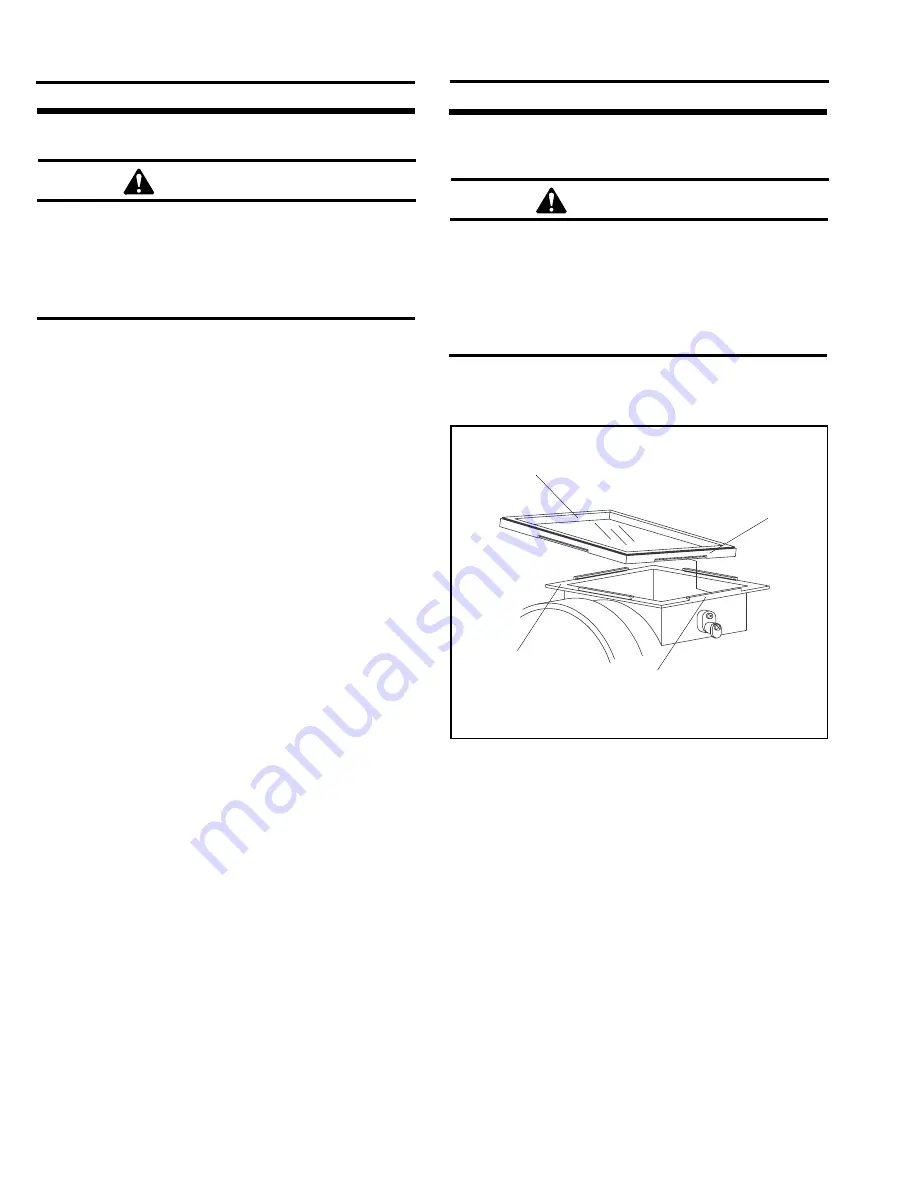
9.1.6
Identify the retaining slots on the gasket, and the
holding tabs located on the helmet window opening shown
in Figure 3.
Figure 3.
Retaining Slot
(one on each
side)
Window
Opening Flange
Lens Gasket
with Inner Lens
Holding Tab
(one on each side)


