PIPE-PRO XL™ INTERNAL-PIPE BLAST TOOL
Page 14
© 2017 CLEMCO INDUSTRIES CORP.
www.clemcoindustries.com
Manual No. 27804 Rev A
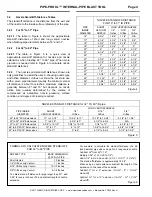
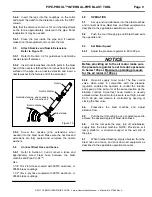
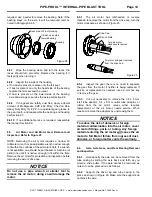
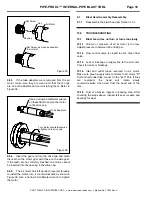
required, use a puller to remove the bearing. Note: if the
bearing stays on the axle, it will be removed later as
noted in Paragraph 8.6.5.
Figure
24
8.4.7
Wipe the bearing clean and turn the races; the
races should turn smoothly. Replace the bearing if it
feels gritty when turning it.
8.4.8
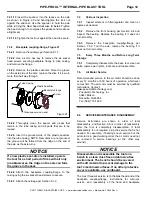
Inspect the inside of the housing:
If no dust is present, replace only the felt seal.
If dust is present on only the head side of the bearing,
replace the felt seal and the u-seal.
If dust is present on the inward side of the bearing,
axle and axle-gear, service the axle per Section 8.6
8.4.9
If the gears are totally dust free, apply a liberal
amount of Mobilgrease XHP 462 Moly, Chevron Delo
Heavy Duty Moly 3% EP 2, or equivalent gear grease to
the gear teeth, and reassemble the bearing and housing
per Section 9.3.
8.4.10
If no additional service is required, reassemble
the tool per Section 9.0.
8.5
Air Motor and Air Motor Gear Removal and
Inspection. Refer to Figure 25
NOTE: Removing the air motor requires a narrow 33
millimeter wrench or an adjustable wrench narrow enough
to fit within the confines of the air motor’s flats. If a wrench
is not available, one should be purchased, or machine (or
grind) one until it is narrow enough to fit within the flats.
Remove the air motor for protection and inspection before
removing the axle or drive cap.
NOTICE
Do not use a pipe wrench or similar tool to
remove the air motor; doing so will damage the
motor.
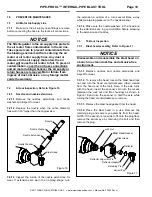
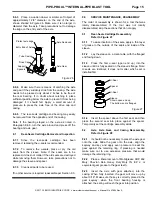
8.5.1
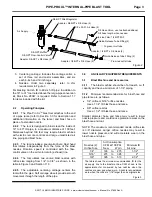
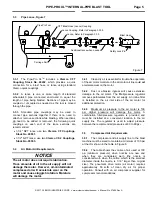
The air motor has left-handed or reverse
threads; to remove the motor from the drive cap, turn the
motor clockwise as shown in Figure 25.
Figure
25
8.5.2
Inspect the gear; there is no need to separate
the gear from the motor if neither is being replaced. If
service or replacement is needed, use a 2-mm hex key
to remove the gear.
8.5.3
It is not necessary to remove the 1/8 x 8 mm
inlet tube adaptor, 1/4 x 8 mm outlet tube adaptor, or
tubing from the air motor unless either requires
replacement or the air motor needs service. When
required, remove the adaptors by unscrewing them.
NOTICE
To reduce the risk of abrasive or foreign
material contamination into the air motor, cover
air motor fittings, ports, or tubing. Any foreign
material entering the air motor will cause the air
motor to fail. Motor failure from ingress of dust,
abrasive, or foreign matter voids the warranty.
8.6
Axle, Axle Gear, and Rear Bearing Removal
and Inspection
8.6.1
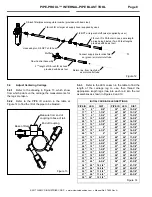
Occasionally the axle can be removed from the
tube casing by sliding the axle back and forth as you
would a slide puller. If the axle cannot be removed as
noted, it can be pressed out, as follows.
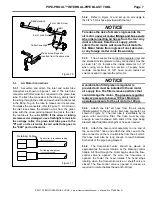
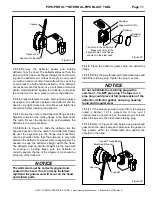
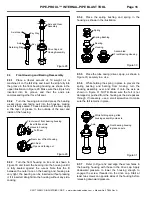
8.6.2
Support the drive cap and tube casing in the
press as shown in Figure 26. Make sure the supports do
not block the axle.
Air motor and gear removed
from the drive cap.
Wrench Flats
Turn air motor
clockwise to remove.
Drive Cap
Bearing
Back side of Front Housing
U-Seal, open side
toward bearing

