41
D
1
2
3
C
English
English
Whirlpool installation
Fig. C:
Place whirlpool in it‘s fi nal position and check
the alignement with the spirit level. As neces-
sary re-adjust the tub feets. Tighten the locking
nuts (SW 17) at the tub feets.
Draw lower bath tub edge and replace it.
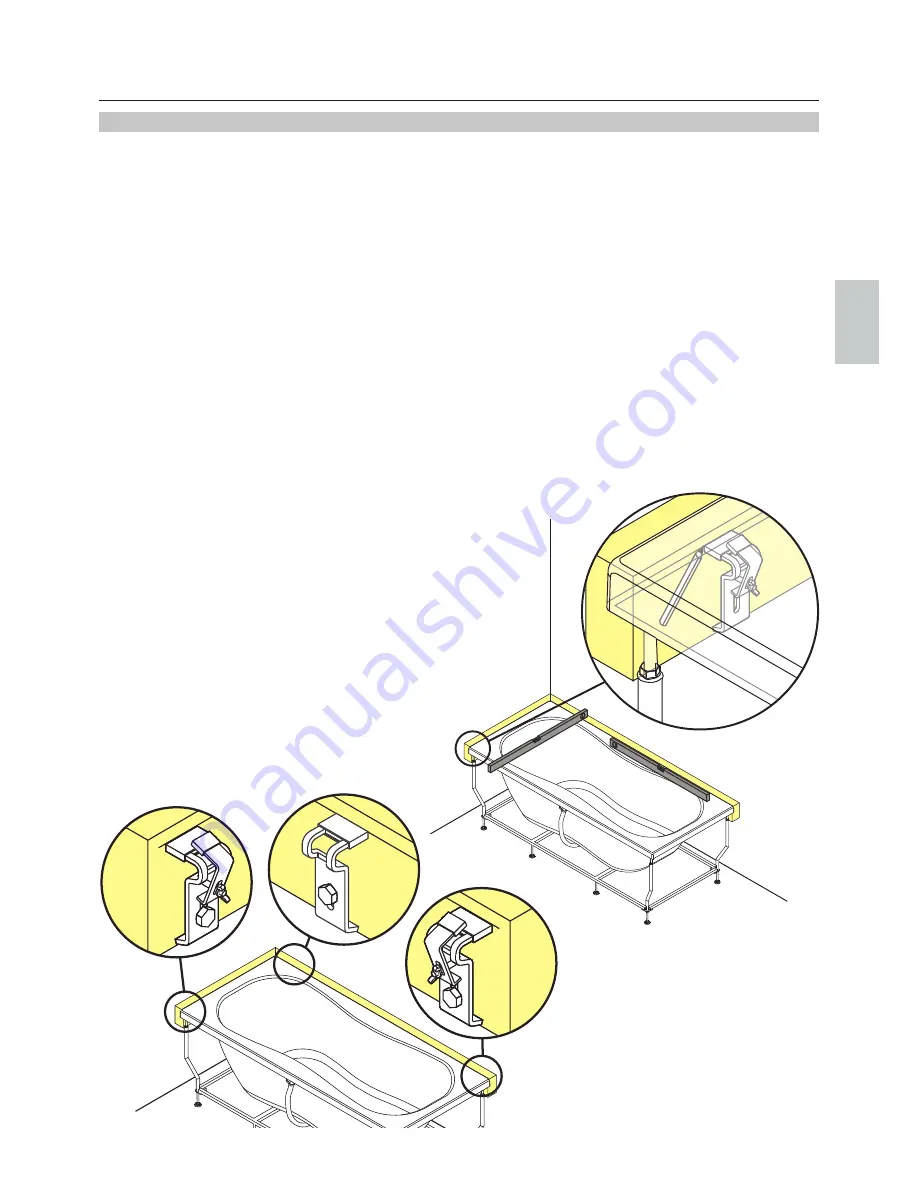
Fig. D:
a) The wall anchors with clamping yoke (1
and 2) are mounted at the outer ends of
the tub.
The distance to the outer ends of the
tub should be 50 -70 mm or should be
voted so that the clamping yokes can be
adjusted comfortably after establishing the
tub.
The wall anchors without clamping yoke
(3) is mounted at the edge.
b) After mounting of the wall anchors
establishing the tub and check the
alignement again.
c) Unsrew wing nut at the wall anchor,
presseing up clamping yoke and tighten
wing nut (see Fig. A / tub installation).
without fi gure
Connect drain to the prepared drain connection
DN 50.
without fi gure
Flush through the supply pipes DN15 according
DIN Norms. Connect bath rim thermostatic
mixer to supply pipes with with shut-off isolation
angled valves.
Summary of Contents for Luxusline Duo Imaza 750
Page 2: ...2...
Page 35: ...35 5 16 17 18 1 2 3 8 4 6 7 9 10 11 12 15 14 13 English English Equipment...
Page 75: ...75 97308000 English Service Replacement of rechargeable battery in the Poolkontrol...
Page 77: ...77 English Declaration of performance...
Page 78: ...78 Declaration of performance...


