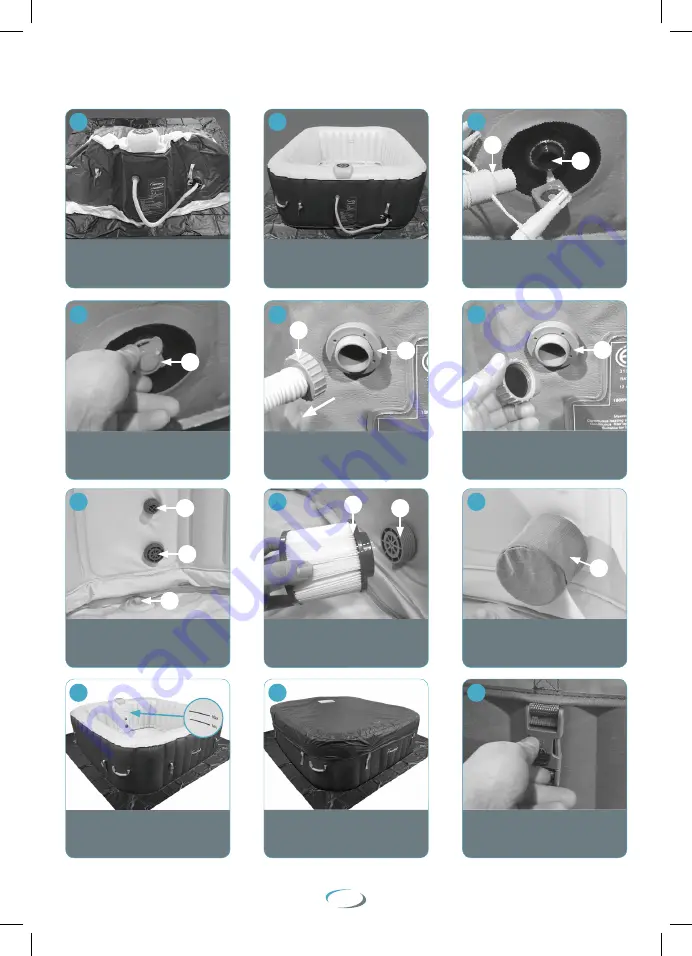
The CleverSpa
®
will now begin to
inflate. To aid the inflation pull the sides
upright and spread out the base.
Remove the
Hose (D)
from the
Inflation Valve (K)
.
Once inflated and firm, press the
‘Inflate/Bubble’
button on the
control panel to ‘
Stop
’ the inflation.
Remain with spa during inflation.
D
K
K
J
Screw the
Filter Cartridge (B)
onto
the
Filter Connector (N)
turning
clockwise until hand tight.
Add the
Filter Protector Cover (C)
onto the
Filter Cartridge (B)
.
B
D
J
Your CleverSpa
®
is now ready
to be filled with water. Fill with
a suitable hose to the
water level as indicated.
Inner CleverSpa
®
features:
Water Circulation Outlet (M)
Filter Connector (N)
Drainage Plug (G)
M
N
G
Set the temperature on the digital
control panel* and clip-on the
Top Cover (E)
to retain the heat.
*See page 10 for full operating instructions.
For added peace of mind,
please double lock the clips with the
Safety Locking Keys (H)
provided.
Screw the cap back onto
the
Inflation Valve (K)
.
Screw the cap back onto the
Air Outlet (J).
Do not over tighten
.
You can also see our Clever Clips on how to setup your CleverSpa
®
just visit cleverspa.co.uk
N
07
C
Unscrew the
Hose (D)
from the
Air Outlet (J)
.
13
16
19
22
14
17
20
23
15
18
21
24
SS19 6 Person Square CleverSpa IM_AW.indd 7
30/10/2018 15:29


