background image

Summary of Contents for 18CL36

Page 1: ......

Page 2: ......

Page 3: ... version française de ce guide commence à la page 61 Le Manuel de l Utilisa teur étendu se trouve sur le disque de Pilotes Utili taires Manuel de l Utilisateur disque Device Drivers Utilities User s Manual Introducción Español Esta Guía del Usuario Concisa le presenta las caracterís ticas principales de su ordenador La versión española de esta guía comienza en la página 91 El Manual del usua rio c...

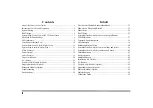
Page 4: ... 25 Bluetooth Module Option 26 Troubleshooting 28 Specifications 29 Inhalt Über das Ausführliche Benutzerhandbuch 31 Hinweise zu Pflege und Betrieb 32 Schnellstart 34 RAID Setup 35 Systemübersicht Ansicht von vorne mit geöffnetem LCD Bildschirm 37 Tastatur Funktionstasten 38 LED Anzeigen 39 Berührungssensor Tasten 40 Systemübersicht Ansicht von vorne links und rechts 41 Systemübersicht Ansicht von...

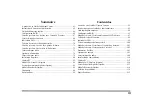
Page 5: ...tes digitales Option 85 Module Bluetooth Option 86 Dépannage 88 Spécifications 89 Contenidos Acerca de esta Guía del Usuario Concisa 91 Instrucciones para el cuidado y funcionamiento 92 Guía rápida para empezar 94 Configuración RAID 95 Mapa del sistema Vista frontal con panel LCD abierto 97 Teclado teclas de función 98 Indicadores LED 99 Teclas instantáneas del sensor táctil 100 Mapa del sistema V...

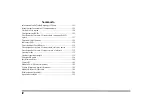
Page 6: ...nzione 128 Indicatori LED 129 Tasti istantanei Touch Sensor 130 Descrizione del sistema Vista anteriore sinistra e destra 131 Descrizione del sistema Vista posteriore e inferiore 132 Funzioni video 133 Opzioni risparmio energia 135 Funzionalità audio 136 Installazione driver 140 Camera PC 142 Modulo LAN Wireless Opzione 144 Lettore d impronte digitali Opzione 145 Modulo Bluetooth Opzione 146 Risol...

Page 7: ...have been setup If they aren t or you are planning to re configure or re install portions of the system refer to the expanded User s Manual The Device Drivers Utilities User s Manual disc does not contain an operating system Regulatory and Safety Information Please pay careful attention to the full regulatory notices and safety information contained in the expanded User s Manual on the Device Driv...

Page 8: ... requires a steady uninterrupted power supply If you are unsure of your local power specifications consult your service rep resentative or local power company The AC DC adapter may have either a 2 prong or a 3 prong grounded plug The third prong is an important safety feature do not defeat its purpose If you do not have access to a compatible outlet have a qualified electrician install one When yo...

Page 9: ...cing Attempting to service the computer yourself may violate your warranty and expose you and the computer to electric shock Refer all servicing to qualified service personnel particularly under any of the following conditions When the power cord or AC DC adapter is damaged or frayed If the computer has been exposed to any liquids If the computer does not work normally when you follow the oper ati...

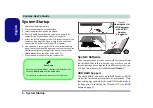
Page 10: ...of the computer Note Never lift the computer by the lid LCD 7 Press the power button to turn the computer on System Software Your computer may already come with system software pre installed Where this is not the case or where you are re configuring your computer for a different system you will find this manual refers to Microsoft Windows 7 HDD RAID Support Your hard disk s can be set up in AHCI m...

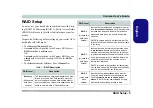
Page 11: ...e two hard disks needed Identical drives reading and writing data in paral lel to increase performance RAID 0 implements a striped disk array and the data is broken into blocks and each block is written to a separate disk drive RAID 0 a striped array is not fault tolerant The failure of one drive will result in the loss of all data in the array RAID 1 at lease two hard disks needed Identical drive...

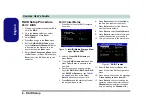
Page 12: ...n press Tab or Enter to advance to the next field 4 Specify use the up and down arrow keys the RAID level RAID 0 or RAID 1 or RAID 5 or Recovery see Table 1 on page 5 and then press Tab or Enter to advance to the next field 5 Press Enter and the system will select the physical disks to use 6 Press Enter and select if applicable the Strip Size best set to default 7 Press Enter and select the Capaci...

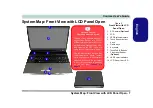
Page 13: ...ED Power Indicators 10 LCD Panel Color LED 2 1 6 7 8 4 5 3 9 Wireless Device Operation Aboard Aircraft The use of any portable electronic transmission devices e g WLAN or Bluetooth aboard aircraft is usu ally prohibited Make sure any wire less modules are OFF if you are using the computer aboard aircraft Use the appropriate function key combination touch sensor instant key to toggle power to any w...

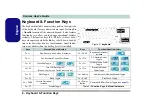
Page 14: ...ver is installed Keys Function Visual Indicators Keys Function Visual Indicators Fn Play Pause in Audio Video Programs Fn F8 F9 Brightness Decrease Increase Fn 1 Fan Automatic Control Full Power Fn F10 PC Camera Power Toggle Fn F1 TouchPad Toggle Fn F11 WLAN Module Power Toggle Fn F2 Turn LCD Backlight Off Press a key to or use TouchPad to turn on Fn F12 Bluetooth Module Power Toggle Fn F3 Mute To...

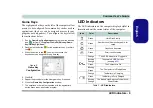
Page 15: ...rocedure for the other game key if required 6 Close the Game Key Configuration window 7 The keystroke order will be repeated with the appropriate button press in any application program LED Indicators The LED indicators on the computer display helpful in formation about the current status of the computer Table 3 LED Indicators Figure 6 Game Key Configuration Icon Color Description Green Hard Disk ...

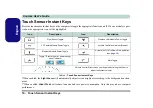
Page 16: ...ss according to the background environ ment When enabled Silent Mode will reduce fan noise and save power consumption Note this may reduce computer performance Icon Description Icon Description Light Sensor Toggle Wireless LAN Module Power Toggle PC Camera Module Power Toggle Activate the Default Internet Browser Bluetooth Module Power Toggle Activate the THX TruStudio Pro Application see page 19 ...

Page 17: ...crophone In Jack 16 Line In Jack 17 S PDIF Out Jack 18 Combined eSATA USB Port 19 Security Lock Slot 20 Power Button 3 6 4 5 7 1 2 1 Front Left Right 12 17 16 15 14 10 18 5 20 19 11 USB The USB 3 0 ports are colored blue USB 3 0 will transfer data much faster than USB 2 0 and is backwards compatible with USB 2 0 When the powered USB port is on it will sup ply power when the system is off but still...

Page 18: ...Ac cessing the CPU in any way may violate your warranty Overheating To prevent your com puter from overheating make sure nothing blocks any vent while the computer is in use 2 1 1 3 4 6 7 5 4 4 Battery Information Always completely discharge then fully charge a new battery before using it Completely dis charge and charge the battery at least once every 30 days or after about 20 partial discharges ...

Page 19: ...creen Resolution Adjust resolution OR 4 Alternatively you can right click the desktop and select Screen resolution 5 Use the dropbox to select the screen resolution 6 Click Advanced settings To access the NVIDIA Control Panel 1 Click Start and click Control Panel or point to Settings and click Control Panel 2 Click NVIDIA Control Panel icon in the Appearances and Personalization category OR 3 Righ...

Page 20: ... F7 key combination to tog gle through display options when SLI is enabled SLI supports only a Single display and attempting to config ure dual displays may cause an error Use the NVIDIA Control Panel to select the display to be used SLI Multi GPU Configuration Battery Power Note that due to the high power and system demands cre ated by enabling SLI Configuration you should not en able SLI configu...

Page 21: ...for the power button sleep button Fn F4 computer lid when closed display and sleep mode the default power saving state from the left menu Note that the Power saver plan may have an affect on computer performance Click to select one of the existing plans or click Create a power plan in the left menu and select the options to create a new plan Click Change Plan Settings and click Change advanced pow...

Page 22: ...level is set using the volume control within Windows and the volume function keys on the computer Click the Vol ume icon in the notification area to check the setting Headphone Configuration It is recommended that you set the Speaker Configu ration to Stereo not to 5 1 or 7 1 Speaker when lis tening through headphones in order to maximize audio quality See Audio Setup for HDMI on page 17 for a des...

Page 23: ...ol panel tabs 7 Adjust the HDMI settings from the control panel tabs 8 Click OK to close the Sound control panel Setup for Audio Recording To record audio sources on your computer at optimum quality follow the instructions below 1 Click Start and click Control Panel or point to Settings and click Control Panel 2 Click Realtek HD Audio Manager or right click the notification area icon and select So...

Page 24: ... Select 5 1 Speaker or 7 1 Speaker from the Speaker Configuration pull down menu Figure 14 Speaker Configuration 5 Plug the front speaker cables into the Headphone Out Jack 6 Plug in the cables you may require an adapter to connect each cable to the appropriate jack e g a stereo mini to dual RCA adapter from your speakers as follows Line In Jack Side Speaker Out Microphone In Jack Center Subwoofer...

Page 25: ...onnected to the internet 2 Double click the THX Activate icon on the desktop and click the Activate button 3 The program will connect to the internet to verify the activation key 4 Click Finish to complete the application activation 5 Restart the computer THX TruStudio Pro Application The application can be run from the shorcut in the Start menu Start All Programs Creative THX TruStu dio Pro Setti...

Page 26: ...rd appears during the in stallation procedure click Cancel and follow the instal lation procedure as directed Windows Update After installing all the drivers make sure you enable Windows Update in order to get all the latest security updates etc all updates will include the latest hotfixes from Microsoft Table 5 Driver Installation Driver Windows 7 with SP1 Page Chipset page 21 Video page 21 LAN p...

Page 27: ... license and click Next 4 Click Finish Restart Now to restart the computer Hot Key 1 Click 6 Install Hotkey AP Yes 2 Click Next Next 3 Click Finish Finish to restart the computer Game Key 1 Click 7 Install Gamekey AP Yes 2 Click Next Finish to restart the computer USB 3 0 1 Click 8 Install USB 3 0 Driver Yes 2 Click Next 3 Click the button to accept the license and then click Next 4 Click Install ...

Page 28: ...amera it is necessary to setup the audio recording options in Windows 1 Click Start and click Control Panel or point to Settings and click Control Panel 2 Click Sound Hardware and Sound 3 Click Recording tab 4 Right click Microphone Realtek High Definition Audio and make sure the item is not disabled 5 Double click Microphone or select Properties from the right click menu 6 Click Levels tab and ad...

Page 29: ...lick Open then set the Capture file size and click OK You can then start the capture process as above Reducing Video File Size Note that capturing high resolution video files requires a substantial amount of disk space for each file After re cording video check the video file size right click the file and select Properties and the remaining free space on your hard disk go to Computer right click t...

Page 30: ... Connecting to a Wireless Network The operating system is the default setting for Wireless LAN control in Windows Make sure the Wireless LAN module is turned on 1 Click the taskbar wireless icon and then double click an access point to connect to or click to Open Network and Sharing Center if you do not see a network you want to con nect to in the taskbar menu a list of options will appear allow i...

Page 31: ...u will be prompted to do so note If you have not set a password Protector Suite QL cannot secure access to your computer 4 Click Submit when you have entered password 5 You will then be prompted to enroll your fingerprints you can click Tutorial to get help with fingerprint enrollment at any time 6 Click the button above any of the fingers to begin the enrollment process for that finger 7 Swipe th...

Page 32: ...layed Use the Fn F11 and Fn F12 key combinations to tog gle power to the Combo Bluetooth and WLAN module Bluetooth Combo Driver Installation Intel 1 Click Option Drivers button 2 Click 4 Install Combo BT Driver Yes 3 Click Next Next 4 Click the button to accept the license and click Next 5 Click Next Finish Bluetooth Combo Driver Installation Third Party 1 Click Option Drivers button 2 Click 4 Ins...

Page 33: ...ooth Devices control panel Click Right click the icon and choose an option from the menu Bluetooth Help Click Start and select Help Support and then type Bluetooth in the Search Help box and then click the magnifying glass icon to find more information on Blue tooth transfer Figure 17 Click Icon Menu High Speed Bluetooth Data Transfer The Combination Wireless LAN V3 0 Bluetooth module supports hig...

Page 34: ...The captured video files from the PC Camera are taking up too much disk space Note that capturing high resolution video files requires a substantial amount of disk space for each file See Reducing Video File Size on page 23 No sound can be heard through an HDMI connected display device You have not configured the HDMI audio output See Audio Setup for HDMI on page 17 The computer is off or in Sleep...

Page 35: ...2 30GHz 8MB L3 Cache 32nm DDR3 1600MHz TDP 45W i7 2720QM 2 20GHz i7 2630QM 2 0GHz 6MB L3 Cache 32nm DDR3 1600MHz TDP 45W LCD 18 4 46 74cm HD FHD TFT LCD Core Logic Intel HM67 Chipset Memory Three 204 Pin SO DIMM Sockets Support ing DDR3 1333 1600MHz Memory Memory Expandable up to 12GB Note 1600 MHz Memory Modules are only supported by Quad Core CPUs to a maxi mum of two SO DIMMs BIOS AMI BIOS 32Mb...

Page 36: ...bo Module Interface Four USB 2 0 Ports Note One USB2 0 port can supply power when the system is off but still powered by the AC DC adapter or powered by the bat tery with a capacity level above 20 see page 11 Two USB 3 0 Ports One eSATA Port USB 2 0 Port Combined One HDMI Out Port One DVI Out Port One S PDIF Out Jack One Headphone Speaker Out Jack One Microphone In Jack One Line In Jack One Mini I...

Page 37: ...t sich das Recht vor diese Publikation ohne Vorankündigung zu überarbeiten und den Inhalt zu verändern Einige oder alle Funktionen des Computers sind bereits eingerichtet worden Falls das nicht der Fall ist oder wenn Sie ein zelne Teile des Systems neu konfigurieren oder neu installieren möchten finden Sie eine Anleitung im erweiterten Be nutzerhandbuch Die Disc Device Drivers Utilities User s Man...

Page 38: ... und die Akkus die in diesem Benut zerhandbuch spezifiziert sind Der AC DC Adapter kann zwar für internationale Benutzung vorge sehen sein benötigt aber trotzdem eine gleichmäßige ununterbro chene Stromversorgung Wenn Sie sich über Ihre lokalen Stromspezifikationen nicht im klaren sind wenden Sie sich an Ihren Servicevertreter oder Ihre lokale Stromgellschaft Der AC DC Adapter kann einen zwei oder...

Page 39: ...gesetzt war oder mit Flüssigkeiten in Berührung gekommen ist Wenn der Computer unter Beachtung der Bedienungsanweisungen nicht korrekt arbeitet Wenn der Computer heruntergefallen ist oder beschädigt wurde berühren Sie nicht die giftige Flüssigkeit des LCD Bildschirms Wenn ein ungewöhnlicher Geruch Hitze oder Rauch aus dem Compu ter entweicht Reinigung Reinigen Sie den Computer mit einem weichen sa...

Page 40: ... Abb 1 Hinweis Heben Sie den Computer niemals am Deckel LCD hoch 7 Drücken Sie auf den Netzschalter um den Computer einzuschalten Systemsoftware Möglicherweise wurde das Notebook bereits mit vorin stallierter Software ausgeliefert Ist das nicht der Fall oder wenn Sie das Notebook für ein anderes System neu konfigu rieren möchten finden Sie dazu eine Anleitung in diesem Handbuch zu Microsoft Window...

Page 41: ... parallel um die Leistung zu verbessern Bei RAID 0 wird ein Striped Disk Array verwendet die Daten wer den in Blöcke aufgeteilt und jeder Block wird auf ein anderes Laufwerk geschrieben Ein Striped Array RAID 0 ist NICHT fehlertolerant sodass der Ausfall eines Laufwerks zum Verlust aller Daten im Array führen kann Ein Striped Array ist NICHT fehlertolerant sodass der Ausfall eines Laufwerks zum Ve...

Page 42: ...ens ein und drücken Sie auf Tab oder Enter um zum nächsten Feld zu wechseln 4 Wählen Sie mit den Pfeltasten das RAID Level RAID 0 RAID 1 RAID 5 oder Recovery siehe Tabelle 1 auf Seite 35 und drücken Sie auf Tab oder Enter um zum nächsten Feld zu wechseln 5 Drücken Sie auf Enter Das System wählt nun die physikalischen Disks die verwendet werden sollen 6 Drücken Sie auf Enter und wählen Sie wenn zut...

Page 43: ...eigen 10 LED Farbanzeige auf dem LCD Bildschirm 10 2 1 6 7 8 4 5 3 9 Die Benutzung drahtlos angeschlossener Geräte in Flugzeugen In der Regel ist die Benutzung jeglicher tragbarer elektronischer Funkgeräte in Flugzeugen ver boten z B WLAN oder Blu etooth Achten Sie darauf daß die Wireless Module AUSGE SCHALTET sind wenn Sie den Computer im Flugzeug benut zen Mit der entsprechenden Funktion stasten...

Page 44: ... Pause in Audio Videoprogrammen Fn F8 F9 LCD Helligkeit ver ringern erhöhen Fn 1 Automatische Lüftersteuerung Volle Leistung Fn F10 PC Kamera aktivieren deaktivieren Fn F1 TouchPad aktivieren deaktivieren Fn F11 Wireless LAN Modul aktivieren deaktivieren Fn F2 LCD Hintergrundlicht ausschalten zum Einschalten beliebige Taste drücken oder TouchPad berühren Fn F12 Bluetooth Modul aktivieren deaktivie...

Page 45: ...derholen Sie diese Schritte auch für die andere Game Taste wenn erforderlich 6 Schließen Sie das Fenster Game Key Configuration 7 Sobald die Tasten in einer Anwendung gedrückt werden werden die gespeicherten Tastenfunktionen ausgeführt LED Anzeigen Die LED Anzeigen auf dem Computer zeigen wichtige Informationen über den aktuellen Status des Computers Tabelle 3 LED Anzeigen Abb 6 Game Key Configura...

Page 46: ...n der Leise Modus aktiviert ist werden die Lüftergeräusche und der Stromverbrauch reduziert Beachten Sie dass sich dabei auch die Leistung des Computers verringern kann Symbol Beschreibung Symbol Beschreibung Lichtsensor Schalter Wireless LAN Modul aktivieren deaktivieren PC Kamera aktivieren deaktivieren Einen Standard Internet Browser aktivieren Bluetooth Modul aktivieren deaktivieren Die Anwend...

Page 47: ...ngsbuchse 17 S PDIF Ausgangsbuchse 18 Kombinierter eSATA USB Anschluss 19 Sicherheitsschloß Buchse 20 Netzschalter 2 3 2 1 1 4 Vorderseite Linke Seite Rechte Seite USB Die USB 3 0 Anschlüsse sind blau Die Datenübertragung ist bei USB 3 0 viel schneller als bei USB 2 0 und USB 3 0 ist rückwärts kompatibel mit USB 2 0 Wenn der eingeschaltete USB 2 0 Anschluss ist kann er andere Geräte auch bei ausge...

Page 48: ...U darf nicht vom Anwender repariert wer den Jeglicher Zugriff auf die CPU führt zum Ver lust der Garantieansprü che Überhitzung Zum Schutz vor Überhit zung Ihres Computers dürfen die Luftungsoff nung en nicht während das Notebook in Betrieb ist verdeckt werden Hinweis zum Akku Ein neuer Akku sollte bei seiner ersten Verwendung zuerst einmal vollständig entladen und dann komplett wieder geladen wer...

Page 49: ... rechten Maustaste auf den Arbeitsplatz klicken und dann die Option Bildschirmauflösung wählen 5 Wählen Sie aus dem Drop down Menü die Bildschirmauflösung 6 Klicken Sie auf Erweiterte Einstellungen So öffnen Sie die NVIDIA Systemsteuerung 1 Klicken Sie Start Menü und klicken Sie Systemsteuerung oder zeigen auf Einstellungen und klicken Systemsteuerung 2 Klicken Sie auf NVIDIA Systemsteuerung Symbo...

Page 50: ...ie auf Übernehmen und Ja um den Computer neu zu starten Hinweis Wenn SLI aktiviert ist können Sie NICHT mit der Tastenkombination Fn F7 zwischen den Anzeigeop tionen wechseln SLI unterstützt nur ein einziges An zeigegerät und wenn zwei Geräte konfiguriert werden kann ein Fehler auftreten Wählen Sie das zu verwendende Anzeigegerät in der NVIDIA Systemsteuerung SLI Multi GPU und Akkustrombetrieb Bea...

Page 51: ...tellung beim Schließen des Dekkels und den Anzeige und Energiesparmodus die Standardeinstellung Energie sparen konfigurieren Beachten Sie dass sich die Energiesparpläne Energiesparmodus auf die Computerleistung auswirken Wählen Sie einen bestehenden Plan aus oder klicken Sie im linken Menü auf Energiesparplan erstellen und wählen Sie die Optionen um einen neuen Plan zu erstellen Klicken Sie auf En...

Page 52: ...en Windows Lautstärkereglern oder den Lautstärkereglern am Computer eingestellt Überprüfen Sie die Ein stellung indem Sie in der Taskleiste auf das Lautstär ke Symbol Klicken Kopfhörerkonfiguration Für die Wiedergabe auf Kopfhörern wird für eine bes sere Klangqualität empfoh len die Lautsprecherkonfiguration auf Stereo einzustellen nicht auf 5 1 oder 7 1 Laut sprecher Eine Beschreibung der Audioko...

Page 53: ...karten die HDMI Einstellungen 8 Klicken Sie auf OK um das Fenster Sound zu schließen Einrichten der Audioaufnahme Wenn Sie auf Ihrem Computer Audioaufnahmen mit op timaler Qualität machen möchten führen Sie die folgenden Schritte aus 1 Klicken Sie auf Start Menü und klicken Sie auf Systemsteue rung oder zeigen Sie auf Einstellungen und klicken Sie auf Sys temsteuerung 2 Klicken Sie auf Realtek HD ...

Page 54: ...erkarte 4 Wählen Sie bei Lautsprecherkonfiguration die Option 5 1 Lautsprecher oder 7 1 Lautsprecher 5 Schließen Sie die Kabel der vorderen Lautsprecher an die Kopfhörer Ausgangsbuchse an 6 Schließen Sie die Kabel an möglicherweise benötigen Sie einen Adapter um die Kabel an die entsprechenden Anschlüsse anzuschließen z B einen Stereo mini auf dual RCA Adapter Stellen Sie die folgenden Kabelverbin...

Page 55: ...um Internet herstellen 2 Klicken Sie doppelt auf das Symbol THX Aktivieren auf dem Desktop und klicken Sie auf Aktivieren Schaltfläche 3 Das Programm stellt eine Verbindung zum Internet her um den Aktivierungsschlüssel zu prüfen 4 Klicken Sie auf Finish Fertig stellen um die Aktivierung der Anwendung abzuschließen 5 Starten Sie den Computer neu Anwendung THX TruStudio Pro Die Anwendung kann über d...

Page 56: ...r Wenn während des Installationsvorgangs der Assistent Neue Hardware gefunden erscheint klicken Sie auf Abb rechen Befolgen Sie dann die Installationsanweisungen Windows Update Nachdem Sie alle Treiber installiert haben sollten Sie die Funktion Windows Update aktualisieren um immer die neuesten Sicherheits Updates usw zu erhalten die Updates enthalten die neuesten Fehlerbehebungen von Microsoft Ta...

Page 57: ...Sie auf Fertig stellen Jetzt neu starten um den Computer neu zu starten Hot Key 1 Klicken Sie auf 6 Install Hotkey AP Ja 2 Klicken Sie auf Next Next 3 Klicken Sie auf Finish Finish um den Computer neu zu starten Game Taste 1 Klicken Sie auf 7 Install Gamekey AP Ja 2 Klicken Sie auf Weiter Fertig stellen um den Computer neu zu starten USB 3 0 1 Klicken Sie auf 8 Install USB 3 0 Driver Ja 2 Klicken ...

Page 58: ...indows die Optionen für die Audio Aufnahme einstellen 1 Klicken Sie Start Menü und klicken Sie Systemsteuerung oder zeigen auf Einstellungen und klicken Systemsteuerung 2 Klicken Sie auf Sound Hardware und Sound 3 Klicken Sie auf Aufnahme Registerkarte 4 Klicken Sie mit der rechten Maustaste auf Mikrofon Realtek High Definition Audio und stellen Sie sicher dass die Funktion nicht deaktiviert ist 5...

Page 59: ...file size die Größe der Aufnahmedatei fest und klicken Sie auf OK Nun können Sie den Aufnahmevorgang wie oben beschrieben starten Reduzieren der Videodateigröße Beachten Sie dass die Dateien beim Aufnehmen von Vi deodateien mit großer Auflösung sehr viel Speicherplatz in Anspruch nehmen Prüfen Sie nach dem Aufnehmen des Videos die Dateigröße klicken Sie mit der rechten Maustaste auf die Datei und ...

Page 60: ...t die Standardeinstellung für die Steue rung des Wireless LAN bei Windows Stellen Sie sicher dass das Wireless LAN Modul aktiviert ist 1 Klicken Sie auf das Wireless LAN Symbol in der Taskleiste klicken Sie dann doppelt auf einen Zugriffspunkt zu dem die Verbindung hergestellt werden soll oder klicken Sie auf Netz werk und Freigabecenter öffnen wenn im Taskleisten Menü nicht das Netzwerk angezeigt...

Page 61: ...eis Wenn kein Kennwort festgelegt wurde kann Protector Suite QL nicht den Zugriff auf den Computer sichern 4 Wenn Sie das Kennwort eingegeben haben klicken Sie auf Senden 5 Sie werden dann aufgefordert Ihre Fingerabdrücke zu registrieren bei Tutorial erhalten Sie jederzeit Hilfe zum Registrieren Ihrer Fingerabdrücke 6 Klicken Sie auf eine der Tasten über einem beliebigen Finger um mit der Registri...

Page 62: ...d Wireless LAN Modul ein oder ausschalten Installation des Intel Bluetooth kombinierten Treibers 1 Klicken Sie auf Option Drivers Schaltfläche 2 Klicken Sie auf 4 Install Combo BT Driver Ja 3 Klicken Sie auf Weiter Weiter 4 Klicken Sie auf die Schaltfläche um die Lizenzvereinbarung anzunehmen und klicken Sie dann auf Weiter 5 Klicken Sie auf Weiter Fertig stellen Installation des Bluetooth kombini...

Page 63: ... klicken Sie mit der rechten Maustaste auf das Symbol und wählen Sie eine Option aus dem Menü Bluetooth Hilfe Klicken Sie auf Start wählen Sie Hilfe und Support und geben Sie in das Feld Suchen das Wort Bluetooth ein Klicken Sie dann auf das Lupen Symbol Sie erhalten dann weitere Informationen zur Bluetooth Übertragung Abb 17 Beim Anklikken des Symbols angezeigtes Menü High Speed Bluetooth Datentr...

Page 64: ...mera aufgenommenen Dateien benötigen zu viel Speicherplatz Videodateien die mit hoher Auflösung aufgenommen werden erfordern sehr viel Speicherplatz Siehe Reduzieren der Videodateigröße auf Seite 53 Es ist kein Ton zu hören wenn ein Anzeigegerät an den HDMI angeschlossen ist Der HDMI Audioausgang wurde nicht konfiguriert Siehe Audio Setup für HDMI auf Seite 47 Der Computer ist ausgeschaltet oder i...

Page 65: ...he 32nm DDR3 1600MHz TDP 45W i7 2720QM 2 20GHz i7 2630QM 2 0GHz 6MB L3 Cache 32nm DDR3 1600MHz TDP 45W LCD 18 4 46 74cm HD FHD TFT LCD Speicher Drei 204 Pin SODIMM Sockel Unterstützung von DDR3 1333 1600MHz Speicher Speicher auf bis zu 12GB erweiterbar Kompatibel mit 2 oder 4 GB Modulen Hinweis Speichermodule mit 1600 MHz werden nur von Quad Core CPUs unterstützt jedoch nur maximal zwei SO DIMMs C...

Page 66: ...erwendet werden solange das Gerät über den AC DC Netzadapter mit Strom versorgt wird oder über einen Akku mit mehr als 20 Ladung mit Strom versorgt wird siehe Seite 41 Zwei USB 3 0 Anschlüsse Ein eSATA Anschluss kombinierter USB 2 0 Anschluss Ein HDMI Ausgangsanschluss Ein DVI Ausgangsanschluss Eine S PDIF Ausgangsbuchse Eine Kopfhörer Ausgangsbuchse Eine Mikrofon Eingangsbuchse Ein Mini IEEE 1394...

Page 67: ...réserve le droit de revoir cette publication ou de modifier son contenu sans préavis Certains ou tous les éléments de l ordinateur peuvent avoir été déjà installés Si ce n est pas le cas ou si vous avez l inten tion de reconfigurer ou réinstaller des portions du système reportez vous au Manuel de l Utilisateur complet Le disque Device Drivers Utilities User s Manual ne contient pas de système d ex...

Page 68: ...l lui faut tout de même une source de courant régulière et ininterrompue Si vous n êtes pas sûr des caractèristiques du réseau électrique local consultez notre représentant de service ou la compa gnie électrique locale L adaptateur AC DC que vous utilisez peut être à 2 broches ou à 3 broches comprenant une prise de terre Cette prise de terre est un des éléments de sécurité importants ne vous en pa...

Page 69: ...uivi les instructions de mise en marche à la lettre Si votre ordinateur est tombé par terre ou a été endommagé si l écran LCD est cassé ne touchez pas le liquide car il contient du poison Si une odeur inhabituel de la chaleur ou de la fumée apparaissait sor tant de votre ordinateur Nettoyage Utilisez un chiffon propre et doux pour nettoyer l ordinateur mais n appliquez pas d agent de nettoyage dir...

Page 70: ...e soulevez jamais l ordinateur par le couvercle LCD 7 Pressez le bouton de mise en marche pour allumer Logiciel système Votre ordinateur peut être livré avec un logiciel système pré installé Si ce n est pas le cas ou si vous re configurez votre ordinateur pour un système différent vous constaterez que ce manuel fait référence à Microsoft Windows 7 Prend en charge les disques durs RAID Votre disque...

Page 71: ...es lisant et écrivant des données en parallèle pour améliorer les performances RAID 0 implémente une matrice de disques agrégés et les données sont décomposées en blocs et chaque bloc est écrit sur un disque séparé Une matrice agrégée RAID 0 NE tolère PAS de panne étant donné que la panne d un lecteur entraî nera la perte de toutes les données dans la matrice RAID 1 deux disques durs mini mum sont...

Page 72: ...vant Spécifiez utilisez les touches fléchées haut et bas le niveau RAID RAID 0 RAID 1 ou Récupération voir le Tableau 1 à la page 65 puis appuyez sur Tab ou Entrée pour passer au champ suivant 4 Appuyez sur Entrée et le système sélec tionnera les disques physiques à utiliser 5 Appuyez sur Entrée et sélectionnez si applicable la taille de la bande meilleure configuration par défaut 6 Appuyez sur En...

Page 73: ...mentation LED 10 LED lumineux de l écran LCD 10 2 1 6 7 8 4 5 3 9 Utilisation des appareils sans fil à bord d un avion L utilisation de tout appareil électro nique de transmission est générale ment interdite à bord d un avion p ex WLAN ou Bluetooth Assu rez vous que les modules sans fil sont éteints si vous utilisez l ordi nateur à bord d un avion Utilisez la combinaison de touches de fonction app...

Page 74: ...n Lecture Pause dans les programmes audio vidéo Fn F8 F9 Diminution Augmentation de la luminosité de l écran LCD Fn 1 Contrôle Automatique du Ventilateur Pleine Puissance Fn F10 Activer Désactiver le module caméra PC Fn F1 Activer Désactiver le Touchpad Fn F11 Activer Désactiver le module LAN sans fil Fn F2 Eteindre le rétroéclairage LCD Appuyez sur une touche ou utilisez le Touchpad pour allumer ...

Page 75: ...procédure pour les autres touches de jeu si néces saire 6 Fermez la fenêtre Game Key Configuration 7 L ordre de frappe sera répété avec le bouton choisi que vous pouvez appuyer dans n importe quel programme Indicateurs LED Les indicateurs LED sur votre ordinateur affichent des in formations utiles sur l état actuel de votre ordinateur Tableau 3 Indicateurs LED Figure 6 Game Key Configuration Icône...

Page 76: ...le Mode Silencieux diminuera le bruit du ventilateur et permettra de consommer moins de courant Remarquez que cela peut diminuer les performances de l ordinateur Icône Description Icône Description Permutation du capteur de lumière Activer Désactiver le module LAN sans fil Activer Désactiver le module caméra PC Activer le navigateur Internet par défaut Activer Désactiver le module Bluetooth Active...

Page 77: ...ntrée de ligne 17 Prise de sortie S PDIF 18 Port eSATA USB combiné 19 Fente de verrouillage de sécurité 20 Bouton de mise en marche Face USB Les ports USB 3 0 sont colorés en bleu USB 3 0 transfèrera des données bien plus rapidement que l USB 2 0 et il est compatible en amont avec USB 2 0 Lorsque le port USB 2 0 alimenté est activé il fournit du courant lorsque le système est éteint mais toujours ...

Page 78: ...de votre ordinateur Le fait d accéder au CPU de quelque manière que ce soit risque de violer la garantie Surchauffe Afin de ne pas causer une sur chauffe de votre ordinateur verifiez que rien ne bouche la les ventilation s quand le systeme est allumé Informations batterie Décharger puis rechargez toujours complètement une batterie neuve avant de l utiliser Déchargez complètement puis rechargez la ...

Page 79: ...olution de l écran Ajuster la réso lution OU 4 Autrement vous pouvez cliquer droit sur le bureau et sélection ner la Résolution d écran 5 Utilisez le menu déroulant pour sélectionner la résolution d écran 6 Cliquez sur Paramètres avancés Pour accéder au Panneau de configuration NVIDIA 1 Cliquez sur le menu Démarrer et cliquez sur Panneau de configuration ou pointez sur Paramètres et cliquez sur Pa...

Page 80: ...son de touche Fn F7 pour commuter les options d affichage quand le SLI est activé Le SLI prend en charge un seul écran d affichage et si vous essayez de configurer un mode d écran double cela risque d engendrer une erreur Utilisez le Panneau de configuration NVIDIA pour sélectionner l écran à utiliser Configuration SLI Multi GPU et batterie Notez que en raison d une alimentation élevée et des de m...

Page 81: ...ordinateur lorsqu il est fermé mode Affichage et Veille l état d économie d énergie par défaut dans le menu de gauche Remarquez que le mode de gestion d économie d énergie peut avoir un impact sur les performances de l ordinateur Cliquez pour sélectionner l un des modes existants ou cliquez sur Créer un mode de gestion d alimentation dans le menu gauche et sélectionnez les options pour créer un no...

Page 82: ... niveau du volume sonore est réglé à l aide du contrôle de volume dans Windows et les touches de fonctions de volume sur l ordinateur Cli quez sur l icône Volume dans la barre des tâches pour véri fier le réglage Configuration du casque Il est recommandé de définir la Configuration du haut parleur sur Stéréo pas sur 5 1 ou 7 1 Haut parleurs lors de l écoute au casque afin de maximiser la qualité a...

Page 83: ...au de configuration 7 Cliquez sur OK pour fermer la fenêtre Son Configuration pour l enregistrement audio Pour enregistrer des sources audio sur votre ordinateur à la qualité optimale suivez les instructions ci dessous 1 Cliquez sur le menu Démarrer et cliquez sur Panneau de configuration ou pointez sur Paramètres et cliquez sur Pan neau de configuration 2 Cliquez sur Gestionnaire audio HD Realtek...

Page 84: ...ez 5 1 Haut parleur ou 7 1 Haut parleur à partir du menu déroulant Configuration du haut parleur 5 Connectez les câbles du haut parleur avant à la prise de sortie casque 6 Branchez les câbles vous pouvez avoir besoin d un adaptateur pour connecter chaque câble à la prise appropriée i e un adap tateur mini stéréo vers double RCA depuis vos haut parleurs comme suit Prise d entrée de ligne Sortie hau...

Page 85: ... Internet 2 Double cliquez sur l icône THX Activer sur le bureau et cli quez sur le bouton Activer 3 Le programme va se connecter à Internet pour vérifier la clé d activation 4 Cliquez sur Terminer pour terminer l activation de l application 5 Redémarrez votre ordinateur Application THX TruStudio Pro L application peut être exécutée à partir du raccourci dans le menu Démarrer Démarrer Programmes T...

Page 86: ...t pendant la procédure d installation cliquez sur Annuler et suivez la procédure d installation comme indiqué Windows Update Après avoir installé tous les pilotes vérifiez que vous avez activé Windows Update afin d obtenir toutes les dernières mises à jour de sécurité etc toutes les mises à jour inclu ront les derniers correctifs de Microsoft Tableau 5 Procédure d Installation Pilote Windows 7 ave...

Page 87: ...ur Suivant 4 Cliquez sur Terminer Redémarrer maintenant pour redémarrer votre ordinateur Hot Key 1 Cliquez sur 6 Install HotKey AP Oui 2 Cliquez sur Next Next 3 Cliquez sur Finish Finish pour redémarrer votre ordinateur Touche de jeu 1 Cliquez sur 7 Install Gamekey AP Oui 2 Cliquez sur Suivant Terminer pour redémarrer votre ordinateur USB 3 0 1 Cliquez sur 8 Install USB 3 0 Driver Oui 2 Cliquez su...

Page 88: ...n dans Windows 1 Cliquez sur le menu Démarrer et cliquez sur Panneau de configuration ou pointez sur Paramètres et cliquez sur Pan neau de configuration 2 Cliquez sur Son Matériel et audio 3 Cliquez sur Enregistrement onglet 4 Cliquez avec le bouton droit de la souris sur Microphone Real tek High Definition Audio et vérifiez que l élément n est pas désactivé 5 Double cliquez sur Microphone ou séle...

Page 89: ...quez sur OK Vous pouvez alors lancer le processus de capture comme ci dessus Réduire la taille des fichiers vidéo Notez que la capture de fichiers vidéo à haute résolution né cessite un espace substantiel sur le disque pour chaque fi chier Après avoir enregistré la vidéo vérifiez la taille du fichier vidéo cliquez avec le bouton droit de la souris sur le fichier et sélectionnez Propriétés et l esp...

Page 90: ...exploitation est le paramètre par défaut pour le contrôle LAN sans fil dans Windows Assurez vous que le module LAN sans fil est allumé 1 Cliquez sur l icône LAN sans fil de la barre des tâches puis double cliquez sur un point d accès auquel vous souhaitez vous connecter ou cliquez sur Ouvrir le Centre Réseau et partage si vous ne voyez pas le réseau auquel vous souhaitez vous connecter dans le men...

Page 91: ... serez invité à le faire remarque Si vous n avez pas défini de mot de passe Protector Suite QL ne peut pas sécuriser l accès à votre ordinateur 4 Cliquez sur Soumettre après avoir entré le mot de passe 5 Vous serez alors invité à inscrire vos empreintes digitales vous pouvez cliquer à tout moment sur Didacticiel pour obtenir de l aide pour inscrire vos empreintes digitales 6 Cliquez sur le bouton ...

Page 92: ...sculer l alimentation sur le Combo Bluetooth et LAN sans fil Installation du pilote du Intel Combo Bluetooth 1 Cliquez sur Option Drivers bouton 2 Cliquez sur 4 Install Combo BT Driver Oui 3 Cliquez sur Suivant Suivant 4 Cliquez sur le bouton pour accepter le contrat de licence puis cliquez sur Suivant 5 Cliquez sur Suivant Terminer Installation du pilote du Combo Blue tooth tiers 1 Cliquez sur Op...

Page 93: ...s sur l icône et sélectionnez une option dans le menu Aide Bluetooth Cliquez sur Démarrer et sélectionnez Aide et assistance puis tapez Bluetooth dans la boîte d Aide de recherche puis cliquez sur l icône de la loupe pour rechercher plus d informations à propos du transfert Bluetooth Figure 17 Cliquer sur le Menu d icône Transfert de données Bluetooth à haute vitesse Le Combo LAN sans fil et Bluet...

Page 94: ...s fichiers vidéo capturés depuis la caméra PC prennent trop de place sur le disque Notez que la capture de fichiers vidéo à haute résolution nécessite un espace substantiel sur le disque pour chaque fichier Reportez vous à Réduire la taille des fichiers vidéo à la page 83 Aucun son audible à via un périphérique d affichage connecté par HDMI Vous n avez pas configuré la sortie audio HDMI Reportez v...

Page 95: ...m DDR3 1600MHz TDP 45W i7 2720QM 2 20GHz i7 2630QM 2 00GHz Cache L3 6Mo 32nm DDR3 1600MHz TDP 45W LCD 18 4 46 74cm HD FHD TFT LCD Mémoire Trois emplacements SODIMM 204 broches supportant la mémoire DDR3 1333 1600MHz Mémoire extensible jusqu à 12Go Compatible avec les modules de 2Go ou 4Go Remarque Les modules mémoire de 1600 MHz ne sont pris en charge que par les processeurs Quad Core avec un maxi...

Page 96: ...ne alimentation lorsque le système est arrêté mais encore alimenté par l adaptateur AC DC ou alimenté par la batterie avec un niveau de capacité supérieur à 20 voir la page 71 Deux ports USB 3 0 Un port eSATA port USB 2 0 combiné Un port de Sortie HDMI Out Un port de Sortie DVI Une prise de sortie S PDIF Une prise de sortie casque Une prise d entrée de microphone Un port Mini IEEE 1394a Une prise ...

Page 97: ...compañía se reserva el derecho a revisar esta publicación o cambiar su contenido sin previo aviso Algunas o todas las características del ordenador pueden haberse configurado de antemano Si no lo están o si desea reconfigurar o reinstalar partes del sistema consulte el Manual del usuario completo El disco Device Drivers Utilities User s Manual no contiene un sistema operativo Información de regula...

Page 98: ...ual Su adaptador AC DC puede estar diseñado para viajes internacionales pero puede que necesite una fuente de alimentación continuada Si no está seguro de las especificaciones de alimentación locales consulte con el servicio de asistencia o compañía de electricidad del lugar El adaptador de alimentación puede tener un enchufe de 2 dientes o un enchufe con tierra de 3 dientes El tercer diente es un...

Page 99: ...luvia u otros líquidos Si el ordenador no funciona con normalidad tras seguir las instrucciones de uso Si el ordenador se ha caído o dañado no toque el líquido venenoso si el panel LCD se rompe Si hay un olor fuera de lo normal calor o humo que sale del ordenador Limpieza Utilice un trapo limpio y suave para limpiar el ordenador pero no aplique limpiador directamente en el ordenador No utilice lim...

Page 100: ...a 1 para sostener la base del ordenador Nota Nunca levante el ordenador por la tapa LCD 7 Presione el botón de encendido para encender Software de sistema Puede ser que su ordenador tenga instalado un software de sistema Si no es el caso o si desea reconfigurarlo con otro sistema este manual se refiere a Microsoft Windows 7 Soporte para HDD RAID Su s disco s duro s puede n configurarse en modo AHC...

Page 101: ...os duros Unidades idénticas leyendo y escribiendo datos en paralelo para aumentar el rendimiento RAID 0 implementa una matriz de discos dividida los datos se dividen en dos bloques y cada uno se escribe en una unidad de disco diferente Una Matriz Repartida RAID 0 NO tolera fallos pues el fallo de una unidad dará como resultado la pérdida de todos los datos en la matriz RAID 1 se necesitan al menos...

Page 102: ... para ir al campo siguiente 4 Especifique utilizando las flechas arriba y abajo el nivel RAID RAID 0 o RAID 1 o RAID 5 o Recuperación ver la Tabla 1 en la página 95 y luego presione Tabulador o Entrar para pasar al campo siguiente 5 Pulse Entrar y el sistema seleccionará los discos físicos para usar 6 Pulse Entrar y seleccione si es necesario el Strip Size Tamaño de tira mejor ajustarlo a predeter...

Page 103: ...onal 9 Indicadores LED de encendido 10 LED de color de la pantalla LCD 10 Uso de dispositivos inalámbricos a bordo El uso de dispositivos electrónicos portátiles a bordo de un avión suele estar prohibido p ej WLAN o Bluetooth Compruebe que los módulos inalámbricos estén DESCONECTADOS si va a utilizar el ordenador en el avión Utilice la combinación de teclas de función apropiada o la tecla instantá...

Page 104: ...nción indicadores visuales Fn Reproducir Pausar en los programas Audio Vídeo Fn F8 F9 Reducción Aumento brillo LCD Fn 1 Control automático del ventilador Potencia completa Fn F10 Activar desactivar el módulo cámara PC Fn F1 Activar desactivar el Touchpad Fn F11 Activar desactivar el módulo LAN Wireless Fn F2 Apagar luz de fondo del LCD presione una tecla o utilice el Touchpad para encenderlo Fn F1...

Page 105: ...a otra tecla para juegos 6 Cierre la ventana Game Key Configuration 7 El orden de las pulsaciones se repetirá cuando presione el botón apropiado en cualquier programa de aplicación Indicadores LED Los indicadores LED en su ordenador muestran una valiosa información sobre el estado actual del ordenador Tabla 3 Indicadores LED Figura 6 Game Key Configuration Icono Color Descripción Verde El disco du...

Page 106: ...orno Cuando se activa el Modo silencio reduce el ruido del ventilador y ahorra energía Tenga en cuenta que esto puede reducir el rendimiento del ordenador Icono Descripción Icono Descripción Activar desactivar sensor de luz Activar desactivar el módulo LAN Wire less Activar desactivar el módulo cámara PC Activar el buscador de Internet predeter minado Activar desactivar el módulo Bluetooth Activar...

Page 107: ...entrada para micrófono 16 Conector de entrada de línea 17 Conector de salida S PDIF 18 Puerto combinado eSATA USB 19 Ranura del cierre de seguridad 20 Botón de encendido USB El color de los puertos USB 3 0 es azul USB 3 0 transfiere los datos mucho más rápido que USB 2 0 y es compatible con su antecesor USB 2 0 Cuando el puerto USB con alimenta ción está activado suministrará energía cuando el sis...

Page 108: ...e manipular la CPU El acceso a la CPU de cualquier modo puede anular su garantía Recalentamiento Para evitar que su orde nador se recaliente com pruebe que nada bloquea la s rejilla s con el equipo encendido Información de la batería Siempre complete la descarga de una batería nueva y luego cárguela por completo antes de usarla Descárguela por completo y vuelva a cargarla al menos una vez cada 30 ...

Page 109: ...ón O 4 Como alternativa puede hacer clic con el botón derecho en el escritorio y seleccionar Resolución de pantalla 5 Utilice el cuadro desplegable para seleccionar la resolución de la pantalla 6 Haga clic en Configuración avanzada Para acceder al Panel de control de NVIDIA 1 Haga clic en Inicio menú y haga clic en Panel de control o vaya a Configuración y haga clic en Panel de control 2 Haga clic...

Page 110: ... Nota NO utilice la combinación de teclas Fn F7 para cambiar por las opciones de pantalla cuando SLI esté activado SLI sólo soporta una pantalla y si intenta configurar dos pantallas puede causar un error Utilice el Panel de control de NVIDIA para seleccionar la pantalla que va a utilizar Configuración de SLI Multi GPU y energía de la batería Tenga en cuenta que debido al alto consumo de energía y...

Page 111: ...pa del ordenador al cerrarla pantalla y modo de suspensión el estado de ahorro de energía predeterminado en el menú de la izquierda Tenga en cuenta que el plan economizador puede afectar al rendimiento del ordenador Haga clic para seleccionar uno de los planes existentes o haga clic en Crear un plan de energía en el menú izquierdo y seleccione las opciones para crear un plan nuevo Haga clic en Cam...

Page 112: ... utilizando el control dentro de Windows y las te clas de función del volumen en el ordenador Haga clic en el icono del Volumen de la barra de tareas para comprobar la configuración Configuración de auriculares Se recomienda que ajuste la Configuración de los altavo ces a Estéreo no a 5 1 o 7 1 altavoces cuando escuche a través de auriculares para maximizar la calidad del audio Consulte Configurac...

Page 113: ...ación HDMI desde las fichas del panel de control 8 Haga clic en Aceptar para cerrar el panel de control Sonido Configuración para grabación de audio Para grabar de fuentes de audio en su ordenador a calidad óptima siga las instrucciones siguientes 1 Haga clic en Inicio menú y haga clic en Panel de control o vaya a Configuración y haga clic en Panel de control 2 Haga clic en Administrador de sonido...

Page 114: ...a 4 Seleccione 5 1 altavoces o 7 1 altavoces en el menú desplegable Configuración de altavoces 5 Enchufe los cables del altavoz frontal en el conector de salida de auriculares 6 Enchufe los cables puede que necesite un adaptador para conectar cada cable en el conector apropiado como un adaptador estéreo mini o RCA dual de sus altavoces del modo siguiente Conector de entrada de línea Salida de alta...

Page 115: ...tará estar conectado a Internet 2 Haga doble clic en el icono THX Activar en el escritorio y haga clic en Activar botón 3 El programa se conectará a Internet para verificar la clave de activación 4 Haga clic en Finalizar para completar la activación de la aplicación 5 Reinicie el sistema Aplicación THX TruStudio Pro La aplicación puede ejecutarse desde el acceso directo en el menú Inicio Inicio Pr...

Page 116: ... con el procedimiento de instalación Windows Update Tras instalar todos los controladores asegúrese de haber habilitado Windows Update para obtener las últimas actualizaciones de seguridad etc todas las actualizaciones incluirán los últimos parches de Microsoft Tabla 5 Procedimiento de instalación Controlador Windows 7 con SP1 Página Chipset página 111 Vídeo página 111 Red página 111 Lector de tar...

Page 117: ...te 4 Haga clic en Finalizar Reiniciar ahora para reiniciar el sistema Hot Key 1 Haga clic en 6 Install HotKey AP Sí 2 Haga clic en Next Next 3 Haga clic en Finish Finish para reiniciar el sistema Gamekey 1 Haga clic en 7 Gamekey AP Sí 2 Haga clic en Siguiente 3 Haga clic en Finalizar para reiniciar el sistema USB 3 0 1 Haga clic en 8 Install USB 3 0 Driver Sí 2 Haga clic en el botón Acepto este co...

Page 118: ...on su cámara 1 Haga clic en Inicio menú y haga clic en Panel de control o vaya a Configuración y haga clic en Panel de control 2 Haga clic en Sonido Hardware y sonido 3 Haga clic en Grabar ficha 4 Haga clic con el botón derecho en Micrófono Realtek High Definition Audio y compruebe que el ítem esté deshabilitado 5 Haga doble clic en Micrófono o seleccione Propiedades en el menú contextual 6 Haga c...

Page 119: ...Abrir luego ajuste el Tamaño del archivo de captura y haga clic en OK Aceptar Luego podrá iniciar el proceso de captura como arriba Reducir el tamaño de archivo de vídeo Tenga en cuenta que la captura de archivos de vídeo a alta resolución necesita una cantidad considerable de espacio en el disco para cada archivo Tras grabar el vídeo compruebe el tamaño del archivo de vídeo haga clic en el archiv...

Page 120: ... completar la instalación Conectar a una red inalámbrica El sistema operativo es la configuración predeterminada para el control de LAN inalámbrica en Windows Compruebe que el módulo WLAN esté activado 1 Haga clic en el icono de LAN inalámbrica en la barra de tareas y luego haga doble clic en un punto de acceso para conectarse o haga clic para Abrir Centro de redes y recursos compartidos si no ve ...

Page 121: ...le pedirá que lo haga nota Si no ha configurado una contraseña Protector Suite QL no puede asegurar el acceso a su ordenador 4 Haga clic en Enviar cuando haya introducido la contraseña 5 Entonces se le pedirá que registre sus huellas digitales puede hacer clic en Tutorial para obtener ayuda sobre el registro de huellas digitales en cualquier momento 6 Haga clic en el botón sobre cualquiera de las ...

Page 122: ...a al módulo Combo Bluetooth y LAN Inalámbrica Instalación del controlador Bluetooth Combo Intel 1 Haga clic en Option Drivers botón 2 Haga clic en 4 Install Combo BT Driver Sí 3 Haga clic en Siguiente Siguiente 4 Haga clic en el botón para aceptar el acuerdo de licencia luego haga clic en Siguiente 5 Haga clic en Siguiente Finalizar Instalación del controlador Bluetooth Combo tercera parte 1 Haga ...

Page 123: ... Haga clic con el botón derecho en el icono y elija una opción desde el menú Ayuda Bluetooth Haga clic en Inicio y seleccione Ayuda y Soporte y luego escriba Bluetooth en el cuadro Buscar ayuda y haga clic en el icono de la lupa para buscar más información sobre la transferencia por Bluetooth Transferencia de datos Bluetooth de alta velocidad El módulo Combo Bluetooth y LAN Inalámbrica V3 0 so por...

Page 124: ...ivos de vídeo capturados de la cámara PC ocupan demasiado espacio en el disco Tenga en cuenta que capturar archivos de vídeo de alta resolución requiere una cantidad sustancial de espacio en el disco para cada archivo Vea Reducir el tamaño de archivo de vídeo en la página 113 No se escucha sonido a través del dispositivo de pantalla HDMI conectado No ha configurado la salida de audio HDMI Consulte...

Page 125: ...3 1600MHz TDP 45W i7 2720QM 2 20GHz i7 2630QM 2 0GHz Caché de nivel 3 de 6MB 32nm DDR3 1600MHz TDP 45W LCD 18 4 46 74cm HD FHD TFT LCD Memoria Tres bases de 204 contactos SODIMM para memoria DDR3 1333 1600MHz Memoria expansible hasta 12GB Compatible con módulos de 2GB o 4GB Nota Módulos de memoria 1600MHz sólo son soportados por las CPUs Quad Core hasta un máximo de dos SO DIMMs Núcleo logic Chips...

Page 126: ... 2 0 puede suministrar corriente cuando el sistema está apagado pero necesita el adaptador AC DC o alimentado por la batería con un nivel de carga superior al 20 vea la página 101 Dos puertos USB 3 0 Un puerto eSATA puerto eSATA USB combinado Un conector de salida HDMI Un puerto de salida DVI Un conector de salida S PDIF Un conector de entrada de línea Un conector de salida de auriculares Un conec...

Page 127: ...cietà si riserva il diritto di revisionare la presente pubblicazione o di modificarne il contenuto senza preavviso È possibile che alcune o tutte le funzionalità del computer siano già state configurate In caso contrario o se si sta pianificando di riconfigurare o reinstallare componenti del sistema fare riferimento al Manuale utente completo Il disco Device Drivers Utilities User s Manual non con...

Page 128: ... all estero ma richiede ugualmente un alimentazione stabile e continua Se non si è certi delle specifiche elettriche locali consultare l assi stenza tecnica o la società locale di fornitura elettrica L adattatore di alimentazione deve avere una spina dotata di messa a terra a due o tre poli Il terzo polo costituisce un importante funzionalità di sicurezza Non rinunciare al suo impiego Se non è dis...

Page 129: ... dopo aver seguito corretta mente le istruzioni operative Se il computer è caduto o si è danneggiato non toccare il liquido vele noso in caso di rottura dello schermo LCD Se c è un odore non usuale calore o fumo che fuoriesce dal computer Pulizia Per pulire il computer utilizzare solo un panno morbido e pulito evi tando di applicare detergenti direttamente sul computer Non utilizzare detergenti vo...

Page 130: ...re mai il computer tenendolo dal coperchio LCD 7 Premere il pulsante di alimentazione per accendere Software del sistema È possibile che il software sia già pre installato sul computer In caso contrario oppure in casi di riconfigurazione del computer per un sistema diverso questo manuale si riferisce a Microsoft Windows 7 Supporto RAID dei dischi rigidi I dischi rigidi possono essere configurati i...

Page 131: ...eggono e scrivono dati in parallelo per aumentare le prestazioni RAID 0 implementa un array di dischi in configurazione striped e i dati vengono spezzati in blocchi Ciascun blocco viene scritto su un unità disco separata Uno Striped Array RAID 0 NON è fault tolerant dato che un guasto a una delle unità causa la per dita di tutti i dati dell array RAID 1 sono necessari almeno due dischi rigidi Unit...

Page 132: ...al campo successivo 4 Specificare con i tasti freccia su giù il livello RAID RAID 0 RAID 1 RAID 5 o Ripristino vedere la Tabella 1 a pagina 125 e premere Tab o Invio per passare al campo successivo 5 Premere Invio e il sistema selezionerà i dischi fisici da utilizzare 6 Premere Invio e selezionare se applicabile la dimensione di Striping impostazione migliore predefinita 7 Premere Invio e selezion...

Page 133: ...onale 9 Indicatori LED alimentazione 10 LED a colori dello schermo 10 2 1 6 7 8 4 5 3 9 Funzionamento del dispositivo senza fili a bordo di un aereo Solitamente l uso di qualsiasi dispositivo di trasmissione elettronica è proibito a bordo di un aereo p es WLAN o Bluetooth Accertarsi che i moduli wireless siano spenti quando si utilizza il computer in aereo Utilizzare la combinazione dei tasti funz...

Page 134: ...ri visivi Fn Play pausa nei programmi Audio Video Fn F8 F9 Riduzione Aumento luminosità LCD Fn 1 Controllo automatico ventola Pieno Power Fn F10 Attiva disattiva la camera PC Fn F1 Attiva disattiva il Touchpad Fn F11 Attiva disattiva il modulo LAN Wireless Fn F2 Spegne la retroilluminazione dello schermo LCD premere un tasto o utilizzare il Touchpad per ripristinare lo schermo Fn F12 Attiva disatt...

Page 135: ...OK 5 Ripetere la procedura per gli altri tasti gioco se richiesto 6 Chiudere la finestra Game Key Configuration 7 L ordine di pressione dei tasti verrà ripetuto alla pressione del pulsante corrispondente in qualsiasi programma Indicatori LED Gli indicatori LED sul computer segnalano importanti in formazioni relative allo stato corrente del computer Tabella 3 Indicatori LED Figura 6 Game Key Config...

Page 136: ...enziosa riduce il rumore della ventola e consente di ridurre il consumo energetico Tuttavia è possibile che le prestazioni del computer subiscano un calo Icona Descrizione Icona Descrizione Attivazione disattivazione sensore di luce Attivare disattivare modulo LAN Wireless Attivare disattivare camera PC Attivare il browser Internet predefinito Attivare disattivare modulo Bluetooth Attivare l appli...

Page 137: ...ngresso del microfono 16 Jack di ingresso di linea 17 Jack uscita S PDIF 18 Porta eSATA USB combinata 19 Slot blocco di sicurezza 20 Pulsante di alimentazione 2 3 2 1 1 4 Lato anteriore Lato sinistro Lato destro USB Le porte USB 3 0 sono di colore blu USB 3 0 trasferisce i dati molto più velocemente di USB 2 0 ed è compatibile con i dispositivi Quando la porta USB alimentata è attiva essa fornisce...

Page 138: ...dell utente Accedere alla CPU in qualsiasi modo implica una violazione della garanzia Surriscaldamento Per prevenire il surriscaldamen to del computer accertarsi che non vi sia nulla che ostruisca la le ventola ventole durante l uso del computer Informazioni sulla batteria Prima di utilizzare una batteria nuova scaricarla prima completamente quindi caricarla al massimo Scari care completamente e c...

Page 139: ...bile fare clic con il pulsante destro del mouse sul desktop e scegliere Risoluzione dello schermo 5 Utilizzare la casella di riepilogo a discesa per selezionare la risoluzione dello schermo 6 Fare clic su Impostazioni avanzate Per accedere al Pannello di controllo NVIDIA 1 Fare clic con il pulsante destro del mouse sul desktop e scegliere Pannello di controllo NVIDIA dal menu 2 Fare clic sull icon...

Page 140: ... utilizzare la combinazione di tasti Fn F7 per passare da un opzione video all altra quando è abilitata la configurazione SLI SLI supporta un solo schermo e il tentativo di configurare due schermi può provocare un errore Utilizzare il Pannello di controllo NVIDIA per selezionare lo schermo da utilizzare Configurazione Multi GPU SLI e carica della batteria Si noti che l elevata necessità di energia...

Page 141: ...tazione pulsante di sospensione Fn F4 coperchio del computer chiuso schermo e modalità sospensione lo stato di risparmio di energia predefinito Nota la funzione Risparmio di energia può influire sulle prestazioni del computer Fare clic su una delle combinazioni esistenti o su Crea combinazione per il risparmio di energia sul menu di sinistra e personalizzarla per creare una nuova combinazione Fare...

Page 142: ...o utilizzando il comando di regolazione volu me di Windows e i tasti funzio ne volume sul computer Fare clic sull icona Volume nella barra delle applicazioni per controllare l impostazione Configurazione degli auricolari Per ottenere la qualità audio massima si consiglia di impo stare la Configurazione cas se su Stereo non su 5 1 o 7 1 casse quando si ascolta dagli auricolari Vedere Configurazione...

Page 143: ...l pannello di controllo 8 Fare clic su OK per chiudere il pannello di controllo Audio Configurazione per la registrazione audio Per registrare sorgenti audio sul computer in qualità ottimale seguire le seguenti istruzioni 1 Fare clic su Start e fare clic su Pannello di controllo oppure scegliere Impostazioni e fare clic su Pannello di controllo 2 Fare clic su Gestione Audio Realtek HD oppure fare ...

Page 144: ...ione casse scheda 4 Selezionare 5 1 casse o 7 1 casse dal menu Configurazione casse 5 Collegare i cavi delle casse frontali nel jack di uscita delle cuffie 6 Collegare i cavi può essere necessario disporre di un adattatore per collegare i vari cavi ai jack appropriati ad esempio un adattatore da stereo mini a RCA doppio dalle casse nel modo seguente Jack di ingresso di linea uscita altoparlanti la...

Page 145: ...a Internet 2 Fare doppio clic sull icona THX Activate sul desktop e fare clic su Activate pulsante 3 Il programma si connetterà a Internet per verificare la chiave di attivazione 4 Fare clic su Finish fine per completare l attivazione dell applicazione 5 Riavviare il computer Applicazione THX TruStudio Pro L applicazione potrà essere avviata dal collegamento presente nel menu Start Start Programmi...

Page 146: ...zione fare clic su Annulla per chiudere l installazione guidata e seguire la procedura di installazione come descritto Windows Update Dopo l installazione di tutti i driver assicurarsi di aver attivato Windows update per ottenere tutti i recenti aggiornamenti di sicurezza ecc tutti gli aggiornamenti includeranno i più recenti hotfixes di Microsoft Tabella 5 Procedura di installazione Driver Window...

Page 147: ...c su Avanti 4 Fare clic su Fine Riavvia ora per riavviare il computer Hot Key 1 Fare clic su 6 Install HotKey AP Sì 2 Fare clic su Next Next 3 Fare clic su Finish Finish per riavviare il computer Tasto di gioco 1 Fare clic su 7 Install Gamekey AP Sì 2 Fare clic su Avanti Fine per riavviare il computer USB 3 0 1 Fare clic su 8 Install USB 3 0 Driver Sì 2 Fare clic su Avanti 3 Fare clic sul pulsante...

Page 148: ...controllo oppure scegliere Impostazioni e fare clic su Pannello di controllo 2 Fare clic su Audio Hardware e suoni 3 Fare clic su Registrazione scheda 4 Fare clic con il pulsante destro del mouse su Microfono Realtek High Definition Audio et accertarsi che la voce non sia disabilitata 5 Fare doppio clic su Microfono o selezionare Proprietà dal menu di scelta rapida ottenuto con il tasto destro del...

Page 149: ...ile avviare il processo di cattura di cui sopra Riduzione delle dimensioni dei file video Si noti che la cattura di file video ad alta risoluzione richiede una grande quantità di spazio sul disco rigido per ogni file Dopo aver registrato il video controllare le dimensioni del file video fare clic con il pulsante destro del mouse sul file e scegliere Proprietà e lo spazio libero rimanente sul disco...

Page 150: ...efinita per il controllo LAN wireless in Windows Accertarsi che il modulo LAN Wireless sia acceso 1 Fare clic sull icona della LAN wireless nell area di notifica quindi fare doppio clic su un Access Point per connettersi oppure fare clic su Apri Centro connessioni di rete e condivisione se nel menu della barra dell area di notifica non è presente una rete a cui connettersi appare un elenco di opzi...

Page 151: ...rotector Suite QL non potrà garantire la sicurezza all accesso al proprio computer 4 Dopo aver immesso la password fare clic su Invia 5 Viene richiesto di effettuare la registrazione delle proprie impronte digitali è possibile fare clic in qualsiasi momento su Esercitazione per un aiuto su come eseguire la registrazione delle impronte digitali 6 Premere il pulsante per ogni impronta per avviare il...

Page 152: ... F11 e Fn F12 per accendere spegnere il modulo Combo Bluetooth e Wireless LAN Installazione del driver Bluetooth Combo Intel 1 Fare clic su Option Drivers pulsante 2 Fare clic su 4 Install Combo BT Driver Sì 3 Fare clic su Avanti Avanti 4 Fare clic sul pulsante di accettazione dell accordo di licenza quindi fare clic su Avanti 5 Fare clic su Avanti Fine Installazione del driver Bluetooth Combo ter...

Page 153: ...e clic con il pulsante destro del mouse sull icona e selezionare un opzione dal menu Guida per il Bluetooth Scegliere Start e selezionare Guida in linea e supporto quindi digitare Bluetooth nel riquadro Cerca A questo punto fare clic sull icona della lente d ingrandimento per trovare altre informazioni sul trasferimento tramite Bluetooth Figura 17 Cliccare l icona Menu Bluetooth ad alta velocità d...

Page 154: ...uetooth dopo che il computer ha ripreso da Sospensione I file video catturati dalla camera PC prendono troppo spazio sul disco Nota catturare file di video ad altra risoluzione molto spazio disco disponibile per ogni file Vedere Riduzione delle dimensioni dei file video a pagina 143 Non si sente alcun suono da un dispositivo di visualizzazione collegato via HDMI L uscita audio HDMI non è stata con...

Page 155: ... L3 da 8MB 32nm DDR3 1600MHz TDP 45W i7 2720QM 2 20GHz i7 2630QM 2 0GHz Cache L3 da 6MB 32nm DDR3 1600MHz TDP 45W LCD 18 4 46 74cm HD FHD TFT LCD Memoria Tre prese SODIMM 204 pin dotate di supporto per la memoria DDR3 1333 1600MHz Memoria espandibile fino a 12GB Compatibile con moduli da 2 GB o 4 GB Nota le CPU Quad Core supportano solo moduli di memoria da 1600 MHz con un massimo di due moduli SO...

Page 156: ...e alimentazione quando il sistema è spento ma alimentato tramite l alimentatore AC DC o dalla batteria con un livello di capacità superiore al 20 vedere la pagina 131 Due porte USB 3 0 Una porta eSATA porta USB 2 0 combinata Una porta uscita HDMI Una porta uscita DVI Un jack uscita S PDIF Un jack uscita delle cuffie Un jack ingresso del microfono Un jack di ingresso di linea Line In Una porta Mini...

Reviews: