2 - 9
Using the computer
2
2
3
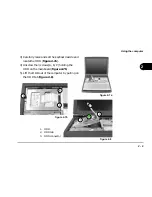
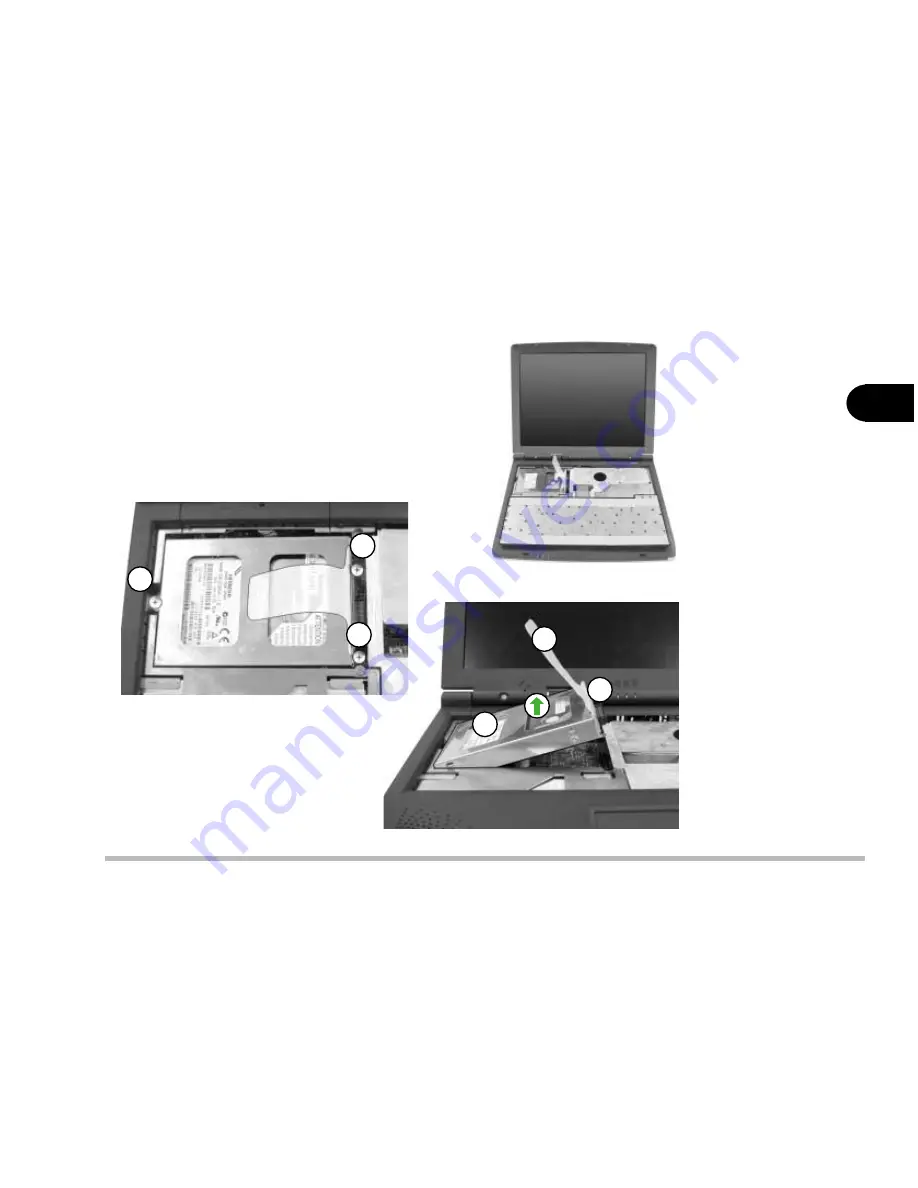
figure 2-8
1
1. HDD
2. HDD tab
3. HDD connector
figure 2-7a
U
U
3) Carefully raise and set the keyboard aside and
locate the HDD (figure 2-7a).
4) Unscrew the 3 screws(A, B, C) holding the
HDD on the mainboard (figure 2-7b) .
5) Lift the HDD out of the computer by pulling on
the HDD tab (figure 2-8).
figure 2-7b
A
C
B
Summary of Contents for Notebook
Page 1: ......
Page 21: ......
Page 39: ...Notes ...
Page 59: ...Notes ...
Page 96: ...5 19 BIOS Utilities 5 SCU Screen samples Memory Screen Startup Screen ...
Page 97: ...5 20 User s Guide 5 Disks Screen Components Screen ...
Page 98: ...5 21 BIOS Utilities 5 Power Screen Exit Screen ...
Page 99: ...Notes ...
Page 123: ...Notes ...
Page 141: ...A 6 User s Manual A Notes ...

