Disassembly
Removing the Battery 2 - 5
2.Disassembly
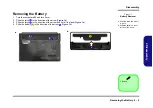
Removing the Battery
3. Battery
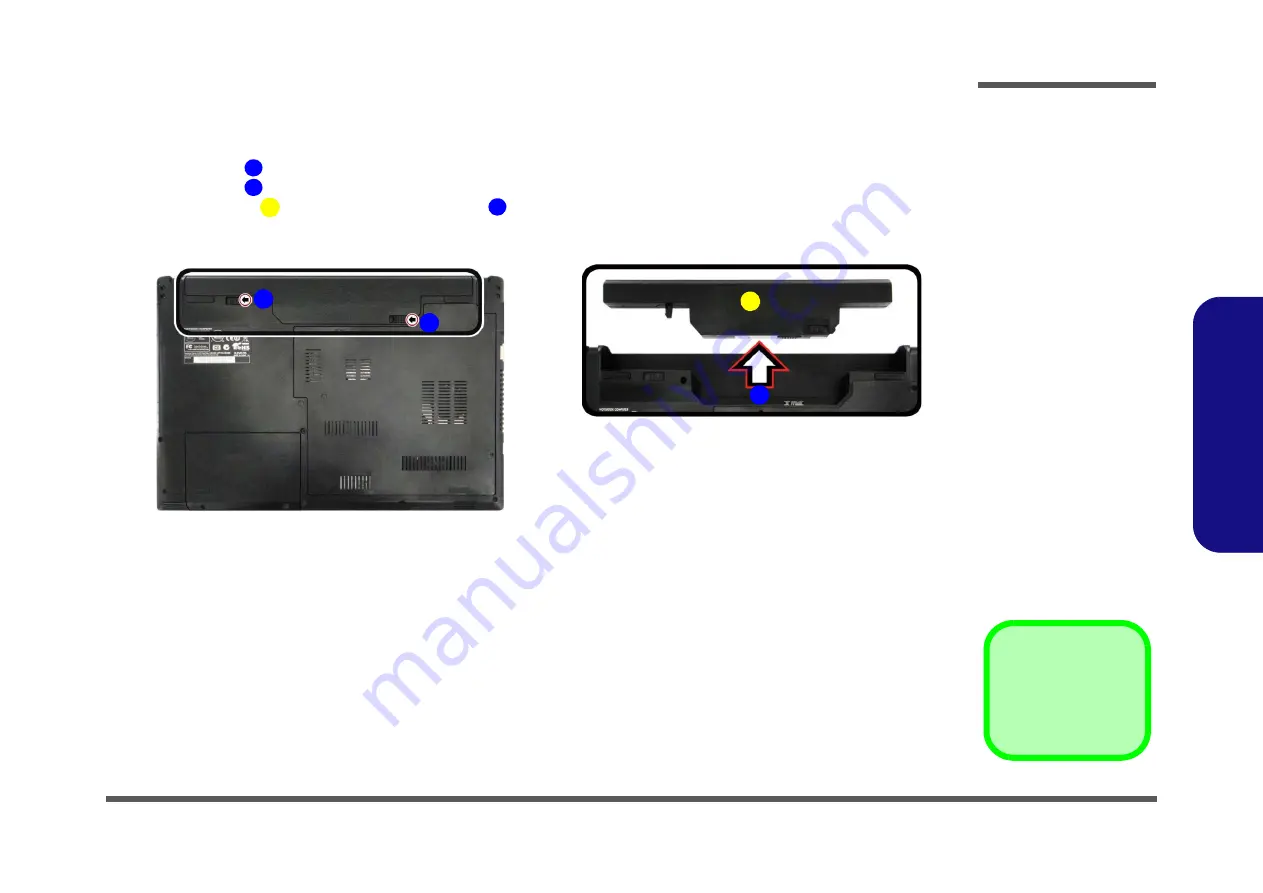
1.
Turn the computer
off
, and turn it over.
2.
Slide the latch
in the direction of the arrow (
)
.
3.
Slide the latch
in the direction of the arrow, and hold it in place (
)
.
4.
Slide the battery
in the direction of the arrow
)
.
1
2
6
3
4
Figure 1
Battery Removal
a. Slide the latch and hold it
in place.
b. Slide the battery in the di-
rection of the arrow.
1
a.
b.
3
2
4
Summary of Contents for W540SU1
Page 1: ...W540SU1 W545SU1 ...
Page 2: ......
Page 3: ...Preface I Preface Notebook Computer W540SU1 W545SU1 Service Manual ...
Page 24: ...Introduction 1 12 1 Introduction ...
Page 47: ...Top W540SU1 A 3 A Part Lists Top W540SU1 Figure A 1 Top W540SU1 ...
Page 48: ...A 4 Top W545SU1 A Part Lists Top W545SU1 Figure A 1 Top W545SU1 ...
Page 49: ...Bottom A 5 A Part Lists Bottom Figure A 2 Bottom ...
Page 50: ...A 6 SATA BLU RAY COMBO A Part Lists SATA BLU RAY COMBO 非耐落 Figure A 3 SATA BLU RAY COMBO ...
Page 51: ...DVD DUAL A 7 A Part Lists DVD DUAL Figure A 4 DVD DUAL 非耐落 ...
Page 52: ...A 8 Dummy ODD A Part Lists Dummy ODD Figure A 5 Dummy ODD ...
Page 53: ...LCD W540SU1 A 9 A Part Lists LCD W540SU1 設變 Figure A 6 LCD W540SU1 ...
Page 54: ...A 10 LCD W545SU1 A Part Lists LCD W545SU1 設變 Figure A 7 LCD W545SU1 ...


