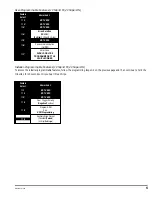
Standard Features of BlackJax 4
Passenger Compartment Connections
Control Unit
1. Select an area behind the dash to mount the control unit, but do not permanently affix it until all wiring and testing is complete.
2. You will route wires from this point, leaving slack in the wiring for ease of service.
Ignition Immobilizer
1. Locate the ignition switch wireloom under the dash.
2. Use a voltmeter to locate the wire that is 0 volts when the ignition is “OFF” and c12v throughout BOTH the
starting/cranking and engine running cycles. With the engine running, cut this wire. The car’s engine should stop running.
3. Connect the WHITE/BROWN wire to the key side of the ignition wire and the GREEN/BLUE wire to the coil side.
Starter Immobilizer
The starter immobilizer ensures the engine will not crank when BlackJax anti-carjack mode is active.
1. Locate the ignition switch wireloom under the dash.
2. Use a voltmeter to locate the one wire that c12v during the cranking cycle ONLY. This is the starter wire.
3. Cut the starter wire, then try to start the engine. If the starter does not crank, you have found the correct wire.
4. Connect the WHITE/RED to the key side and the other WHITE/RED to the starter side.
LED Status Indicator
Select a prominent location on the dash or console visible through all windows. Discuss placement with the owner.
1. Verify there is adequate space to accommodate the LED, then drill a 5/16” (8mm) hole and route the wires through it.
2. Mate the LED connectors to the VIOLET and BLACK wire connectors as shown in the diagram on page 3.
3. Press the LED into place.
PlainView 2 Coded Valet Switch
The PlainView II switch does not need to be hidden. Rather, it should be mounted on the dashboard or console within easy and
convenient reach of the driver. Discuss placement of the switch with the vehicle owner prior to installation.
1. Verify there is adequate space to accommodate the switch. Then drill a 5/16” mounting hole.
2. Route the wires and connectors through the hole and secure the switch.
3. Mate the switch connector to the small connector on the wireloom, noting the wire colors.
Driver’s Door Trigger
Refer to the
Door Trigger
section in this binder. This connection is necessary to initiate the BlackJax countdown.
Brake Lights
For safety reasons, BlackJax is wired to the brake light rather than the parking lights. Also, pressing the brake after the door has been
opened/closed starts the BlackJax countdown. When BlackJax is activated, the flashing brake lights will warn motorists that are
driving behind the soon-to-be-stalled vehicle.
1. Turn the ignition on and press the brake pedal to make sure the brake light turns on.
2. Connect the black lead of the voltmeter to ground and set the dial to DC volt.
3. Probe the wires at the brake light switch with the voltmeter lead. The voltmeter should read +12v when you press the brake
pedal; 0 volts when released.
4. Connect the BLUE/WHITE wire to the brake wire.
BlackJax/199
1
q
Life time War ranty
q
New op tional tachless mode for ease of
in stal la tion
q
High Out put Si ren
q
Plain View 2 Coded Pro gram ming Switch
q
Puls ing ig ni tion in ter rupt to slowly stop
the car
q
Two points of im mo bi li za tion
q
Pro gram ma ble pas sive im mo bi li za tion
q
Pro gram ma ble si ren/horn out put
q
Pro gram ma ble si ren du ra tion
Summary of Contents for BlackJax 4
Page 2: ...2 BlackJax 199...


