background image


Page 72 

FF5000 Operating Manual 


All manuals and user guides at all-guides.com

Summary of Contents for FF5000

Page 1: ...FF5000 FLANGE FACER MACHINE OPERATING MANUAL P N 36668 December 2015 Revision 4 All manuals and user guides at all guides com a l l g u i d e s c o m ...

Page 2: ...All manuals and user guides at all guides com ...

Page 3: ...manual or any revision hereto is prohibited At Climax Portable Machining and Welding Systems we value your opinion For comments or questions about this manual or other Climax documentation please e mail documentation cpmt com For comments or questions about Climax products or services please call Climax or e mail info cpmt com For quick and accurate service please provide your factory representati...

Page 4: ...Page B FF5000 Operating Manual CLIMAX WORLDWIDE LOCATIONS All manuals and user guides at all guides com ...

Page 5: ...P N 36668 Rev 4 Page C CE All manuals and user guides at all guides com ...

Page 6: ...Page D FF5000 Operating Manual This page left intentionally blank All manuals and user guides at all guides com a l l g u i d e s c o m ...

Page 7: ...ERFACE PLATE 12 3 4 LEVELING THE MACHINE 13 3 5 TO PRECISION LEVEL AND CENTER THE MACHINE 13 3 6 TOOL HEAD SETUP AND ADJUSTMENT 14 3 7 ADJUSTING THE TOOL HEAD 15 4 OPERATION 17 4 1 STARTING AND STOPPING 17 4 1 1 PREPARING THE MACHINE FOR START UP 18 4 1 2 STOPPING THE MACHINE 18 4 2 SETTING VERTICAL AND RADIAL TOOL FEED 19 4 2 1 SETTING THE DRAG 19 4 2 2 TO SET THE FEED 21 4 2 3 AUTOMATIC FEED 21 ...

Page 8: ... MAIN BODY ASSEMBLY 29 6 4 TOOL HEAD ASSEMBLY 29 6 5 AIR MOTOR AND PNEUMATIC ASSEMBLY MAINTENANCE 30 7 STORAGE 31 7 1 SHORT TERM STORAGE 31 7 2 LONG TERM STORAGE 31 7 3 SHIPPING 31 APPENDIX A SPARE PARTS 33 APPENDIX B EXPLODED VIEWS AND PARTS 35 APPENDIX A MSDS 51 All manuals and user guides at all guides com ...

Page 9: ...AWS 12 FIGURE 4 MOUNTING INTERFACE PLATE 12 FIGURE 5 LEVELING THE MACHINE 13 FIGURE 6 PRECISION LEVEING AND CENTERING THE MACHINE 14 FIGURE 7 PNEUMATIC AIR CONTROL VALVE SHUT OFF 18 FIGURE 8 SETTING TOOL FEED 19 FIGURE 9 CAP SCREW LOCATIONS 20 FIGURE 10 SET SCREW LOCATIONS 20 FIGURE 11 REMOVE CRANK HANDLE 21 All manuals and user guides at all guides com ...

Page 10: ...ABLES TABLE 1 RISK ASSESSMENT CHECKLIST BEFORE SET UP 3 TABLE 2 RISK ASSESSMENT CHECKLIST AFTER SET UP 4 TABLE 3 RECOMMENDED LUBRICANTS 29 TABLE 4 SPARE PARTS LIST 33 TABLE 5 TOOL KIT P N 29116 35 All manuals and user guides at all guides com ...

Page 11: ...return the part or repaired machine shipping prepaid to the factory Climax will at its option either repair or replace the defective part and or correct any defect in the labor performed both at no charge and return the part or repaired machine shipping prepaid These warranties do not apply to the following Damage after the date of shipment not caused by defects in materials or workmanship Damage ...

Page 12: ...ury or loss of life WARNING concerns a condition procedure or practice that if not avoided or strictly observed COULD result in injury or loss of life CAUTION concerns a condition procedure or practice that if not avoided or strictly observed could result in minor or moderate injury NOTICE concerns a condition procedure or practice worthy of special attention TIP A tip provides additional informat...

Page 13: ...ng with long sleeves and legs is recommended when operating the machine as hot flying chips from the workpiece may burn or cut bare skin Work area Keep the work area around the machine clear of clutter Keep all cords and hoses away from the work area when operating the machine Moving parts Except for operating controls avoid contact with moving parts by hands or tools during machine operation Secu...

Page 14: ...ce guidelines Section 6Error Reference source not found ith the recommended lubricants I checked that all affected personnel have the recommended personal protective equipment as well as any equipment required by the site or other regulations I checked that all affected personnel understand the danger zone and are clear of it I have evaluated and mitigated any other potential risks specific to my ...

Page 15: ...ng contact Climax immediately for replacements P N 35772 Plus or minus direction indicator P N 59044 Lable safety warning read manual P N 80510 label safety warning cutting of fingers or rotating blade P N 81008 Label safety warnign eye and ear protection required All manuals and user guides at all guides com ...

Page 16: ...Page 6 FF5000 Operating Manual This page left intentionally blank All manuals and user guides at all guides com a l l g u i d e s c o m ...

Page 17: ... before operating the machine 2 2 About the FF5000 The Model FF5000 Portable Flange Facer is an Inside Diameter ID mounted flange re facer Its compact design makes it an ideal on site maintenance tool The machine fits into bores with ID s from 5 0 to 14 0 127 0 to 355 6 mm With the optional larger chuck the mounting range is increased to 24 610 mm and I D flanges from 5 to 24 127 to 610 mm can be ...

Page 18: ...ool holder rotation 45 degrees counter clockwise 85 degrees clockwise facing tool head Right angle drive ratio 4 1 Main drive gear ratio 7 05 1 Overall gear ratio 28 2 1 Machine weight without chuck 60 lbs 28 kg Shipping weight 175 lbs 80 kg Shipping dimensions 25 x 25 x 18 635mm x 635mm x 460mm 2 4 Pneumatic motor option performance specifications Maximum rated horsepower 1 07 hp 800 W Cutter hea...

Page 19: ...P N 36668 Rev 4 Page 9 FIGURE 2 P N 59246 PNEUMATIC SCHEMATIC NOTICE Contact Climax right away if there are any errors or questions about this equipment All manuals and user guides at all guides com ...

Page 20: ...Page 10 FF5000 Operating Manual This page left intentionally blank All manuals and user guides at all guides com ...

Page 21: ...hine The chuck is centered and leveled inside the work piece before the machine is mounted to the chuck To setup and align the machine 1 Remove the chuck from the machine if necessary in preparation for setup 2 Remove and store the jam nut used when storing the machine 3 Measure the ID of the work piece 4 Using the table and chart below select the appropriate chuck body and jaws If using the optio...

Page 22: ...g screws should be equally set to level the interface plate with the chuck 2 Apply JET LUBE 500 or a similar product to the end of the screws to prevent them from binding 3 Screw the jaws into the threaded holes on the side of the chuck Be sure the jaws are screwed in far enough to allow the chuck to be placed inside the work piece 4 Using the knob attach the alignment assembly onto the chuck Do n...

Page 23: ...ernating between leveling and centering in several steps is required 6 Loosen the alignment spindle knob 7 Remove the setup fingers 8 Lightly retighten the spindle knob The Spindle knob on top is tightened so that the alignment fixture is registered accurately on its mounting surface but the spindle can still be rotated 3 5 To precision level and center the machine 1 Slide the dial indicator rod i...

Page 24: ...y use a hand stone to lightly hone any scratches or imperfections in the mating surfaces 13 Place the machine on the chuck interface plate 14 Align the dowel pin in the spindle with the receiver holes in the interface plate 15 The machine should be rotated until the feed control is in a convenient location for the operator 16 Tighten the spindle screw to 50ft lbs 68 N m CAUTION Do not over tighten...

Page 25: ... 1 Rotate the tool holder to the necessary angle 2 Clamp the tool bit into the holder The tool bit should barely touch the surface of the flange 3 Check that the tool bit faces the proper direction for cutting 4 Tighten the setscrew 5 Attach the crank handle to the side of the machine 6 Set the feed to RADIAL by lightly applying pressure on the feed selector lever while turning the crank handle 7 ...

Page 26: ...Page 16 FF5000 Operating Manual This page left intentionally blank All manuals and user guides at all guides com a l l g u i d e s c o m ...

Page 27: ...icator oil cup with air tool oil before using the machine The air filter and lubricator supplied with the machine must be used or the machine warranty becomes void Lubricate at a rate of five drops per minute at full throttle See the Maintenance section for recommended air tool oil CAUTION Some lubricants can cause the seals to dry out causing major issues with the air motor Please check to be sur...

Page 28: ...eumatic conditioning unit 3 Open the air control valve to make sure the machine is turning 4 Close the air control valve and follow the procedures in Sections 4 2 4 3 and 4 4 for set up procedures 4 1 2 Stopping the machine 1 Close the air control valve by turning the handle counterclockwise until it stops 2 Disconnect the air supply line at the quick disconnect FIGURE 7 PNEUMATIC AIR CONTROL VALV...

Page 29: ...1 Set the feed direction selector to the neutral center position 2 Insert the crank in the side of the main body 3 Crank the tool head to the desired location 4 2 1 Setting the drag Before setting the tool feed the drag must be set Drag affects cutting performance To feed in either vertical or radial feed modes the drag must be set correctly If the drag is set too high the machine may be damaged w...

Page 30: ... that the drag can be felt at the crank 4 2 1 2 Setting the vertical drag 1 Loosen the three set screws in the tool holder swivel that tighten the tool holder slide Gib 2 Insert the crank handle onto the flange facer main body 3 Pull up the spring plunger and move the feed selector lever to VERTICAL Turn the crank till the feed selector lever moves to the vertical position 4 Turn the crank so the ...

Page 31: ...g the crank handle attached to the side of the main body Be sure the plunger seats at the desired position 4 2 3 Automatic feed 1 Set the feed speed as described Section 4 3 2 The feed direction selector must be in the neutral center position CAUTION The feed crank handle must be removed from the machine before turning the machine on FIGURE 11 REMOVE CRANK HANDLE All manuals and user guides at all...

Page 32: ...s not move smoothly do not force it Stop the machine and gently work the arm back and forth while jogging the feed mechanism with the manual feed crank handle Forcing the arm will damage the arm and may misalign the feed system 4 3 1 Setting the feed direction 1 Select the feed direction after positioning the tool manually Select either OUT UP or IN DOWN 2 Move the Feed Speed adjust lever to ZERO ...

Page 33: ...andle in the main body and slide the turning bar to the desired position 6 Set the feed direction selector to NEUTRAL 7 Open the air control valve so that the machine will start rotating slowly 8 Move the feed speed arm to the desired feed rate setting 9 Open the air control valve counter clockwise until the machine is rotating at the desired RPM 10 Allow the flange facing machine to complete faci...

Page 34: ...tscrews 6 Roughly adjust the turning bar and tool head by loosening the eight screws below the handle in the main body slide the turning bar to the desired position and retighten the screws 7 With the feed direction selector in the NEUTRAL set the feed to VERTICAL by lightly applying pressure to the feed selector lever while rotating the hand crank Adjust the tool head down until the tool bit is a...

Page 35: ... valve and disconnect the air line before removing chips Remove chips with a brush 17 Rotating machinery can seriously injure the operator Turn off and lock out the machine before removing chips Remove chips with a brush 18 After machining the work piece close the air control valve and disconnect the air line 19 Repeat Steps 1 through 18 as necessary 20 After the work piece is repaired disconnect ...

Page 36: ...Page 26 FF5000 Operating Manual This page left intentionally blank All manuals and user guides at all guides com a l l g u i d e s c o m ...

Page 37: ...sassemble the machine 1 Close the air control valve and disconnect the air line 2 Unscrew the spindle bolt and remove the machine 3 Mount the setup fingers So when the jaws are released the chuck stays in place 4 Loosen the jaws and remove the chuck from the work piece 5 To store the machine see Storage Section 7 All manuals and user guides at all guides com ...

Page 38: ...Page 28 FF5000 Operating Manual This page left intentionally blank All manuals and user guides at all guides com ...

Page 39: ... recommended lubricants 6 1 Chuck assembly Prevent leveling screws from seizing by applying JET LUBE 500 to the jaws before and after each use 6 2 Alignment assembly Protect the set up fingers from corrosion by applying a light layer of oil after each use See recommended lubricants 6 3 Main body assembly The main body is sealed and lubricated for life If problems with the main body occur contact C...

Page 40: ...eriodically to be sure the air pressure is 90 psi 620 kPa Adjust motor speed by turning the air control valve at the motor CAUTION To avoid machine damage DO NOT adjust the motor speed by changing the in line air pressure from 90 psi 620 kPa Fill the lubricator oil cup with air oil before using the machine Use high quality oil with rust inhibitors and emulsifiers such as Marvel Tool Oil The lubric...

Page 41: ...ine surfaces with a layer of light oil 1 Add a desiccant pouch to the shipping container Replace according to manufacturer instructions 2 Store the FF5000 in its shipping container 3 Store the shipping container in an environment out of direct sunlight with temperature 70ºF and humidity 50 7 3 Shipping The FF5000 can be shipped in its original shipping box All manuals and user guides at all guides...

Page 42: ...Page 32 FF5000 Operating Manual This page left intentionally blank All manuals and user guides at all guides com ...

Page 43: ...7801 Jaw 9 14 ID 4 29169 Indicator support rod 1 Alignment assembly 29121 10 setup fingers 2 29122 14 setup fingers 2 29123 20 setup fingers 2 81084 Handwheel 1 Tool kit 29173 7 8 combination wrench 1 11082 3 16 short arm hex wrench 1 14649 3 16 x 6 T handle hex wrench 1 16807 5 16 x 6 T handle hex wrench 1 14668 1 1 8 Open end wrench 1 31859 1 2 x 4 HSS tool bit LH finishing As needed Not include...

Page 44: ...Page 34 FF5000 Operating Manual This page left intentionally blank All manuals and user guides at all guides com ...

Page 45: ...KIT P N 29116 P N DESCRIPTION QTY UOM 14668 WRENCH END 1 1 8 THIN BLACK OXIDE 1 Piece 16479 WRENCH END 9 16 COMBINATION LONG KB 1 Piece 25710 BIT TOOL HSS 1 2 X 4 0 LH RH PRE GROUND 1 Piece 81084 HANDLE WHEEL 1 Piece 29173 WRENCH END 7 8 COMBINATION LONG CHROME 1 Piece 31868 BIT TOOL HSS 1 2 X 4 0 LH ROUGHING SINGLE KB 1 Piece 33999 WRENCH HEX SET 050 3 8 BONDHUS BALL END KB 1 Piece 36668 MANUAL I...

Page 46: ...Page 36 FF5000 Operating Manual All manuals and user guides at all guides com a l l g u i d e s c o m ...

Page 47: ...P N 36668 Rev 4 Page 37 All manuals and user guides at all guides com ...

Page 48: ...Page 38 FF5000 Operating Manual All manuals and user guides at all guides com ...

Page 49: ...P N 36668 Rev 4 Page 39 All manuals and user guides at all guides com ...

Page 50: ...Page 40 FF5000 Operating Manual All manuals and user guides at all guides com ...

Page 51: ...P N 36668 Rev 4 Page 41 All manuals and user guides at all guides com a l l g u i d e s c o m ...

Page 52: ...Page 42 FF5000 Operating Manual All manuals and user guides at all guides com ...

Page 53: ...P N 36668 Rev 4 Page 43 All manuals and user guides at all guides com ...

Page 54: ...Page 44 FF5000 Operating Manual All manuals and user guides at all guides com ...

Page 55: ...P N 36668 Rev 4 Page 45 All manuals and user guides at all guides com ...

Page 56: ...Page 46 FF5000 Operating Manual All manuals and user guides at all guides com a l l g u i d e s c o m ...

Page 57: ...P N 36668 Rev 4 Page 47 All manuals and user guides at all guides com ...

Page 58: ...Page 48 FF5000 Operating Manual All manuals and user guides at all guides com ...

Page 59: ...P N 36668 Rev 4 Page 49 All manuals and user guides at all guides com ...

Page 60: ...Page 50 FF5000 Operating Manual This page left intentionally blank All manuals and user guides at all guides com ...

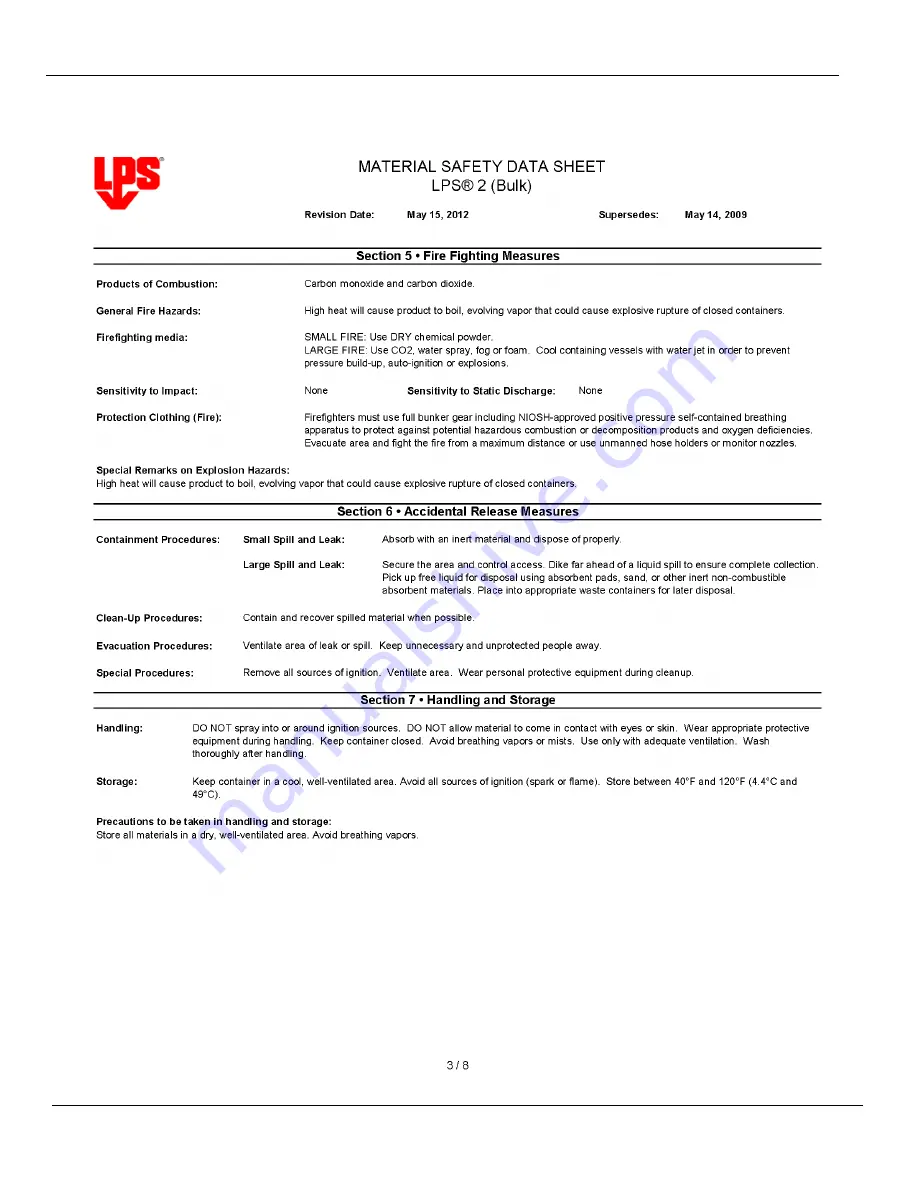
Page 61: ...X A MSDS The following MSDSs are found on the pages listed MSDS Page Polytac EP 52 Jet Lube Anti Seize Compound 59 LPS 1 61 LPS 2 70 Koolkut Spectrum 78 Unax AW 84 All manuals and user guides at all guides com a l l g u i d e s c o m ...

Page 62: ...Page 52 FF5000 Operating Manual All manuals and user guides at all guides com ...

Page 63: ...P N 36668 Rev 4 Page 53 All manuals and user guides at all guides com ...

Page 64: ...Page 54 FF5000 Operating Manual All manuals and user guides at all guides com ...

Page 65: ...P N 36668 Rev 4 Page 55 All manuals and user guides at all guides com ...

Page 66: ...Page 56 FF5000 Operating Manual All manuals and user guides at all guides com a l l g u i d e s c o m ...

Page 67: ...P N 36668 Rev 4 Page 57 All manuals and user guides at all guides com ...

Page 68: ...Page 58 FF5000 Operating Manual All manuals and user guides at all guides com ...

Page 69: ...P N 36668 Rev 4 Page 59 All manuals and user guides at all guides com ...

Page 70: ...Page 60 FF5000 Operating Manual All manuals and user guides at all guides com ...

Page 71: ...P N 36668 Rev 4 Page 61 All manuals and user guides at all guides com a l l g u i d e s c o m ...

Page 72: ...Page 62 FF5000 Operating Manual All manuals and user guides at all guides com ...

Page 73: ...P N 36668 Rev 4 Page 63 All manuals and user guides at all guides com ...

Page 74: ...Page 64 FF5000 Operating Manual All manuals and user guides at all guides com ...

Page 75: ...P N 36668 Rev 4 Page 65 All manuals and user guides at all guides com ...

Page 76: ...Page 66 FF5000 Operating Manual All manuals and user guides at all guides com a l l g u i d e s c o m ...

Page 77: ...P N 36668 Rev 4 Page 67 All manuals and user guides at all guides com ...

Page 78: ...Page 68 FF5000 Operating Manual All manuals and user guides at all guides com ...

Page 79: ...P N 36668 Rev 4 Page 69 All manuals and user guides at all guides com ...

Page 80: ...Page 70 FF5000 Operating Manual All manuals and user guides at all guides com ...

Page 81: ...P N 36668 Rev 4 Page 71 All manuals and user guides at all guides com a l l g u i d e s c o m ...

Page 82: ...Page 72 FF5000 Operating Manual All manuals and user guides at all guides com ...

Page 83: ...P N 36668 Rev 4 Page 73 All manuals and user guides at all guides com ...

Page 84: ...Page 74 FF5000 Operating Manual All manuals and user guides at all guides com ...

Page 85: ...P N 36668 Rev 4 Page 75 All manuals and user guides at all guides com ...

Page 86: ...Page 76 FF5000 Operating Manual All manuals and user guides at all guides com a l l g u i d e s c o m ...

Page 87: ...P N 36668 Rev 4 Page 77 All manuals and user guides at all guides com ...

Page 88: ...Page 78 FF5000 Operating Manual All manuals and user guides at all guides com ...

Page 89: ...P N 36668 Rev 4 Page 79 All manuals and user guides at all guides com ...

Page 90: ...Page 80 FF5000 Operating Manual All manuals and user guides at all guides com ...

Page 91: ...P N 36668 Rev 4 Page 81 All manuals and user guides at all guides com a l l g u i d e s c o m ...

Page 92: ...Page 82 FF5000 Operating Manual All manuals and user guides at all guides com ...

Page 93: ...P N 36668 Rev 4 Page 83 All manuals and user guides at all guides com ...

Page 94: ...Page 84 FF5000 Operating Manual All manuals and user guides at all guides com ...

Page 95: ...P N 36668 Rev 4 Page 85 All manuals and user guides at all guides com ...

Page 96: ...Page 86 FF5000 Operating Manual All manuals and user guides at all guides com a l l g u i d e s c o m ...

Page 97: ...P N 36668 Rev 4 Page 87 All manuals and user guides at all guides com ...

Page 98: ...Page 88 FF5000 Operating Manual All manuals and user guides at all guides com ...

Page 99: ...P N 36668 Rev 4 Page 89 All manuals and user guides at all guides com ...

Page 100: ...Page 90 FF5000 Operating Manual All manuals and user guides at all guides com ...

Page 101: ...All manuals and user guides at all guides com a l l g u i d e s c o m ...

Page 102: ...All manuals and user guides at all guides com ...

Reviews: