3
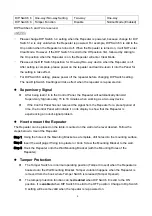
DIP Switch 6 One-way/Two-way Setting
Two-way
One-way
DIP Switch 8 Tamper Function
Disable
Normal Mode (Enabled)
DIP Switches 5 and 7 are reserved.
<NOTE>
Please change DIP Switch 1-4 setting when the Repeater is powered, because change for DIP
Switch 1-4 is only valid when the Repeater is powered. For example, DIP Switch 3 is slid to the
On position when the Repeater is turned off. When the Repeater is turned on, it will NOT enter
Clear Mode. However, if the DIP Switch 3 is slid to the Off position first, followed by sliding to
the On position when the Repeater is on, the Repeater will enter Clear Mode.
Please set the DIP Switch 6 position for One-way/Two-way device when the Repeater is off.
After setting is complete, please power on the repeater and learn/re-learn it into the Panel for
the setting to take effect.
For DIP Switch 8 setting, please power off the repeater before changing DIP Switch setting.
The new Dip Switch 8 settings will take effect when the repeater is re-powered on.
Supervisory Signal
After being learnt in to the Control Panel, the Repeater will automatically transmit
Supervisory Signals every 15 to 18 minutes when working as a two-way device.
If the Control Panel has not received the signal from the Repeater for a preset period of
time, the Control Panel will indicate it on its display to show that the Repeater is
experiencing an out-of-signal problem.
How to mount the Repeater
The Repeater can be placed on the table, mounted on the wall or wherever desired. Follow the
steps below to mount the Repeater:
Step 1
Using the holes of the Mounting Bracket as a template, drill holes into the mounting surface.
Step 2
Insert the wall plugs if fixing into plaster or brick. Screw the Mounting Bracket to the wall.
Step 3
Hook the Repeater onto the Wall Mounting Bracket (with the Mounting Holes of the
Repeater).
Tamper Protection
The Tamper Switch is in normal operating position (Tamper Closed) when the Repeater is
hooked onto the Wall Mounting Bracket. Tamper violation happens when the Repeater is
removed from the hook where Tamper Switch is released (Tamper Opened).
The tamper protection function can be
disabled
when DIP Switch 8 is slid to the ON
position. It is
enabled
when DIP Switch 8 is slid to the OFF position. Change to Dip Switch
8 setting will become valid when the repeater is re-powered on.


