climecon.fi
15
Lämmittäjänkatu 4 A, 00880 Helsinki, FINLAND · Tel. +358 (0)20 198 6600
© Climecon
123,0
123,0
1
2
6
7
5
3 4
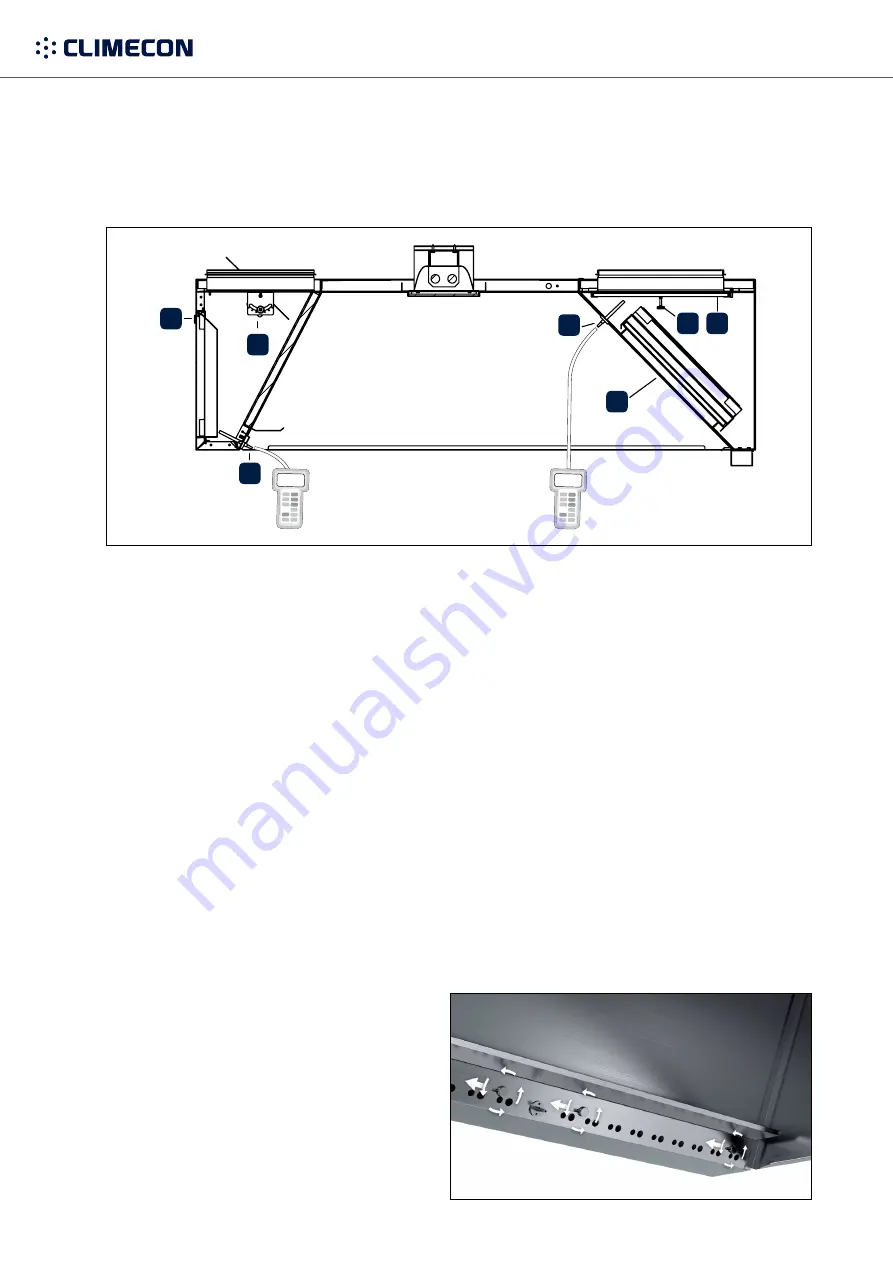
11. Adjustment instructions for CleanMaster® hoods
Adjusting the exhaust air:
•
Separate the grease separator cartridges (1) care-
fully by pushing its lower edge backwards while
lifting the upper edge away from the mounting
trough.
•
Open the damper’s (4) locking screw (3).
•
Make the suction opening larger or smaller by mov-
ing the damper in its slide rails.
•
Install the separator cartridge/cartridges in place
properly.
•
Measure the pressure loss from the chamber’s
measuring connection (2).
•
Repeat the steps above if necessary.
•
Finally, lock the damper with a locking screw and
check that the separator cartridges are properly
installed.
Adjusting supply air
•
First, measure the pressure loss from the sup-
ply air chamber’s measuring connection (5).
•
Disconnect the supply air modules (6) with
a screwdriver.
•
Supply air can be controlled by turning
the control damper (7) inside the supply
air chamber.
•
Lock the control damper with a locking screw.
•
Reinstall the supply air modules (6).
•
Measure the pressure loss from the supply air
chamber’s measuring connection (5).
•
Repeat the steps above if necessary.
Adjusting the control air
It is possible to adjust the throw length of
control air. These adjustments can be made
by first turning the hand knobs of the control
air unit, then moving them sideways and
finally locking the position by retightening
the hand knobs.
4.1 Adjusting supply air, exhaust air and control air


