background image


Air Filter

17

The BBM307/YBM307 Block Buster Mini Masonry Saw is equipped with a specially designed air filter to 
help protect the motor from damage due to dust intake.  

For Best Performance:

Clean Air Filter Before Each Use   
Inspect Air Filter and Replace Filter if Damaged
Do Not Use the Machine with a Dirty, Damaged, or Missing Air Filter
Reinstall the Filter Before Use

To clean the Air Filter:
1. Carefully remove the Air Filter from the Motor Air In-Take Cover opening.  Do not tear or damage the
    Filter (see Figure 5-1: Air Filter Location).
2. Clean the air filter by patting, and shaking the dust from the filter.  Compressed air can be used to
    blow the dust out of the filter.
3. Inspect the filter for damage.  Any damaged Air Filter must be replaced before using the machine.
4. Replace the filter into the Motor Air In-Take Cover.  
5. Check to see if the Air Filter is installed properly.  The Air Filter should fill the opening in the front of the
     Air In-Take Cover and should completely fill the filter cavity.

To replace the Air Filter:
1. Carefully remove the old  Air Filter from the Motor Air In-Take Cover opening.  NOTE: Pull the Air Filter
    thru the opening in the front of the Motor Air In-Take Cover.
2. Inspect the new Air Filter for damage.
3. Place the new Air Filter into the Motor Air In-Take Cover.
4. The Air Filter should fill the opening in the front of the Air In-Take Cover and should completely fill the
     filter cavity.

Using the machine with a dirty, damaged, or missing Air Filter will result in motor damage and is not 
covered under warranty.

· 
· 
· 
· 

Air Filter 
Location

Figure 5-1: Air Filter Location

Summary of Contents for BBM307

Page 1: ...BLOCK BUSTER MINI MASONRY SAW MODELS BBM307 YBM307 OWNERS MANUAL A PRODUCT OF NORTON COMPANY Revised 9 2003...

Page 2: ...Shown In Standard Configuration Shown With Dust Collecting Dust Vacuum System A PRODUCT OF NORTON COMPANY...

Page 3: ...amages arising out of the failure of any product to operate properly Integral units such as gasoline engines electric motors batteries tires transmissions etc are excluded from this warranty and are s...

Page 4: ...ssembly 11 Electric Motor 12 Electrical Safety 12 15 Carbon Brush 16 Air Filter 17 Conveyor Cart Assembly Figure 1 18 Conveyor Cart Assembly Figure 2 19 Frame and Dust Collecting Pan 20 CuttingTable G...

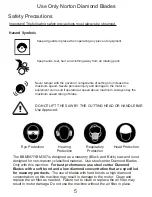
Page 5: ...THE CUTTING HEAD OR HANDLE BAR Use Approved Eye Protection Hearing Protection Respiratory Protection Head Protection The BBM307 YBM307 is designed as a masonry Block and Brick saw and is not designed...

Page 6: ...The operator should wear approved eye hearing respiratory and head protection 8 When starting the saw the operator should stand away and to the side of the blade 9 If for any reason the saw should sta...

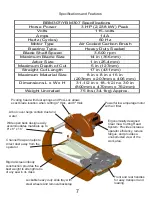
Page 7: ...rator Wide open back design easily accommodates materials up to 8 x 8 x 16 Arbor cover helps contain dust and water Pivoting head with dual springs and Posi Loc allows exact blade location when cuttin...

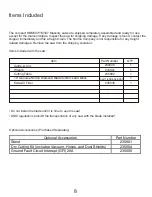
Page 8: ...container Items Included with the saw Item Part Number QTY Guide A Cut Wrench Cutting Table 14 Genuine Norton Diamond Blade for Brick and Block 234030 233041 Call 1 800 554 8003 1 1 1 1 Do not instal...

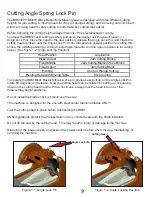
Page 9: ...ngle Lock Pin rotate 90 degrees and release Now the cutting head can be rotated by pulling up or pushing down on the cutting head handle When not in use always lock the head into one of the three cutt...

Page 10: ...r and Washer from each corner of the machine frame and remove the rails from the frame see Figure 2 1 Removing the Rails Note the orientation of the Hardware and the Rails 2 Remove the Dust Pan Assemb...

Page 11: ...Cart locking pin locks the cart so it will not move Conveyor Cart Locking Pin To lock the Conveyor Cart into position when transporting the machine roll the Conveyor Cart to the forward most position...

Page 12: ...can result in motor damage and is not be covered under warranty Electrical Safety For safety and security concerns the operator should lockout the power switch when the machine is not in use Ground F...

Page 13: ...a safe distance from the work area 6 MAKE THE WORKSHOP CHILD PROOF with padlocks master switches or by removing starter keys 7 DON T FORCE THE TOOL It will do the job better and safer at the rate for...

Page 14: ...r conditions that may affect its operation A guard or other part that is damaged should be properly repaired or replaced 20 DIRECTION OF FEED Feed work into a blade or cutter against the direction of...

Page 15: ...ed extension cords These extension cords are identified by a marking Acceptable for use with outdoor appliances store indoor while not used Use only extension cords having an electrical rating not les...

Page 16: ...rbon Brush Cap Use care not to damage the Carbon Brush Cap Inspect the Cap for damage If the Cap has any signs of damage replace see Figure 4 2 Carbon Brush Removal 6 Remove the Carbon Brush 7 Use com...

Page 17: ...damage Any damaged Air Filter must be replaced before using the machine 4 Replace the filter into the Motor Air In Take Cover 5 Check to see if the Air Filter is installed properly The Air Filter sho...

Reviews: