7
STEP 5 – Removing Door Sections and Track
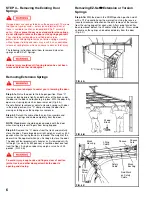
Step 5-1:
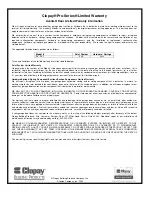
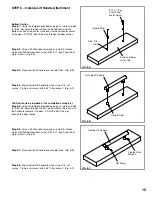
The door can now be disassembled. Starting with the
top section, remove the hardware and unstack the sections one
at a time. (Fig. 5-A)
Step 5-2:
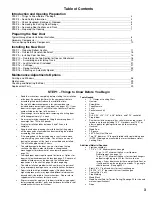
After all sections have been removed from the
opening, detach all remaining track and hardware from the
jambs. The hangers that attach the rear ends of the overhead
track to the ceiling (called rear track hangers) in many cases can
be reused on the new door if made of 13 gauge (3/32") or
heavier steel and is not loose or unstable. (Fig. 5-B)
To avoid installation problems which could result in
personal injury or property damage, use only the track
specified and supplied with the door. Do not attempt to
reuse old track
.
STEP 6 – Preparing the Opening
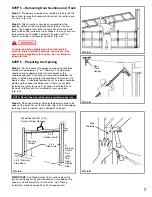
Step 6-1:
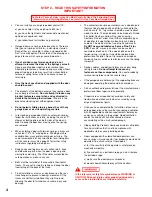
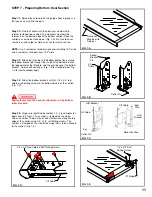
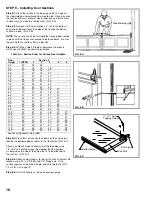
On the inside of the garage your opening should be
framed with wood jambs, 2" x 6" if possible. The side jambs
should extend to approximately the same height as the
headroom required. If you have just removed an old door, the
jambs should be inspected for the condition of the wood. If the
wood is rotten, it should be replaced now. The jambs should be
plumb and the header should be level. If there are any bolts
fastening the jambs to the wall, the heads should be flush so
they don’t interfere with the installation of your new door.
(Fig. 6-A)
NOTE: Rough Opening (without stop molding)=door size
Step 6-2:
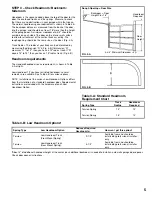
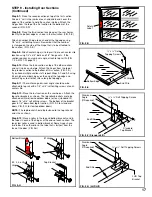
Door stop molding should be temporarily nailed to the
edges of the jambs flush with the inside. (Fig. 6-B) Stop molding
featuring a built-in weather seal is offered as an option.
FIG. 6-A
*IMPORTANT:
The Wood Anchor Pad is used to mount the
torsion spring and has specific requirements for wood quality,
species, and attachment that must be met. See “Spring
Installation” section on page 23 or 26 for requirements.
FIG. 5-A
FIG. 5-B
FIG. 6-B
Wood Anchor Pad* (2 x 6)
Center of Door Opening
Rear
Track
Hanger
Stop
Molding
2 x 6
“Side Jamb”
8”
Minimum
Center
Post
(With
Two
Doors
Side by
Side)
3-3/4” Minimum
Side Room
2 x 6
“Header Jamb”
Opening
Height


