Test procedure
1
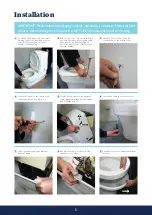
Fill the Closomat with water and switch
on mains electricity. Locate the on/off
switch and click to the on position ‘I’,
the switch will illuminate blue. Check all
joints for leaks.
6
Should the water pressure need
adjusting to suit the user, locate the
pump situated on the right hand side
of the Closomat. Hold down or release
the pump pressure spring slide by either
tightening or untightening the adjacent
holding nut. Clockwise will increase the
pump pressure, whereas anticlockwise
will achieve the opposite.
3
Simultaneously pressing the right hand
seat hull and the operation bar will
activate the warm water wash. Run the
wash for approximately 30 seconds to
ensure water pressure is constant.
4
Should the wash splutter during the
wash cycle described in step 4, the
douche system may need purging to
remove any potential air-lock, generated
during the unit’s transit/installation.
To do this, insert the special tool supplied
hook end into the recess at the bottom
of the douche arm (arrow).
➞
5
Pull out the douche arm using the special
tool, with force against the spring pressure,
until the arm reaches its maximum stop.
Hold the douche arm with a free hand
once fully extended, rotate the tool and
locate the tool into the slot and recess in
the douche arm to hold in this extended
position (arrow). Run wash cycle to purge.
Once wash is constant remove tool and
allow the douche arm to retract.
➞
2
Allow approximately 5 minutes for the water to heat in the boiler. Check the circuit board,
the boiler light will be permanently illuminated red while the water is being heated to the
operating temperature. As the water temperature approaches the required operating
temperature the light will flash red. If the boiler light does not illuminate, check the safety
stat has not tripped (see inset) by pressing ‘click’ to reset.
➞
Check procedure
1
Ensure electrical supply is connected to unit, and switched on: check that correct fuse is fitted.
2
Ensure water supply is turned on and that the inlet valve is allowing water to enter the cistern
and shutting off at correct level. Ensure flow of water is adequate to keep douche supplied.
3
Ensure rear of seat is depressed.
4
Keep elbow pad depressed until water runs cold. Keep seat depressed while hot air is operating.
5
Ensure joints are dry and have not been disturbed during installation.
note
•
Foot switch, hand switch or remote switch, if fitted, will operate exactly as elbow pads.
•
Douche temperature and pressure are preset at factory, and adjustments should only
be carried out by Closomat engineers familiar with the equipment.
note
•
The Closomat will not function automatically if the seat switch is not depressed.
•
The unit should be switched on electrically at all times when in service.
7


