Page 12-33
G
12
Visual Inspection of Armature
Obvious defects can be seen by examining the armature. If an armature has frayed or charred insulation,
broken wires or thrown solder, it is obvious without testing that it should be replaced. Faults seen during the
visual inspection can aid in diagnosing the original cause of the failure. Items to look for are listed below.
• Burned, charred, or cracked insulation.
• Improperly cured varnish.
• Thrown solder.
• Flared armature windings.
• Worn, burned, or glazed commutator.
• Loose or raised commutator bars.
• Bruised or damaged armature core laminations.
• Worn armature bearing or shaft.
• Dirty or oily commutator.
Slight roughness of the commutator can be polished away with 400 or finer sandpaper.
• DO NOT REMOVE THE INSULATORS OR THE FIELD COILS UNLESS ELECTRICAL TEST INDI-
CATES THAT IT IS NECESSARY (FIGURE 12-47). SEE TEST PROCEDURE NO. 7, PAGE 12-19.
• WHEN MAKING ELECTRICAL TESTS OR REPAIRS, ALWAYS:
- WEAR SAFETY GLASSES OR APPROVED EYE PROTECTION.
- REMOVE THE KEY.
- PUT THE FORWARD AND REVERSE SWITCH IN NEUTRAL.
- DISCONNECT THE BATTERY AS SHOWN (FIGURE 12-1, PAGE 12-2).
• FOLLOW ALL PROCEDURES EXACTLY AS INSTRUCTED.
• SEE THE SAFETY WARNINGS ON PAGE 12-1.
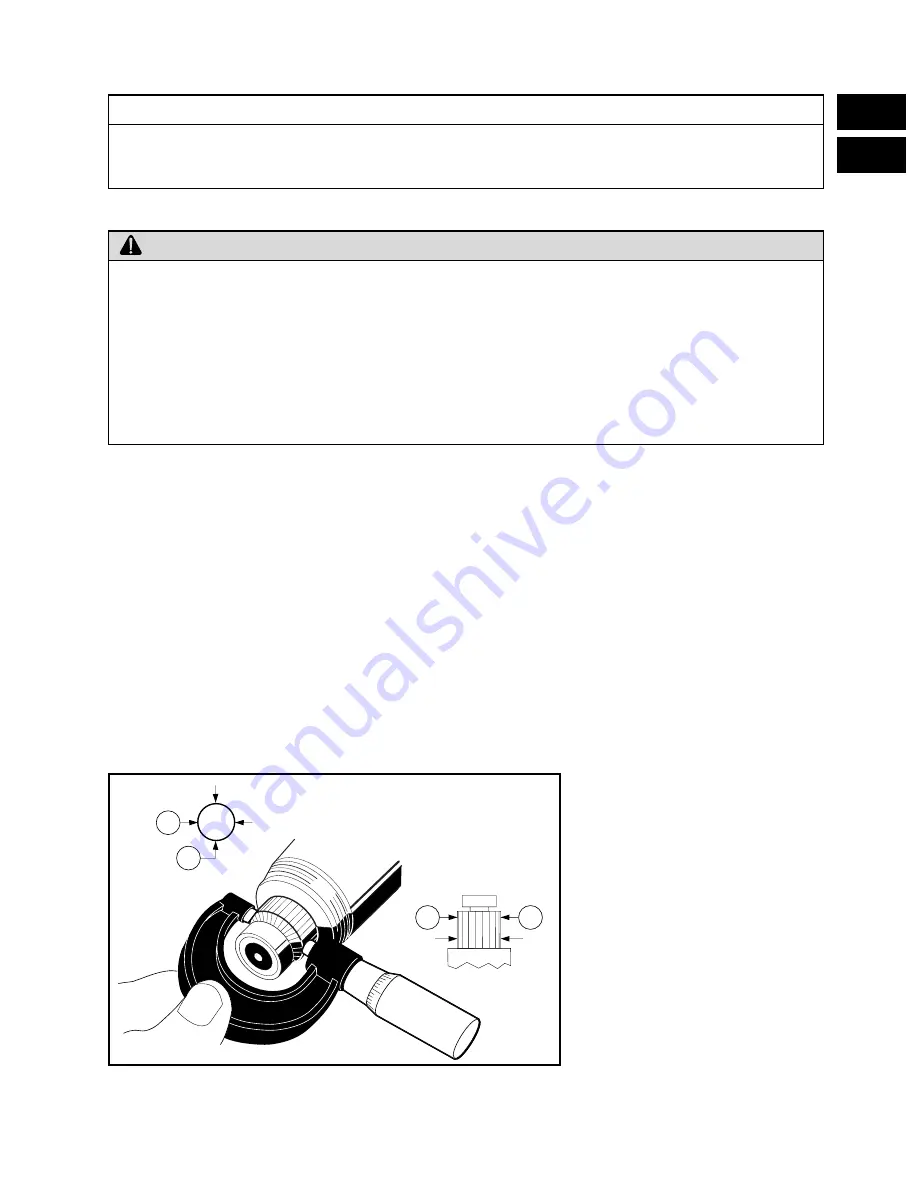
FIGURE 12-48
NOTE
WARNING
A
2
A
B
B
A
1
1
1
1
A
1
MEASURE EACH POSITION
IN 2 PLACES 90
°
APART
Summary of Contents for 1996 DS Golf Car Gasoline
Page 2: ......
Page 28: ...Page 3 14 3 E G...
Page 38: ...Page 4 10 4 E G...
Page 76: ...Page 6 30 6 E G...
Page 110: ...Page 8 26 8 E G...
Page 136: ...Page 11 6 11 G...
Page 268: ...Page 15 4 15 G...
Page 286: ......
Page 316: ...Page 18 6 18 G...
Page 332: ...Page 19 16 19A E...
Page 350: ...Page 19 34 19A E...
Page 444: ......
Page 451: ...Page 21 59 E 21B FIGURE 21 85 2 4 5 7 8 1 9 6 5 4 3...
Page 452: ...Page 21 60 21A E...
Page 472: ...Page 22 20 22 E...
Page 524: ...Page 23 52 23A E...
Page 543: ......
Page 544: ...Golf Cars Club Car Inc P O Box 204658 Augusta GA 30917 4658...


