9
Rear Coil-Over Shock Absorber – Starting 2012 Model Year
REAR SUSPENSION
CAUTION
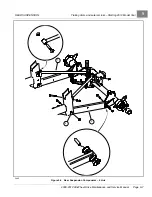
• Do not hammer or drive against the grease fitting.
5.
Install the washer and locknut on the pivot bolt and tighten to 14 ft-lb (18 N·m)
6.
Attach a new rue pin to the pivot bolt.
7.
Install the rear axle.
See Rear Axle Installation, Section 17, Page 17-9.
REAR COIL-OVER SHOCK ABSORBER – STARTING 2012 MODEL YEAR
See General Warnings, Section 1, Page 1-2.
WARNING
• 2012 Model Year and newer vehicles equipped with 4-link rear suspension have different length
rear coil-over shocks than previous model years. To prevent altering the stability or handling of the
vehicle, never use these shocks on older models; likewise, never use shocks intended for older
models on 2012 and newer vehicles.
Standard models are equipped with rear shock absorbers and coil-over springs designed for standard-duty service.
Heavy-duty rear shock absorbers and coil-over springs are available as an option for heavy-duty service. The rear
standard-duty and heavy-duty shock absorbers are designed differently.
See following NOTE.
NOTE: All Model Years:
The standard-duty and heavy-duty rear shock absorber bodies look identical, but they are
different in design internally.
2012 Model Year and Newer:
The standard-duty rear coil-over springs and shocks are painted black.
Heavy-duty rear coil-over springs and shocks have shock housings painted black and springs painted silver.
When rear shock absorbers are installed, ensure both shock absorbers have identical part numbers.
The part number for standard-duty rear shock absorbers is different than the part number for heavy-duty rear shock
absorbers. Ensure that the correct rear shock absorbers and coil-over springs are used for the vehicle’s load service
option when the rear shock absorbers are removed and replaced.
REAR SHOCK ABSORBER REMOVAL
1.
Disconnect battery and spark plug wire(s).
See Disconnecting the Battery – Gasoline/Diesel Vehicles on
2.
Lift and support the rear of vehicle and remove the wheels.
See Lifting The Vehicle on page 3-9.
3.
Position the floor jack under the differential, and raise the jack arm until the pad touches the differential.
4.
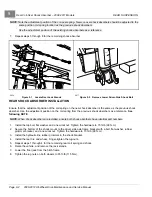
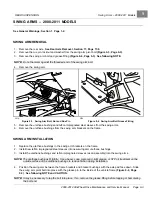
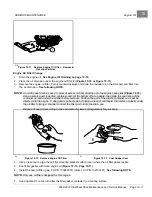
If more clearance is needed, remove the brake hose and rubber grommet from the lower shock bracket (1) and
move brake hose out of the way
.
5.
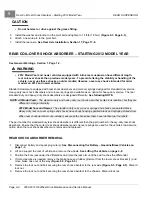
Remove the lock nut and bolt securing the rear shock absorber to the rear axle
. Discard
lock nut.
6.
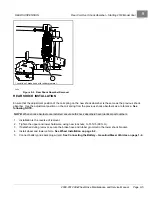
Remove the lock nut and bolt securing the rear shock absorber to the chassis. Discard lock nut.
Page 9-4
2008-2012 All-Wheel Drive Maintenance and Service Manual
Summary of Contents for Carryall 295 SE
Page 2: ......
Page 20: ......
Page 28: ......
Page 58: ......
Page 66: ......
Page 100: ......
Page 122: ......
Page 150: ......
Page 157: ......
Page 190: ......
Page 197: ......
Page 236: ......
Page 284: ......
Page 386: ......
Page 394: ......
Page 442: ......
Page 452: ......
Page 454: ......
Page 455: ......
Page 456: ......

