GASOLINE ENGINE, MUFFLER, FUEL SYSTEM,
AND CLUTCHES
Clutches
15
CAUTION
• Do not hit or tap the clutch with a hammer. Do not pry the clutch. These actions will damage the clutch.
Driven Clutch Disassembly
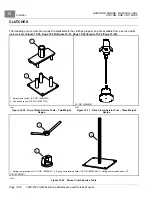
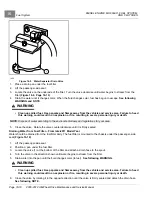
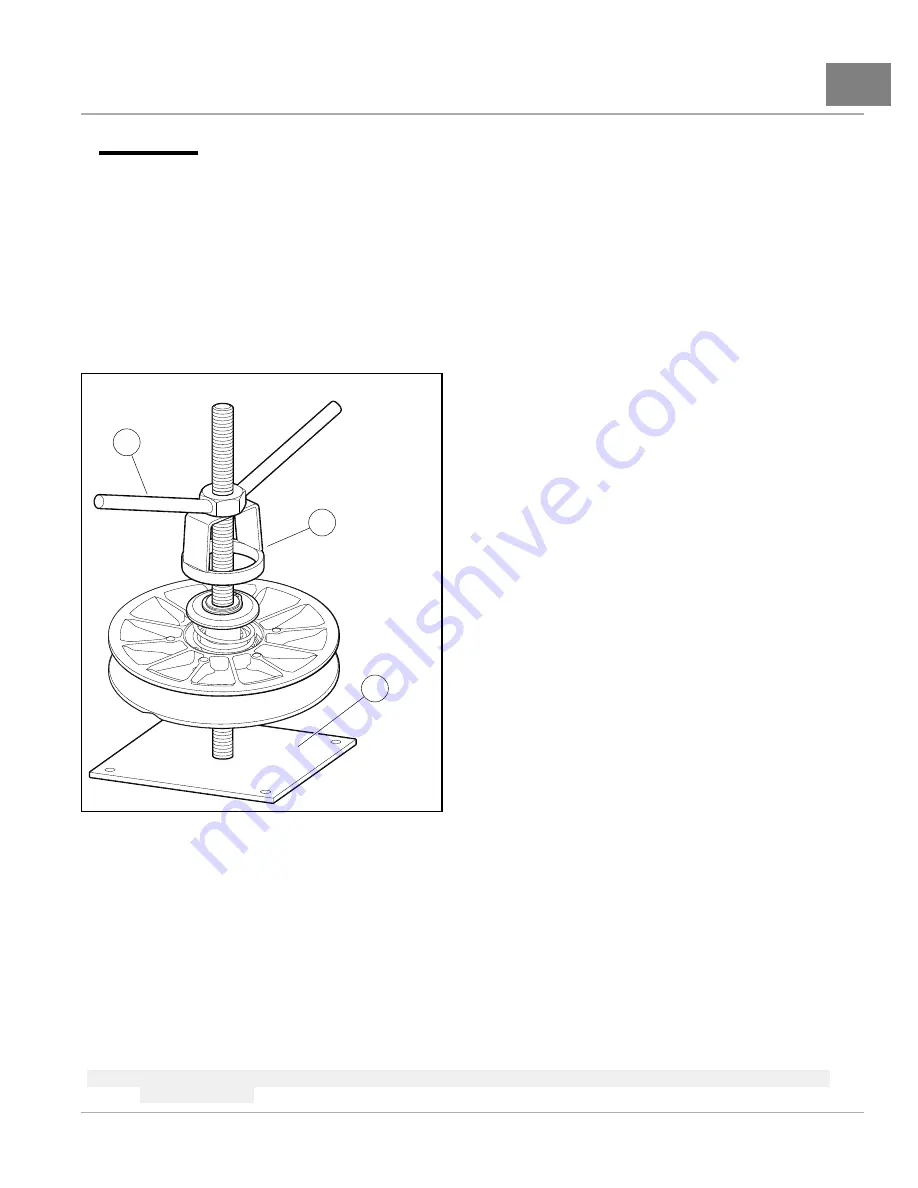
The following service tools are required to disassemble and assemble the driven clutch. They are available from
a service parts representative:
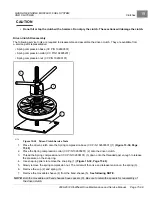
• Spring compression base (CC P/N 102603501)
• Spring compression collar (CC P/N 102605201)
• Spring compression nut (CC P/N 102606101)
1
3
2
2174
Figure 15-38
Driven Clutch Service Tools
1.
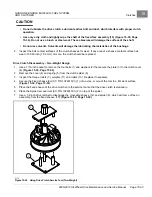
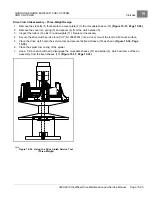
Place the driven clutch onto the Spring compression base (CC P/N 102603501) (1)
2.
Place the Spring compression collar (CC P/N 102605201) (2) onto the driven clutch.
3.
Thread the Spring compression nut (CC P/N 102606101) (3) down onto the threaded post enough to release
the pressure on the snap ring.
4.
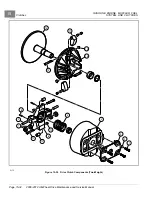
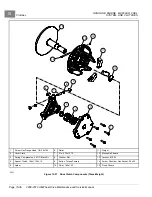
Use snap-ring pliers to remove the snap ring (1)
5.
Slowly remove the spring compression nut. The collar will then rise and release tension on the spring (3).
6.
Remove the cup (2) and spring (3).
7.
Remove the moveable sheave (4) from the fixed sheave (5).
See following NOTE.
NOTE:
Both the moveable and fixed sheaves have spacers (6). Be sure to retain the spacers for reassembly of
the driven clutch.
2008-2012 All-Wheel Drive Maintenance and Service Manual
Page 15-39
Summary of Contents for Carryall 295 SE
Page 2: ......
Page 20: ......
Page 28: ......
Page 58: ......
Page 66: ......
Page 100: ......
Page 122: ......
Page 150: ......
Page 157: ......
Page 190: ......
Page 197: ......
Page 236: ......
Page 284: ......
Page 386: ......
Page 394: ......
Page 442: ......
Page 452: ......
Page 454: ......
Page 455: ......
Page 456: ......

