GASOLINE ENGINE, MUFFLER, FUEL SYSTEM,
AND CLUTCHES
Clutches
15
NOTE:
Ensure the hose contacts the canister and the clamp is installed tightly between the port bead and canister.
6.
Connect battery and spark plug wire(s).
See Connecting the Battery – Gasoline/Diesel Vehicles, Section
7.
Drive the vehicle and check for proper operation.
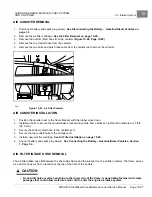
CLUTCH COVER
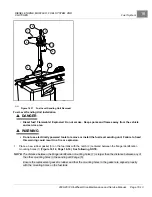
Clutch Outer Cover Removal
1.
Disconnect battery and spark plug wire(s).
See Disconnecting the Battery – Gasoline/Diesel Vehicles on
2.
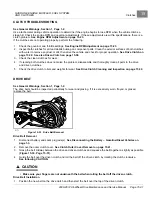
Remove the top air filter hose from the filter canister.
3.
Remove the self-threading screws and remove the clutch outer cover.
See following WARNING.
WARNING
• Clutch outer cover must be installed before returning the vehicle to normal operation. If the engine is
operated with the clutch outer cover removed, keep hands away from the clutches and belt. Failure to
heed this warning could result in severe personal injury.
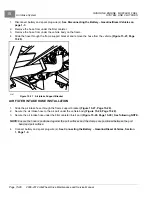
Clutch Outer Cover Installation
1.
Align the mounting holes in the clutch cover with the mounting holes in the inner cover.
2.
Install the screws and tighten the hardware to 72 in-lb (8 N·m).
3.
Install the top air filter hose on the filter canister.
4.
Connect battery and spark plug wire(s).
See Connecting the Battery – Gasoline/Diesel Vehicles, Section 1,
Page 1-4. See following NOTE.
NOTE:
Ensure the hose clamp is tightly installed and positioned between the filter canister and canister port bead.
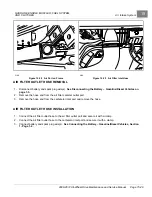
Clutch Inner Cover Removal
1.
Disconnect battery and spark plug wire(s).
See Disconnecting the Battery – Gasoline/Diesel Vehicles on
2.
Remove the outer clutch cover.
See Clutch Outer Cover Removal on page 15-41.
3.
Remove the drive belt.
See Drive Belt Removal on page 15-31.
4.
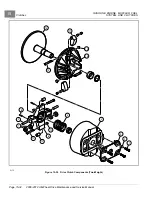
Remove the drive clutch.
See Drive Clutch Removal – Both Designs on page 15-32.
5.
Remove the driven clutch.
See Driven Clutch Removal on page 15-38.
6.
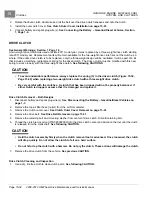
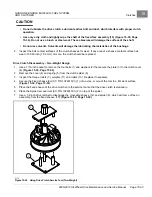
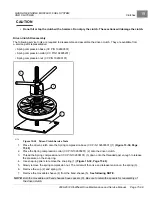
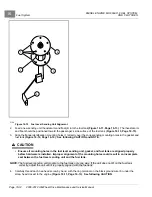
Remove the bolts and washers from the clutch inner cover
.
7.
Remove the clutch inner cover.
Clutch Inner Cover Installation
1.
Align the mounting holes in the clutch cover with the transmission and engine bolt holes.
2.
Loosely install one bolt and washer in each transmission and engine mounting hole.
3.
Finger-tighten the bolts and washers.
NOTE:
Mounting holes in the clutch inner cover have close tolerances. Align the engine and transmission carefully to
ensure the mounting holes in the clutch inner cover match the threaded holes in the engine and transmission.
4.
Tighten the clutch inner cover engine bolts and washers to 21 ft-lb (28.5 N·m).
5.
Tighten the transmission bolts and washers to 21 ft-lb (28.5 N·m).
6.
Install the driven clutch.
See Driven Clutch Installation on page 15-40.
2008-2012 All-Wheel Drive Maintenance and Service Manual
Page 15-41
Summary of Contents for Carryall 295 SE
Page 2: ......
Page 20: ......
Page 28: ......
Page 58: ......
Page 66: ......
Page 100: ......
Page 122: ......
Page 150: ......
Page 157: ......
Page 190: ......
Page 197: ......
Page 236: ......
Page 284: ......
Page 386: ......
Page 394: ......
Page 442: ......
Page 452: ......
Page 454: ......
Page 455: ......
Page 456: ......

