17
Rear Axle – 2008-2011 Models
DRIVETRAIN COMPONENTS
REAR AXLE – 2008-2011 MODELS
REAR AXLE REMOVAL
1.
Disconnect battery and spark plug wire(s)
(gasoline vehicles only)
.
See Disconnecting the Battery –
Gasoline/Diesel Vehicles, Section 1, Page 1-3.
2.
Loosen the lug nuts on both rear wheels.
3.
Lift and support the rear of vehicle and remove the wheel(s).
See Lifting The Vehicle on page 3-9. See
following DANGER.
DANGER
• Ensure that the weight of the vehicle is positioned to the front of the vehicle and the jack stands are as
far back on the vehicle frame tubes as possible.
4.
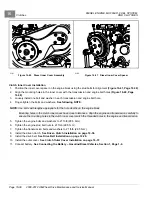
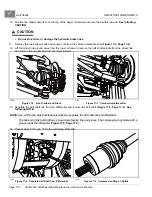
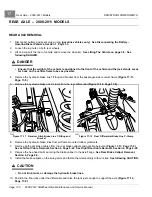
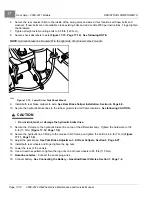
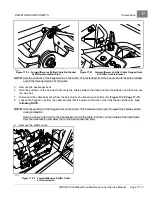
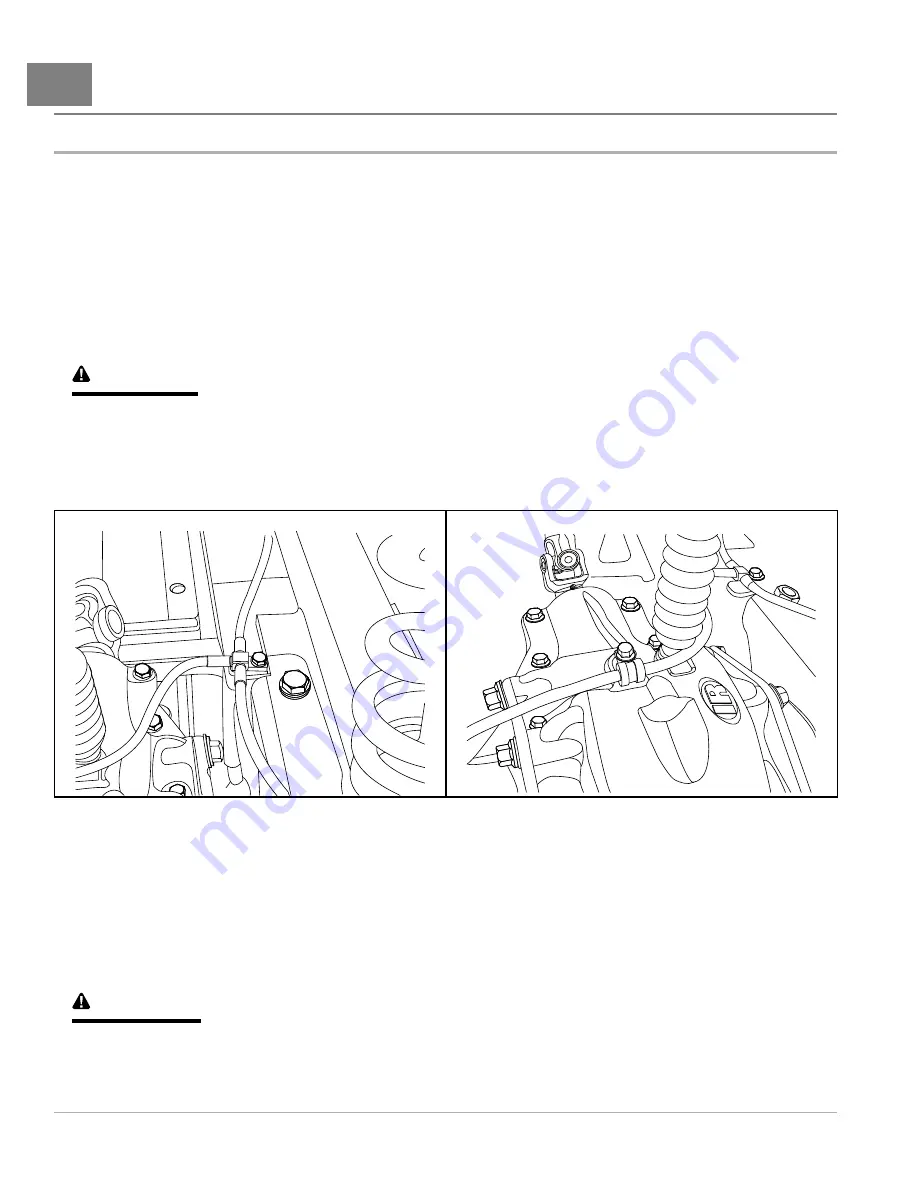
Remove the hydraulic brake line T-fitting and bracket from the passenger-side receiver frame
.
5.
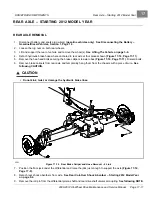
Remove the hydraulic brake line P-clamp from the rear differential
2202
Figure 17-11
Receiver Hitch Brake Line T-Fitting and
Bracket
2203
Figure 17-12
Rear Differential Brake Line P-Clamp
6.
Remove the hydraulic brake lines from all frame-mounted rubber grommets.
7.
Remove both park brake cables from the rear brake calipers and park brake levers
.
See Left Rear Cable Removal, Section 6, Page 6-29. See Right Rear Cable Removal, Section 6, Page 6-28.
8.
Remove the hex-head bolts securing the brake caliper to the axle flange.
See Rear Brake Caliper Removal,
9.
Install the brake calipers on the swing arms and fasten them temporarily with wire ties.
See following CAUTION.
CAUTION
• Do not kink, twist, or damage the hydraulic brake lines.
10. Position the floor jack under the differential and raise the jack just enough to support the axle
.
Page 17-8
2008-2012 All-Wheel Drive Maintenance and Service Manual
Summary of Contents for Carryall 295 SE
Page 2: ......
Page 20: ......
Page 28: ......
Page 58: ......
Page 66: ......
Page 100: ......
Page 122: ......
Page 150: ......
Page 157: ......
Page 190: ......
Page 197: ......
Page 236: ......
Page 284: ......
Page 386: ......
Page 394: ......
Page 442: ......
Page 452: ......
Page 454: ......
Page 455: ......
Page 456: ......

