HYDRAULIC ATTACHMENT SYSTEM
Electrical
19
2.
Set the joystick ON/OFF switch to OFF.
3.
Disconnect battery.
See Disconnecting the Battery – Gasoline/Diesel Vehicles, Section 1, Page 1-3.
4.
Disconnect wires from each post of circuit breaker.
5.
Remove hardware securing breaker to chassis and remove breaker.
Circuit Breaker Installation
1.
Attach breaker to chassis with screws and tighten to 75 in-lb (8.5 N·m).
2.
Connect wires to breaker. Tighten nuts to 75 in-lb (8.5 N·m).
3.
Connect battery.
See Connecting the Battery – Gasoline/Diesel Vehicles, Section 1, Page 1-4.
4.
Lower the cargo bed.
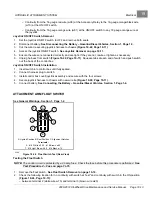
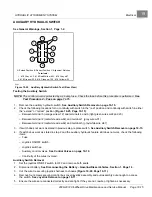
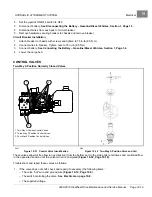
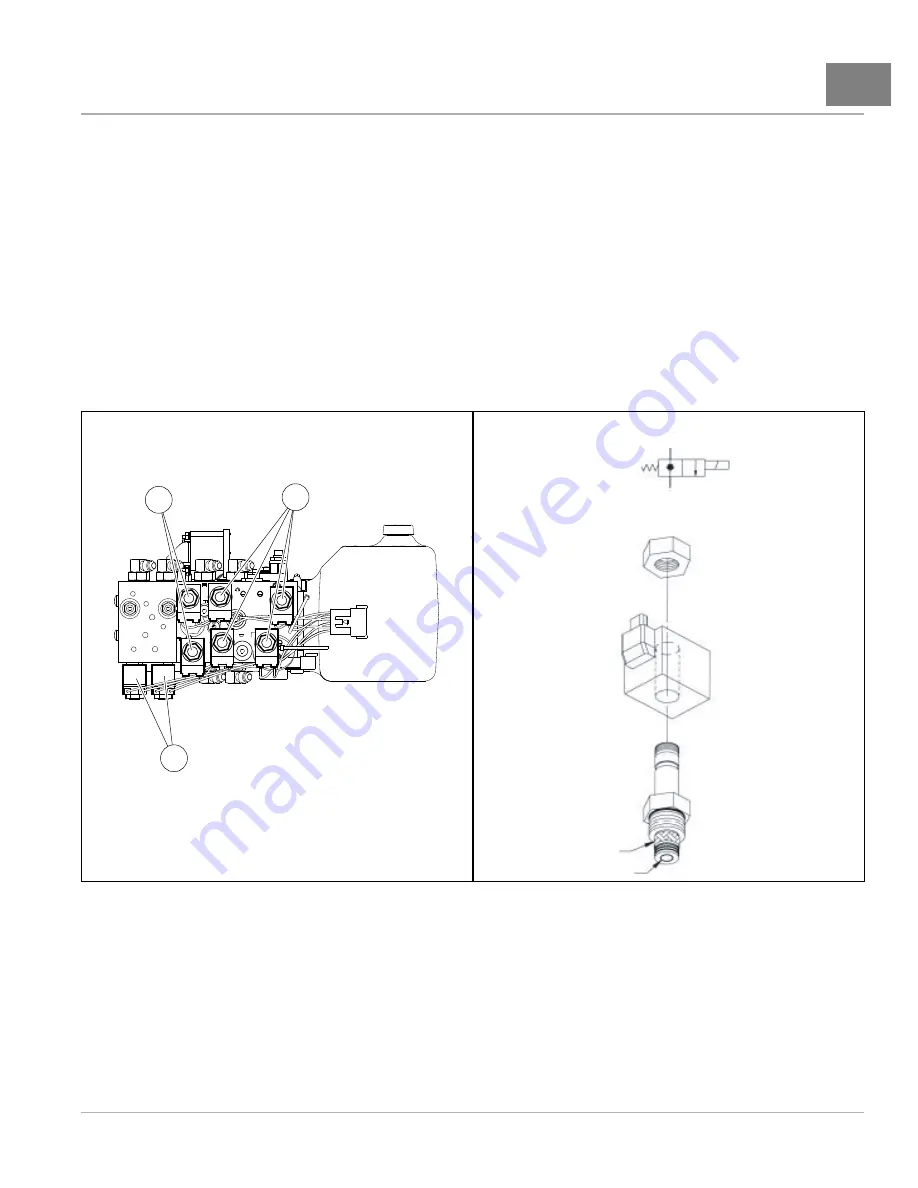
CONTROL VALVES
Two-Way 2-Position Normally Closed Valves
1
2
3
1. Two-Way 2-Position Control Valves
2. Three-Way 2-Position Control Valves
3. Four-Way 2-Position Control Valves
2
1
2
1
2247
Figure 19-31
Control Valve Identification
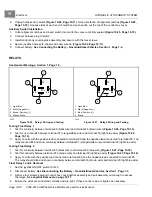
2248
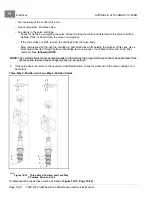
Figure 19-32
Two-Way 2-Position Valve and Coil
These valves allow for free flow in one direction (from the bottom port to the side ports) at all times and controlled flow
in the opposite direction until the solenoid coil is energized
.
Troubleshoot and repair these valves as follows:
1.
If the valve does not shift, check and repair (if necessary) the following items:
– The valve “hot” wire and ground wire
– The switch controlling the valve.
– The supplied voltage.
2008-2012 All-Wheel Drive Maintenance and Service Manual
Page 19-19
Summary of Contents for Carryall 295 SE
Page 2: ......
Page 20: ......
Page 28: ......
Page 58: ......
Page 66: ......
Page 100: ......
Page 122: ......
Page 150: ......
Page 157: ......
Page 190: ......
Page 197: ......
Page 236: ......
Page 284: ......
Page 386: ......
Page 394: ......
Page 442: ......
Page 452: ......
Page 454: ......
Page 455: ......
Page 456: ......

