4
Front Body Components
BODY AND TRIM
10. Connect battery.
See Connecting the Battery – Gasoline/Diesel Vehicles, Section 1, Page 1-4.
11. Unchock wheels.
FRONT FASCIA REMOVAL
1.
Remove both side cowl panels (fenders).
See Side Cowl Panel (Fender) Removal on page 4-5.
2.
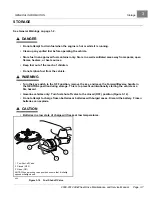
Remove the four Torx
®
screws and the three hex head screws that secure the front fascia to the frame.
3.
Disconnect the lighting wire harness from each light at connectors.
4.
Separate the front fascia from front fenders and remove from vehicle.
FRONT FASCIA INSTALLATION
1.
Position the fascia on the vehicle taking care to fit it to the front fenders securely.
2.
Connect the lighting wire harness to each light at connectors.
3.
Secure the front fascia to the frame using four Torx
®
screws and the three hex head screws.
4.
Reinstall both side cowl panels (fenders).
See Side Cowl Panel (Fender) Installation on page 4-5.
HOOD REMOVAL
1.
Unlatch, raise and securely prop open hood.
2.
Remove the four Torx
®
screws that secure the hood to the hood hinge.
3.
Separate the hood and the hood hinge and remove hood from vehicle.
4.
Retain hardware.
HOOD INSTALLATION
1.
Position the hood on the hood hinge.
2.
Secure the hood to the hood hinge using the four Torx
®
screws.
3.
Lower hood and latch securely.
CENTER COWL PANEL REMOVAL
1.
Remove hood.
2.
The center cowl panel is held in place by four exposed Tuflok plastic locking fasteners and four metal body trim
clips that are hidden from view on the top, underside of the panel. Carefully remove the four Tuflok plastic
locking screws by using a size P2 Phillips head screwdriver. The outer portion of the Tuflok fastener may be left
in the panel at this time.
3.
Grab inside front corner of outboard end of the center cowl panel and firmly pull up to disengage one of the
outboard body trim clips. Repeat for other side.
4.
Lift up firmly on the front edge of the center cowl panel to disengage the two center body trim clips.
Page 4-4
2008-2012 All-Wheel Drive Maintenance and Service Manual
Summary of Contents for Carryall 295 SE
Page 2: ......
Page 20: ......
Page 28: ......
Page 58: ......
Page 66: ......
Page 100: ......
Page 122: ......
Page 150: ......
Page 157: ......
Page 190: ......
Page 197: ......
Page 236: ......
Page 284: ......
Page 386: ......
Page 394: ......
Page 442: ......
Page 452: ......
Page 454: ......
Page 455: ......
Page 456: ......

