14
Wire Harness Diodes
ELECTRICAL COMPONENTS: DIESEL VEHICLES
2148
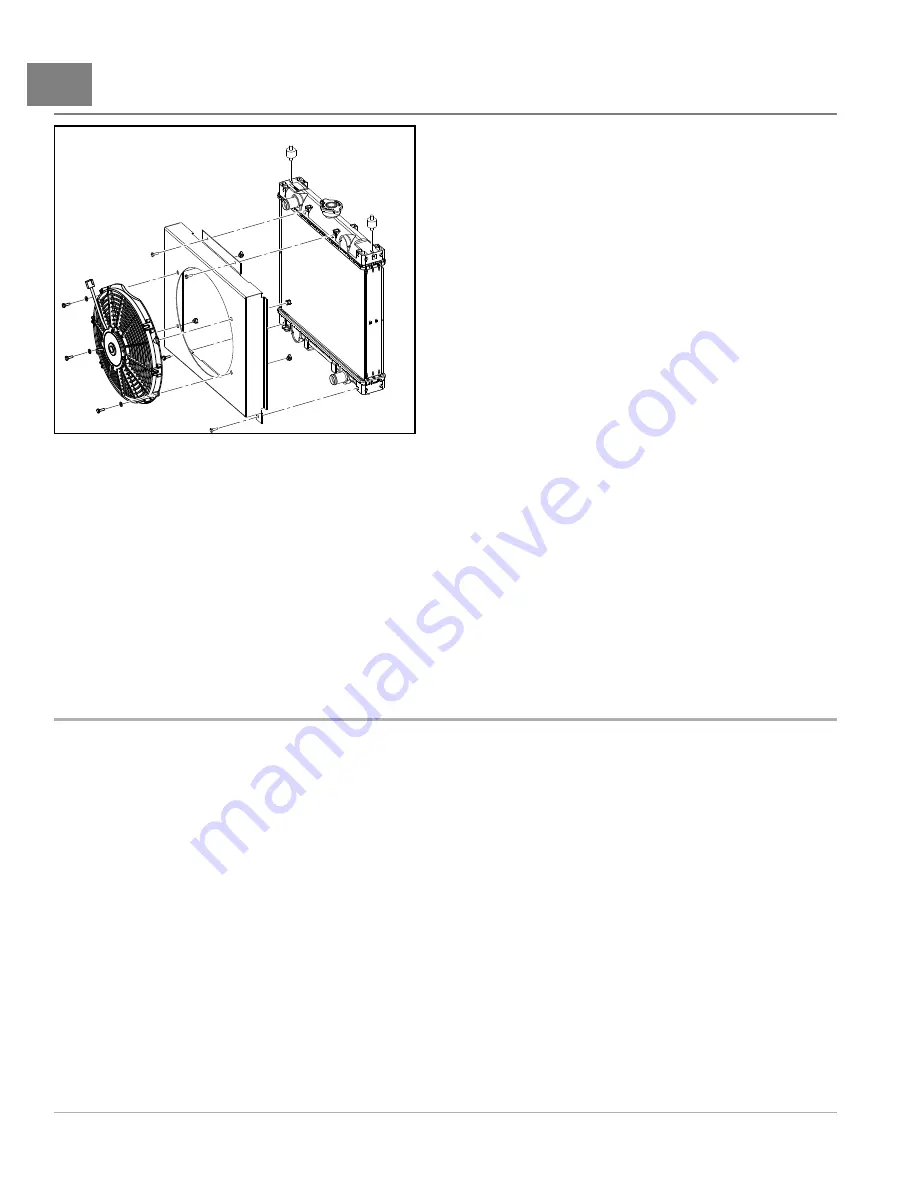
Figure 14-17
Fan and Shroud
FAN INSTALLATION
1.
Correctly position the electric fan assembly on the fan shroud and secure with four lock-patch bolts. Tighten the
hardware to 48 in-lb (5 N·m).
See preceding NOTE.
2.
Connect the two-pin connector from the fan motor to the wire harness
.
3.
Lower and secure the hood.
4.
Connect battery.
See Connecting the Battery – Gasoline/Diesel Vehicles, Section 1, Page 1-4.
WIRE HARNESS DIODES
See General Warnings, Section 1, Page 1-2.
The wire harness is equipped with several in-line diodes.
TESTING THE WIRE HARNESS DIODES
See Test Procedure 12 – Wire Harness Diodes on page 12-24.
WIRE HARNESS DIODE REMOVAL
1.
Disconnect battery.
See Disconnecting the Battery – Gasoline/Diesel Vehicles, Section 1, Page 1-3.
2.
Locate the diode to be replaced by removing the wire conduit and tracing the wire.
3.
Note the polarity of the diode, as indicated by the silver stripe on one end of the diode, and mark the wire
on the side of the silver stripe.
4.
Cut the wires attached to each side of the diode and discard the diode.
Page 14-20
2013 Carryall 295/XRT 1550 Maintenance and Service Manual
Summary of Contents for Carryall XRT 1550
Page 2: ......
Page 28: ......
Page 40: ......
Page 62: ......
Page 106: ......
Page 120: ......
Page 180: ......
Page 224: ......
Page 272: ......
Page 310: ......
Page 344: ......
Page 362: ......
Page 370: ......
Page 418: ...NOTES...
Page 428: ...NOTES...
Page 430: ...NOTES...
Page 431: ......
Page 432: ......


