BATTERY CHARGER
Maintenance
15
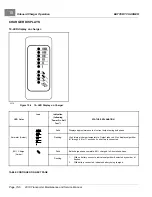
The charger monitors battery voltage, charge current and charge time to determine when the batteries are properly
charged. The charger will shut off by itself and the green battery icon will stop flashing and remain on.
The vehicle’s control circuit lockout remains activated until the charger AC plug is disconnected from the AC receptacle.
MAINTENANCE
See General Warnings on page 1-2.
To ensure trouble-free performance, it is very important to follow an established preventive maintenance program.
Regular and consistent maintenance can prevent vehicle downtime and expensive repairs that can result from neglect.
Any charger not functioning correctly should be removed from use until it is properly repaired. This will prevent further
damage to the vehicle and avoid the possibility of injury due to unsafe conditions. Contact your local Club Car
distributor/dealer to perform all repairs and semiannual and annual periodic service
WARNING
• If any problems are found during scheduled inspection or service, do not operate the vehicle until
repairs are made. Failure to make necessary repairs could result in fire, property damage, severe
personal injury, or death.
• Do not wear loose clothing or jewelry, such as rings, watches, chains, etc., when servicing the charger.
• Do not expose charger to oil, dirt, mud or direct heavy water spray when cleaning vehicle.
• Keep all AC connections clean and dry.
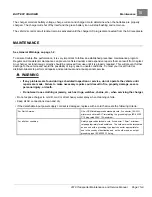
• If the detachable input power supply cord set is damaged, replace with a cord that meets the following criteria:
For North America:
UL or CSA listed/approved detachable cord, 3 conductor, 16AWG
minimum, and rated SJT; terminating in a grounding type IEC 60320
C14 plug rated 250V, 13A minimum.
For all other countries:
Safety approved detachable cord, 3 conductor, 1.5mm²; minimum,
rated appropriately for industrial use. The cord set must be terminated
on one end with a grounding type input connector appropriate for
use in the country of destination and, on the other end, an output
grounding type IEC 60320 C14 plug.
2019 Transporter Maintenance and Service Manual
Page 15-9
Summary of Contents for TransPorter 4
Page 2: ......
Page 271: ...ELECTRIC MAIN HARNESS Wiring Diagrams Electric Main Harness 18 ...
Page 272: ... Page intentionally left blank ...
Page 273: ...ELECTRIC INSTRUMENT PANEL HARNESS Wiring Diagrams Electric Instrument Panel Harness 18 ...
Page 274: ... Page intentionally left blank ...
Page 275: ...ELECTRIC ACCESSORIES HARNESS Wiring Diagrams Electric Accessories Harness 18 ...
Page 276: ... Page intentionally left blank ...
Page 282: ...NOTES ...
Page 283: ...NOTES ...
Page 284: ...NOTES ...
Page 285: ......
Page 286: ......


