4
Front Body
BODY AND TRIM
GRILLE REMOVAL
1.
Park vehicle and chock the tires.
2.
Disconnect the batteries.
See Disconnecting the Batteries – Electric Vehicles, Section 1, Page 1-3.
3.
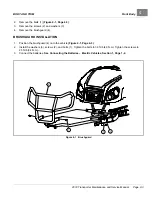
Remove HD bumper (if equipped).
See Brushguard Removal, Section 4, Page 4-2.
4.
Remove cowl.
5.
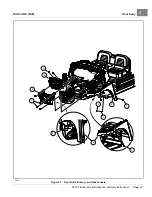
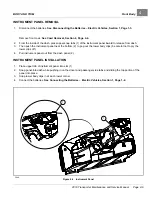
Loosen and remove the two M6 self-tapping fasteners (1) at the top of grille (7).
6.
Loosen and remove the two lower left and right side bolts (1 and 7) that attach the grille and plastic bumper (6).
7.
Remove charger receptacle (if equipped) by removing the three screws that attach the receptacle or disconnect
connector (quick connect).
GRILLE INSTALLATION
1.
Connect the charger receptacle or connector (quick connect).
2.
Install, but do not tighten upper M6 screws. (Do not tighten screws until plastic bumper is installed).
3.
Lower grille holes are shared with the front bumper, ensure lower bumper screws are attached first then install
grille.
4.
Line up upper and lower bolt holes.
5.
Install and tighten upper bolts, then lower right and left side bolts. Tighten to 44 in·lb (5 N·m).
6.
Connect the batteries.
See Connecting the Batteries – Electric Vehicles, Section 1, Page 1-4.
Page 4-6
2019 Transporter Maintenance and Service Manual
Summary of Contents for TransPorter 4
Page 2: ......
Page 271: ...ELECTRIC MAIN HARNESS Wiring Diagrams Electric Main Harness 18 ...
Page 272: ... Page intentionally left blank ...
Page 273: ...ELECTRIC INSTRUMENT PANEL HARNESS Wiring Diagrams Electric Instrument Panel Harness 18 ...
Page 274: ... Page intentionally left blank ...
Page 275: ...ELECTRIC ACCESSORIES HARNESS Wiring Diagrams Electric Accessories Harness 18 ...
Page 276: ... Page intentionally left blank ...
Page 282: ...NOTES ...
Page 283: ...NOTES ...
Page 284: ...NOTES ...
Page 285: ......
Page 286: ......


