9
1. Make sure the chemical containers are full and the correct pick-up tubes are in the
containers.
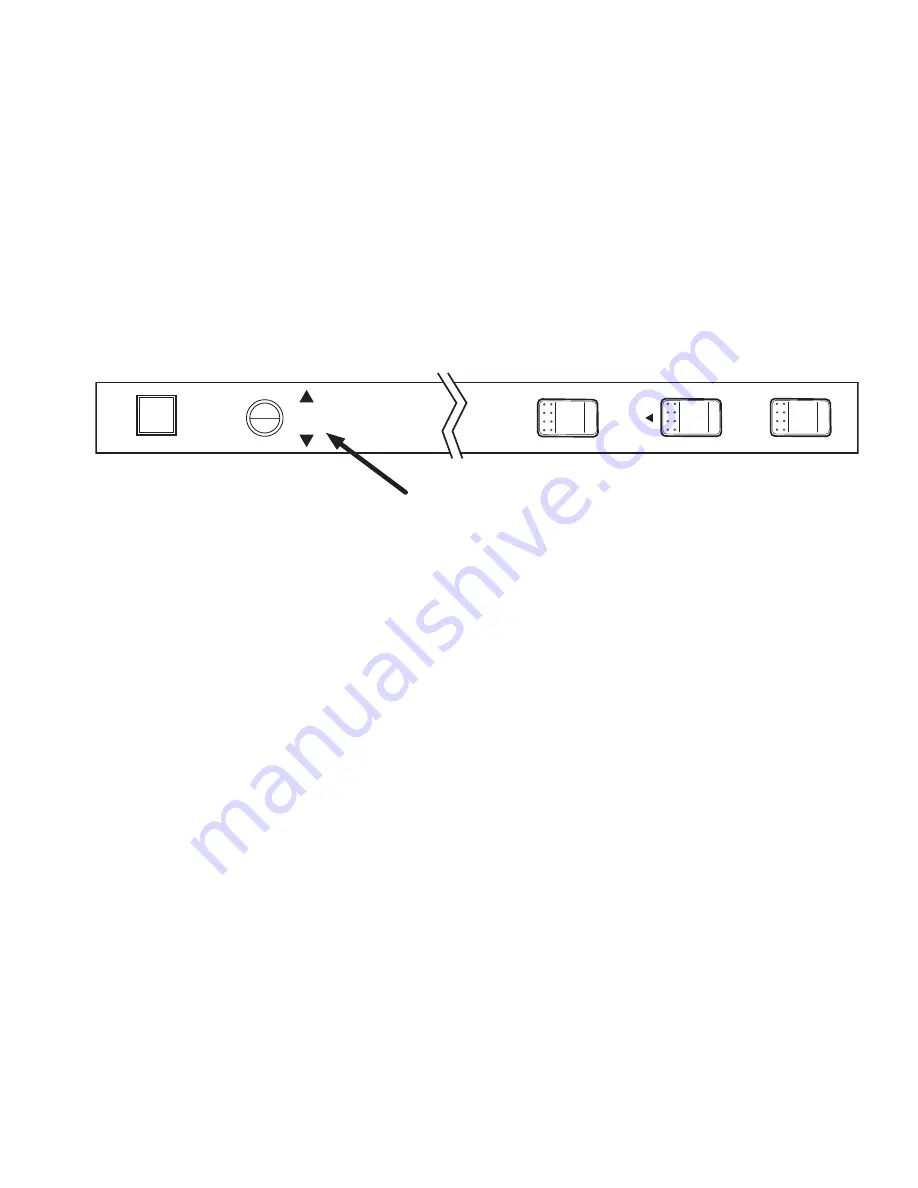
2. Turn the dishwasher power switch ON. The switch will illuminate and the dishwasher will
fill with water.
3. Once the fill is complete, open the dishwasher door, then push and hold the prime push
button UP to the DET (detergent) position until detergent is observed entering at the right-
rear of the wash tank compartment.
4. Push and hold the prime push button DOWN to the R/A (rinse-aid) position for thirty
seconds. Release the push button.
5. Close the door.
Initial Start-up
START
DRAIN
EXT. WASH
ON
OFF
POWER
OFF
ON
PRIME
DET
R/A
0
I
Chemical Dispenser Prime Switch
The chemical dispensing pumps must be primed during initial start-up and whenever a chemical
container . A momemtary two position PRIME switch is located on the front control panel to do
this. The Detergent dispensing pump is primed when the Prime switch is pushed UP to the DET
position. The Rinse-aid dispensing pump is primed when the Prime switch is pushed DOWN to the
R/A position.
Priming the Chemical Dispensing Pumps
Chemical Dispensing Pumps
Summary of Contents for UC65e M2
Page 6: ...iv Blank Page This Page Intentionally Left Blank ...
Page 24: ...18 Blank Page This Page Intentionally Left Blank ...
Page 26: ...20 Wash Pump Motor 1 2 6 3 4 5 7 9 8 10 11 12 13 ...
Page 28: ...22 Booster 10 12 11 10 13 13 15 9 9 10 9 6 5 9 3 1 7 8 4 14 2 ...
Page 30: ...24 Power Wiring Box 4 12 9 11 3 8 7 6 5 13 1 8 2 10 ...
Page 32: ...26 Electrical Panel and Timer 1 6 6 7 8 9 11 12 13 14 15 16 10 5 3 2 4 ...
Page 34: ...28 Control Panel 1 4 5 6 7 8 9 10 11 11 12 12 8 11 11 2 2 3 ...
Page 36: ...30 Upper Final Rinse Piping 10 13 8 7 6 2 1 1 4 5 4 2 2 12 14 15 1 9 11 3 ...
Page 44: ...38 Fill Solenoid Valve 7 8 6 2 3 4 1 5 9 10 ...
Page 46: ...40 Detergent Pump 7 8 9 6 4 14 1 2 3 5 5 10 10a 11 12 13 13 9d 9c 9b 9a ...
Page 48: ...42 Rinse Aid Pump 7 8 9 6 10 10a 11 12 13 13 4 2 3 5 1 14 15 16 ...
Page 50: ...44 Panels 12 11 9 9 9 7 8 7 6 5 1 4 2 3 10 14 14 13 12 14 ...
Page 52: ...46 Door 1 5 4 3 2 3 2 6 7 ...
Page 54: ...48 Dish Racks Line Strainer PRV 1 2 3 4 ...
Page 56: ...50 Electrical Schematic ...
Page 58: ...52 Blank Page This Page Intentionally Left Blank ...


