IMPORTANT:
Check that the Glass Doors in the enclosure are aligned properly.
If the Glass Doors do not close properly, or do not lay flat against the frame, the frame is most likely twisted. It is not unu-
sual to find that a masonry fireplace face is not perfectly flat, plumb, level, or that the opening is not perfectly square. Do
not force the enclosure frame to conform to a fireplace that is not plumb or level. This is less common with flanges.
The most common adjustment on Overlap installations is accomplished by loosening the pressure screws on the side of
the frame opposite the glass door that is away from the frame. Move bottom corner of the frame out until the doors line
up properly. Retighten the pressure screw (s). Any resulting gap can be filled with extra insulation.
Inside-Fit enclosures can be straightened within the opening. Moving the door back slightly from the fireplace face will
create a reveal that will conceal minor gaps. Larger gaps can be filled with insulation or black RTV sealant as desired.
NOTE:
Failure to align the Masonry Fireplace Enclosure Glass Doors properly may result in glass breakage or other
damage directly attributable to improper installation.
Page 2
Installation Instructions
INSTALLATION:
Remove the glass doors from the Fireplace Enclosure frame to make the
enclosure lighter for installation and to protect the finish.
NOTE:
Frameless TotalView doors are not shipped installed on hinges.
They are packaged in cardboard inside the master shipping carton.
Remove the Cabinet Mesh Screens from the enclosure if so equipped.
○
If Hanging Mesh Screens were ordered, instructions for installing them
are packed with the screens.
▪
The mesh screen panels will be packed flat between layers of card-
board.
Be careful not to discard the screens accidentally.
Set aside all of the parts that were removed in a safe place.
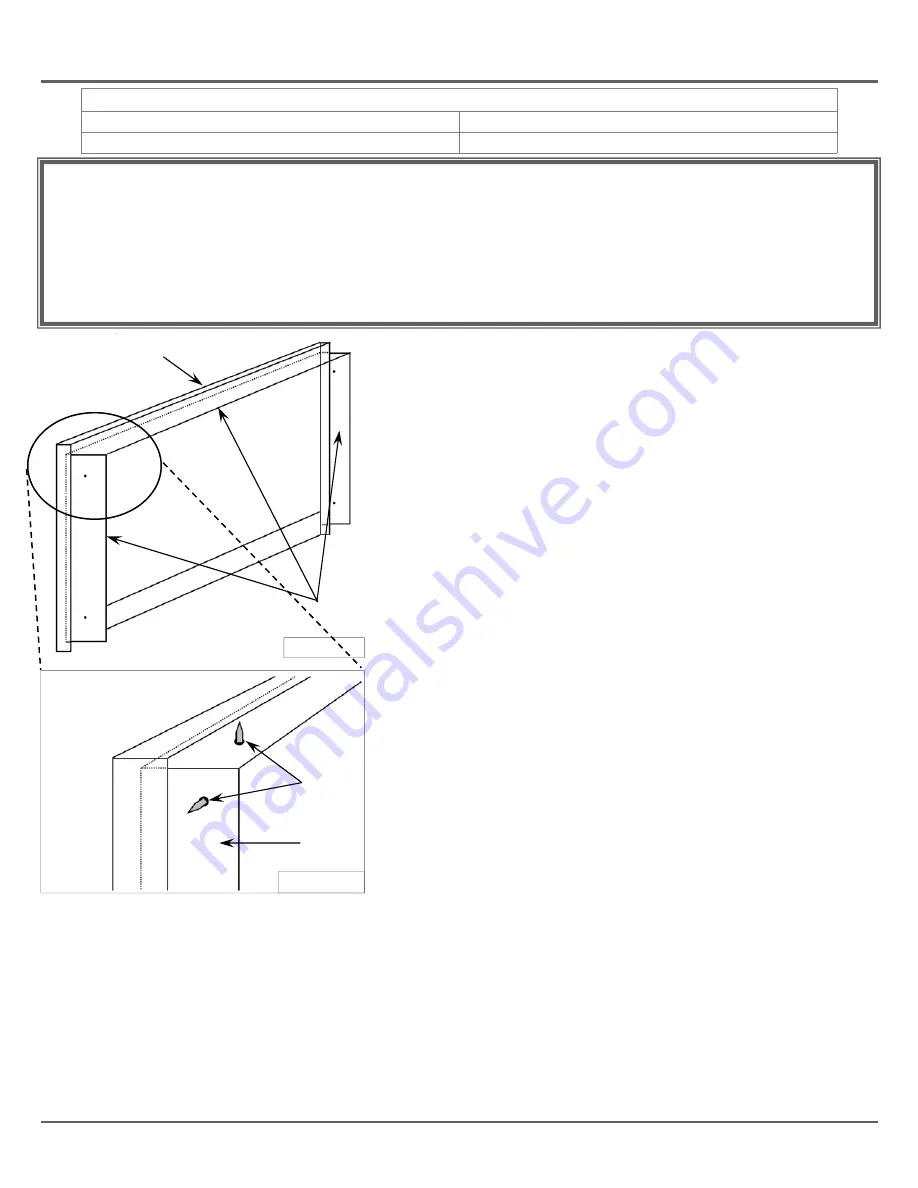
Thread the six (6) Pressure Screws into the tapped holes in the flanges
with the tips of the screws barely projecting through the flanges.
Remove the protective plastic film from any polished metal trim or over-
lay material on the Fireplace Enclosure frame/doors if applicable.
Set the Fireplace Enclosure frame into the fireplace opening.
○
Overlap fit enclosures will cover the edges of the fireplace opening.
○
Inside Fit enclosures will be installed inside the fireplace opening.
Center the Fireplace Enclosure frame in the fireplace opening.
○
Fill the gap between the flanges and the fireplace opening with the
insulation provided. If the gaps are extremely large, extra insulation is
available from your Stoll Dealer.
Snug down the Pressure Screws evenly but do not tighten. (
Figure 2
)
Replace the Glass Doors. Discard the shipping hinge screws if used.
Use the color-matched hinge pins that are taped to the glass doors if
needed.
NOTE:
Some hinge styles do not use separate hinge pins.
○
Check that the enclosure is aligned straight and plumb.
○
Use the glass doors to verify the correct position. See Below.
Tighten the Pressure Screws snugly. Do not over-tighten.
Replace the Mesh Screen Doors if so equipped.
○
A shipping spring is used on Mesh Screen Doors. The spring can be
discarded or reinstalled to tighten the screen fit.
PLEASE NOTE:
Your CMC Masonry Fireplace Enclosure must be installed and adjusted correctly.
Misalignment of the enclosure frame can cause improper latching of the glass doors, glass breakage, and/or improper
operation. P lease read and follow the installation instructions carefully. If y ou do not fe el confident that you a re
equipped to complete the installation properly please contact Fireplace Doors Online or arrange professional installation.
New masonry fireplaces must be cleaned and allowed to cure thoroughly before any fireplace enclosure is installed.
Failure to “cure” the mortar properly may damage the enclosure finish. This type of damage is not covered by warranty.
If you have questions:
Please contact your Fireplace Doors Online before proceeding with installation.
Flanges
Fireplace Enclosure Main Frame
Back View of Frame
Figure 1
Figure 2
Pressure
Screws
Flanges
Expanded Corner View
PARTS INCLUDED FOR INSTALLATION:
6 ea. Pressure Screws
1 ea. Roll of Insulation
1 ea. Allen wrench for tightening Pressure Screws


