background image

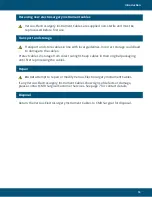
Receiving new electrosurgery instrument cables

Versius Electrosurgery Instrument Cables are supplied non-sterile and must be 

reprocessed before first use.

Transport and storage

Transport and store cables in line with local guidelines. Incorrect storage could lead 
to damage to the cables.

Protect cables in storage from direct sunlight. Keep cables in their original packaging 

until first reprocessing the cables.

Repair

Do not

 attempt to repair or modify Versius Electrosurgery Instrument Cables.

If any Versius Electrosurgery Instrument Cables show signs of defects or damage, 
please contact CMR Surgical Customer Services. See page 7 for contact details.

Disposal

Return the Versius Electrosurgery Instrument Cables to CMR Surgical for disposal.

13

Introduction

Summary of Contents for versius

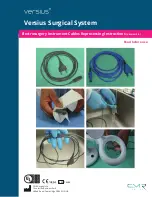
Page 1: ...CMR Surgical Ltd 1 Evolution Business Park Milton Road Cambridge CB24 9NG UK Versius Surgical System Electrosurgery Instrument Cables Reprocessing Instructions Version 2 0 REF 70300 Read before use...

Page 2: ...g Instructions CMR Surgical Ltd 2021 2021 08 Document number U 00350v2 0 This document provides instructions for the reprocessing of the Versius Electrosurgery Instrument Cables Rx only Advena Ltd Tow...

Page 3: ......

Page 4: ...4...

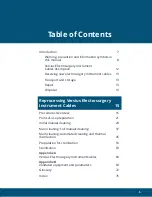
Page 5: ...pair 13 Disposal 13 Reprocessing Versius Electrosurgery Instrument Cables 15 Procedures Overview 16 Point of use preparation 21 Initial manual cleaning 29 Main cleaning Full manual cleaning 37 Main cl...

Page 6: ...6...

Page 7: ...d before first use Discolouration of metal surfaces is possible when alkaline enzymatic detergents are used pH 8 11 However this does not impair the functional capability of the Versius Electrosurgery...

Page 8: ...rsius Electrosurgery Instrument Cables Only use validated cleaning solutions Cleaning solutions that have not been validated e g bleach or hydrogen peroxide may result in damage to or ineffective clea...

Page 9: ...not touching or shadowing each other This could result in ineffective cleaning disinfection of the items Only use validated parameter settings Parameter settings that have not been validated could res...

Page 10: ...shadowing each other as this could result in ineffective sterilisation Always place packaged cables into a sterilisation tray before placing the tray into the steam steriliser to avoid damage The ster...

Page 11: ...least 16 mm Full list of information points Follow all applicable national and local laws and guidelines or hospital protocols for cleaning disinfection and sterilisation Always follow the manufacture...

Page 12: ...onnect monopolar instruments such as the Versius Monopolar Hook to a bedside unit Bipolar instrument cables are grey see Figure 1 and connect bipolar instruments such as the Versius Bipolar Maryland G...

Page 13: ...e cables Protect cables in storage from direct sunlight Keep cables in their original packaging until first reprocessing the cables Repair Do not attempt to repair or modify Versius Electrosurgery Ins...

Page 14: ...14...

Page 15: ...15 Reprocessing Versius Electrosurgery Instrument Cables...

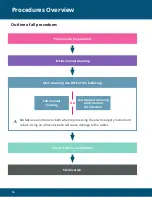
Page 16: ...Main cleaning use ONE of the following OR Full manual cleaning Automated cleaning and thermal disinfection Sterilisation Preparation for sterilisation Do not use an ultrasonic bath when reprocessing t...

Page 17: ...ner page 32 Step 2 Brush cable page 32 Step 3 Soak cable page 33 Step 4 Rinse cable under cold running water page 34 Proceed to main cleaning with ONE of the following methods Full manual cleaning con...

Page 18: ...ep 4 Brush cable under cold running water second time page 42 Step 5 Rinse cable under running critical water page 42 Main cleaning Automated cleaning and thermal disinfection Step 1 Place cable into...

Page 19: ...59 Step 4 Place packed cable into sterilisation tray page 60 Sterilisation Step 1 Load sterilisation tray into steam steriliser page 66 Step 2 Run steriliser page 66 Step 3 Leave cables to cool down...

Page 20: ...20...

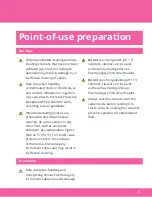
Page 21: ...s enzymatic detergent at a temperature higher than 45 C 113 F This could cause proteins to stick to the surfaces of the Versius Electrosurgery Instrument Cables and may result in ineffective cleaning...

Page 22: ...disinfection and sterilisation Always follow the manufacturer s recommended concentrations and application times for the detergent and disinfectant Begin point of use preparation within 30 minutes of...

Page 23: ...gh for the cables Choose one of the following methods for keeping the cables moist pH 7 11 enzymatic detergent preferred premixed according to the manufacturer s instructions OR pH 7 11 enzymatic foam...

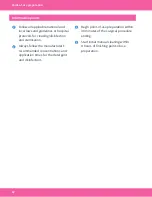
Page 24: ...nes Begin point of use preparation within 30 minutes of the surgical procedure ending Option A using liquid solution Place the cable into the container ensuring that it is lying flat and fully covered...

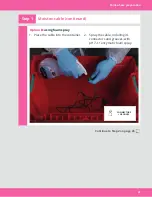
Page 25: ...Option B using foam spray 1 Place the cable into the container 2 Spray the cable including its connectors and grooves with pH 7 11 enzymatic foam spray CONNECTORS GROOVES Continue to Step 2 on page 2...

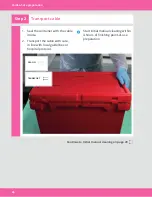
Page 26: ...he cable inside 2 Transport the cable with care in line with local guidelines or hospital protocol Start initial manual cleaning within 4 hours of finishing point of use preparation SEAL IN Continue t...

Page 27: ...27...

Page 28: ...28...

Page 29: ...s as these may damage Versius Electrosurgery Instrument Cables When undertaking point of use preparation and initial manual cleaning do not use water or any other fluid such as enzymatic detergent at...

Page 30: ...ion and sterilisation Always follow the manufacturer s recommended concentrations and application times for the detergent and disinfectant Start initial manual cleaning within 4 hours of finishing poi...

Page 31: ...enzymatic detergent premixed according to the manufacturer s instructions and enough to completely cover the cables Soft bristled brush Sink or container large enough for the cables Cold running water...

Page 32: ...e cable from the container 2 Drain the container of the enzymatic detergent or water Step 2 Brush cable Using a soft bristled brush brush the entire length of the cable under cold running water to rem...

Page 33: ...iner COVER WITH B Leave the cable to soak for a minimum of 10 minutes unless the detergent manufacturer s instructions recommend a longer soaking period SOAK 10 MINUTES MINIMUM C When the soaking peri...

Page 34: ...Step 4 Rinse cable under cold running water Rinse the cable under cold running water for a minimum rinsing time of 1 minute 30 seconds RINSE UNDER 1 MINUTE 30 SECONDS MINIMUM Continue to page 35 34 I...

Page 35: ...main cleaning Proceed to main cleaning with ONE of the following methods Full manual cleaning continue to page 37 or Automated cleaning and thermal disinfection continue to page 45 35 Initial manual...

Page 36: ...36...

Page 37: ...these may damage Versius Electrosurgery Instrument Cables Do not use strong alkaline pH 11 solutions cleaners or rinse aids as these may damage Versius Electrosurgery Instrument Cables During full man...

Page 38: ...ent Cables beyond their maximum number of reprocessing cycles as this may result in damage to the cables Information points Follow all applicable national and local laws and guidelines or hospital pro...

Page 39: ...11 enzymatic detergent premixed according to the manufacturer s instructions Soft bristled brush Sink or container large enough for the cables Cold running water Running critical water 39 Main cleani...

Page 40: ...atic detergent to completely immerse the cable B Place the cable in the sink or container so that all parts and surfaces of the cable are immersed in the detergent COVER WITH C Remove the cable from t...

Page 41: ...e immersed in the detergent COVER WITH C Remove cable from the sink or container and drain the sink or container of pH 7 11 enzymatic detergent Continue to Step 4 on page 42 Step 2 Brush cable under c...

Page 42: ...ing water Pay particular attention to connectors crevices and difficult to clean areas UNDER Step 5 Rinse cable under running critical water Rinse the cable under running critical water for a minimum...

Page 43: ...43...

Page 44: ...44...

Page 45: ...se strong acidic pH 7 solutions cleaners or rinse aids as these may damage Versius Electrosurgery Instrument Cables Do not use strong alkaline pH 11 solutions cleaners or rinse aids as these may damag...

Page 46: ...aximum number of reprocessing cycles for Versius Electrosurgery Instrument Cables Do not reprocess Versius Electrosurgery Instrument Cables beyond their maximum number of reprocessing cycles as this m...

Page 47: ...disinfectors Washer disinfector parameters Stage of cycle Parameter setting Minimum time Pre cleaning Cold water 2 minutes Cleaning Hot water 43 C 110 F 2 minutes Rinsing Critical water 2 minutes Ther...

Page 48: ...ector tray are not touching or shadowing each other This could result in ineffective cleaning disinfection of the items PLACE INTO Step 2 Load tray into washer disinfector Carefully load the washer di...

Page 49: ...10 F 2 minutes Rinsing Critical water 2 minutes Thermal disinfection Use national requirements for A0 value see ISO 15883 Drying Hot air 115 C 239 F 5 minutes Carry out thermal disinfection in complia...

Page 50: ...ove cable from washer disinfector Remove the washer disinfector tray containing the cable from the washer disinfector after the cycle finishes Continue to Preparation for sterilisation on page 53 REMO...

Page 51: ...51...

Page 52: ...52...

Page 53: ...before sterilisation as any moisture remaining could result in ineffective sterilisation Always inspect cables using a magnifying glass to detect possible damage or soiling before sterilisation Do not...

Page 54: ...ent Cables beyond their maximum number of reprocessing cycles as this may result in damage to the cables Do not use pressurised or medical air at greater than 3 bar 43 5 psi to avoid damage to the ele...

Page 55: ...dry pressurised or medical air maximum air pressure 3 bar 43 5 psi Magnifying glass Steam permeable sterilisation peel pouch with window and large enough for electrosurgery instrument cable Sterilisat...

Page 56: ...next step Ensure that electrosurgery instrument cables have been thoroughly dried before sterilisation as any moisture remaining could result in ineffective sterilisation If using a cloth to dry elect...

Page 57: ...Pay particular attention to crevices grooves and difficult to clean areas Always repeat the entire cleaning process including initial manual cleaning if any soil is present during the inspection stage...

Page 58: ...cracked insulation Broken electrical wires Crushed or kinked cable Damaged connector If a Versius Electrosurgery Instrument Cable shows signs of defects or damage contact CMR Surgical Customer Servic...

Page 59: ...ely sized steam permeable sterilisation pouches with one cable only in each pouch for sterilisation Failure to do so could result in damage or ineffective sterilisation Do not coil the cable too tight...

Page 60: ...nto a sterilisation tray making sure items are not touching or shadowing each other Check that items placed into the sterilisation tray are not touching or shadowing each other This could result in in...

Page 61: ...61...

Page 62: ...62...

Page 63: ...been validated could result in damage to or ineffective sterilisation of Versius Electrosurgery Instrument Cables The sterilisation process should conform with ISO 17665 1 Allow electrosurgery instru...

Page 64: ...ormation points Follow all applicable national and local laws and guidelines or hospital protocols for cleaning disinfection and sterilisation Transport and store cables in line with local guidelines...

Page 65: ...g parameters Sterilisation tray Prevacuum steam sterilisation parameters Parameter Value Temperature 134 137 C 273 279 F Exposure time 3 18 minutes minimum holding time Dry time 20 minutes minimum OR...

Page 66: ...erilisation cycle according to ISO 17665 1 Prevacuum steam sterilisation parameters Parameter Value Temperature 134 137 C 273 279 F Exposure time 3 18 minutes minimum holding time Dry time 20 minutes...

Page 67: ...dden changes in temperature could damage electrosurgery instrument cables Step 4 Transport and store cables Transport and store the required cables in individual steam permeable sterilisation peel pou...

Page 68: ...nt cables beyond their maximum number of reprocessing cycles as this may result in damage to the cables The REF numbers can also be found in labelling on the electrosurgery instrument cable or its pac...

Page 69: ...the A0 value see ISO 15883 Drying Hot air 115 C 239 F 5 minutes Always use ISO 15883 compliant washer disinfectors Carry out thermal disinfection in compliance with ISO 15883 and follow the national r...

Page 70: ...lisation process should conform with ISO 17665 1 The validated drying times for the parameters outlined were 20 minutes Drying times are likely to vary depending on the steriliser and loading conditio...

Page 71: ...71...

Page 72: ...that is between 10 25 C 50 77 F Connector Part on the end of an electrosurgery instrument cable that connects to a Versius Electrosurgery Instrument or to a Versius Instrument Bedside Unit Crevice Sm...

Page 73: ...contains information about the connector Grooves on the electrosurgery instrument cable connector may contain soil High voltage insulation testing device A device that measures the insulation of high...

Page 74: ...o referred to as medical air Prevacuum A method that uses a vacuum pump to remove air from the sterilisation chamber before sterilisation takes place Reprocessing Cleaning disinfecting and sterilising...

Page 75: ...he item inside Sterilisation Treatment of items to destroy all microorganisms Thermal disinfection Heat treatment of items to reduce the number of microorganisms to an acceptable level Validated Teste...

Page 76: ...l customer services 7 CMR Surgical technical support 7 Cold water 23 24 31 32 34 39 41 42 47 69 72 Connector 12 25 72 Container 23 24 25 26 31 33 40 41 Crevice 57 72 Critical water 39 42 47 69 72 Cust...

Page 77: ...Main cleaning Automated cleaning and thermal disinfection 45 equipment 47 Main cleaning Full manual cleaning 37 equipment 39 Maximum air pressure 55 Maximum reprocessing cycles 68 Maximum water tempe...

Page 78: ...0 remove tray from 67 run 19 66 Steam steriliser parameters 65 66 70 Sterilisation 63 75 equipment 65 Sterilisation cycle 65 66 70 Sterilisation tray 55 60 65 66 67 load into steam steriliser 19 66 re...

Page 79: ...sation 63 Washer disinfector 47 48 49 50 69 load tray into 18 48 remove tray from 18 50 run cycle 18 49 Washer disinfector cycle 49 50 Washer disinfector parameters 47 49 69 Washer disinfector tray 47...

Page 80: ...ng Main cleaning use ONE of the following OR Full manual cleaning Automated cleaning and thermal disinfection Sterilisation Preparation for sterilisation Do not use an ultrasonic bath when reprocessin...

Reviews: