•
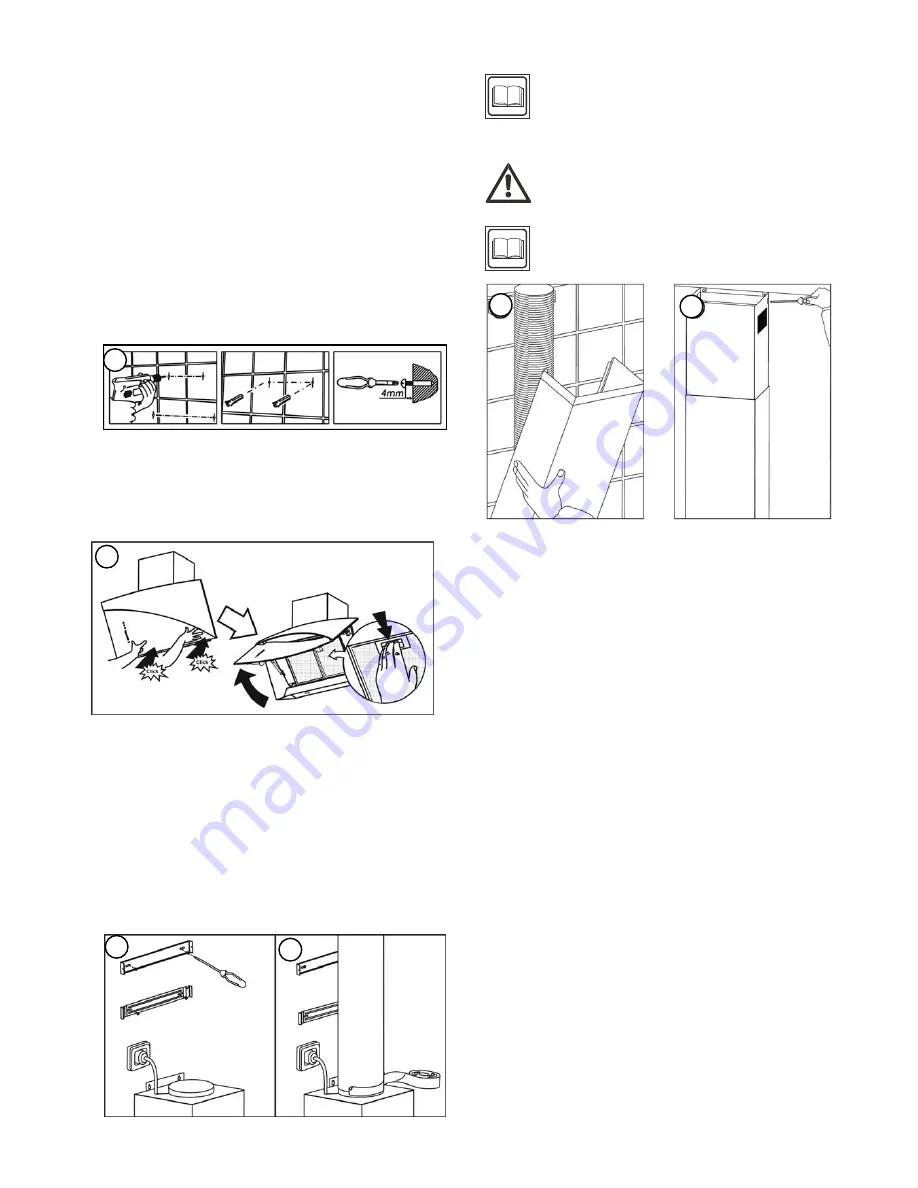
Using bracket (3) as a templates, mark
and drill 6 holes in the wall (fig3). Inset
the wall plugs (8) (fig.3 ).
•
Inset 2 long screws(7) to the middle two
holes ("*" mark dimension holes). Do not
fully insert the screws (7) ; let them
protrude out of the wall by about 4mm
(fig.3 )
•
Hang the cooker hood (1) and fit the 2
upper holes to the 2 screws; Inset 2 long
screws (7) through the cooker hood into
the lower 2 holes & wall plugs (8); Screw
and tighten the cooker hood (1) onto the
wall.
•
To fix the inner screws to the wall, the
central glass panel must be disassembled.
Follow the instructions below step by step.
(Fig. 4)
•
Mount bracket (3) on the wall. Secure with
the remaining 2 sets of long screws (7)
and wall plugs (8)(fig. 7).
•
Attach the vent kit. In the example on figure
8, an exhaust pipe of hardened PVC has
been used. Optionally, the airtight
connection of the vent kit can be improved
with duct tape (fig. 8).
Note:
Sometimes, sponge tape covers
the holes. If the holes are located
behind the sponge tape, simply insert
the screw through the sponge tape.
Risk of injury:
The chimney skirt may
have some sharp edges.
Note:
Remember not to fix the screw
too tight, so that height adjustment
can be done easily later.
•
Slide the upper chimney (2) into the lower
chimney (2). then pull the upper chimney
upwards (fig 9) . Adjust the height
of the chimney to approximatly the
required height. Fix the upper chimney
(2) on the bracket (3), and secure on both
sides with the 2 short screws (10) (fig.
10).
•
Check tight fit of all parts.
Bridging larger distances
•
Bridging larger distances to the outdoors
can be achieved by installing an external
motor inside the exhaust duct. To do this,
consult an electrician.
Installation without exhaust duct
•
If you do not have an outlet to the outside,
the exhaust pipe is not required and the
installation is similar to the one shown in
the Installation with exhaust duct section.
4
3
7
8
9
10


