bâàwÉÉÜ fÑxxw WÉÅx fxÜ|xá |Ñ@åÇxà
8
1. Introduction
⊙
Parts Name & Functions
①
Dome Cover
Do not detach protection vinyl from dome cover before finishing all installation process to protect dome cover
from scratches or dust.
②
DIP Switch
Sets up camera ID and protocol.
③
Main Body
Cable
Enables signals and power to come and go between main body and mount bracket.
④
Drop Prevention
Spring
This part keeps the camera from dropping during installation and maintenance. After install the Bracket, please,
hang the spring to the drop prevention hook of main body as shown in picture for further tasks.
⑤
Lockup Screw
After assembling main body to bracket, screw main body to bracket to protect them from separation by vibration
and so on.
⑥
Fuse
If the fuse is burnt to protect your came from over-current damage, the fuse have to be replace with new one. The
fuse specification is 250V 2A. however, we recommend consulting with supplier to remove the cause of over-
current.
⑦
Cabling
Terminal Block
During installation, Power, Video, Communication, Alarm I/O cables are connected on to this cables terminal block.
⑧
Mold Line
Mark to assemble main body to bracket.
⑨
TACT Switch
Network Board Factory reset
Summary of Contents for IS2765N
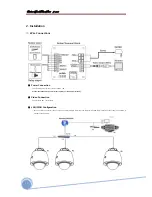
Page 10: ...b w f xxw W x fx x x 10 General LAN WAN Configuration...
Page 11: ...b w f xxw W x fx x x 11 2 Installation Installation Using the Wall Mount...
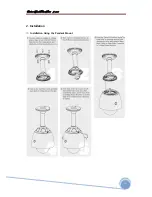
Page 12: ...b w f xxw W x fx x x 12 2 Installation Installation Using the Pendant Mount...
Page 16: ...b w f xxw W x fx x x 16 Figure 3 1 Log in window...
Page 46: ...b w f xxw W x fx x x 46 MEMO...
Page 86: ...b w f xxw W x fx x x 86 MEMO...
Page 89: ...b w f xxw W x fx x x 89 6 Specifications Dimensional Drawings unit mm...
Page 90: ...b w f xxw W x fx x x 90 6 Specifications Dimensional Drawings Unit mm...
Page 92: ...b w f xxw W x fx x x 92 MEMO...

